


Removal
1. Remove the engine protective pan.
2. Drain the engine oil.
Caution: This step must be performed on a cold engine.
3. Remove the lower part of the oil pan:
Unscrew the mounting bolts in the reverse order shown in the figure.
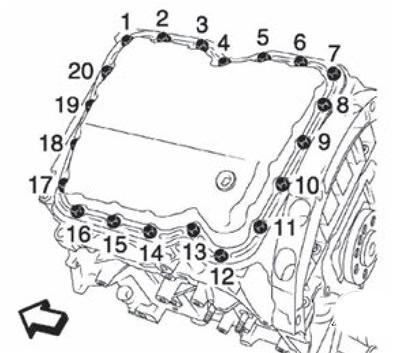
Note: Arrow points towards the front of the engine.
Insert a special sealant knife (A) (KV10111100) between the upper and lower oil pans and, tapping the knife with a hammer, cut the layer of sealant.
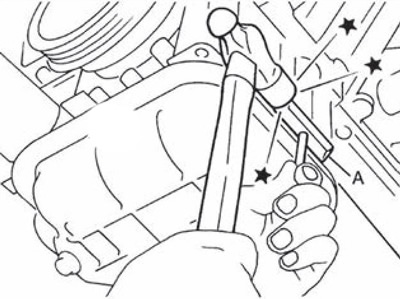
Attention.
- Be careful not to damage the contact surfaces.
- Do not use a screwdriver to separate the fittings, as this may deform the oil pan flange.
Remove the lower oil pan.
4. Loosen the mounting bolts and remove the oil intake.
5. Install the oil intake and tighten the mounting bolts in the sequence shown in the figure.
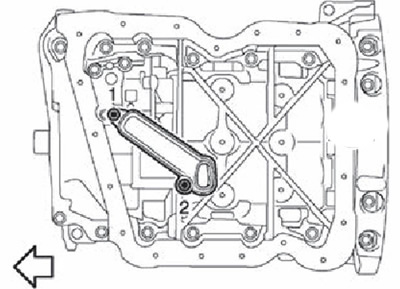
Note: Arrow points towards the front of the engine.
Check after removal
Clean the oil intake from dirt.
Installation
1. Using a scraper (A), remove old sealant from the contact surfaces, as well as from the bolt holes and threads.
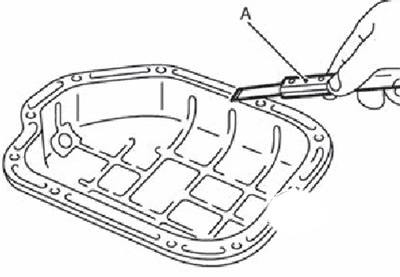
Caution: Be careful not to scratch or damage the contact surfaces when removing old sealant.
2. Using a special gun, apply a continuous bead of sealant (a) with a diameter of 3.0 - 7.0 mm, as shown in the figure.
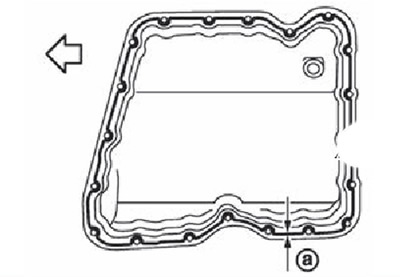
The arrow points towards the front of the engine.
Note: Use original sealant or equivalent.
Attention: Installation must be completed within five minutes after applying the sealant.
7. Tighten the mounting bolts in two stages in the sequence shown in the figure:
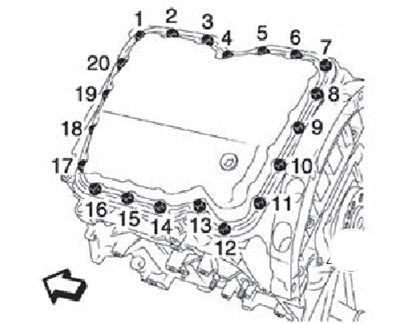
The arrow points towards the front of the engine
- First stage: tightening torque 5.0 Nm.
- Second stage: tightening torque 16.0 Nm.
Note: Fill the engine with engine oil 30 minutes after installing the oil pan.