


Table of contents: Checking the level of the working…↓ Clutch hydraulic drive bleeding…↓
Checking the level of the working fluid of the clutch hydraulic drive
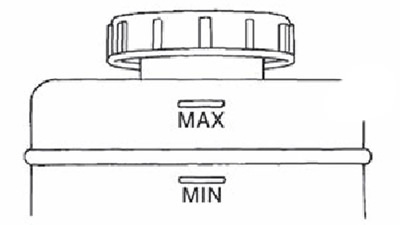
Make sure that the working fluid level in the tank is between the "MAX" and "MIN" marks.
Visually check for signs of leaks around the clutch fluid reservoir.
Check the tightness of the hydraulic clutch system (presence of leaks) when the working fluid level is too low (below the "MIN" mark).
Clutch hydraulic drive bleeding procedure
Note: Do not use a vacuum tool or any other type of special tool to force bleed the clutch hydraulic system, as they will not completely remove air from the system.
Attention.
- Monitor the level of the clutch hydraulic fluid during the bleeding procedure to prevent the reservoir from running dry.
- Do not allow brake fluid to come into contact with the vehicle's paintwork. If this does happen, remove any spilled brake fluid immediately.
- Use only the specially designed nipple (1) to bleed the clutch hydraulic drive.
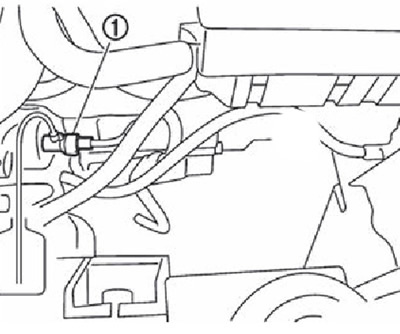
1. Fill the reservoir with fresh brake fluid.
2. Connect the clear vinyl hose to the bleed nipple.
3. Slowly press the clutch pedal all the way down and release it completely 15 times with an interval of 2-3 seconds, then release the clutch pedal.
4. Press the locking pin (1) of the bleed nipple (2) to lock it in one position.
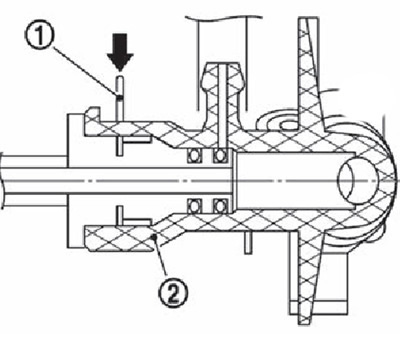
Version RS5F92R
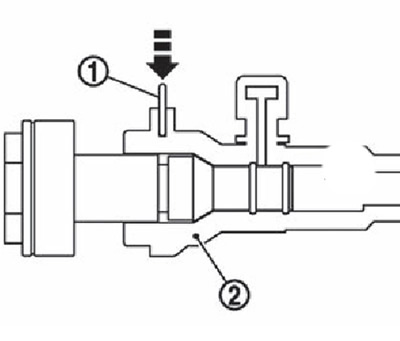
Versions RS6F94R and RS6F52A
Caution: Support the tube to prevent it from coming off the bleed nipple when pressurizing the line.
[For more information, see the website: nissanbook.ru]
5. Move the clutch line (1) in the direction of the arrow in the figure.
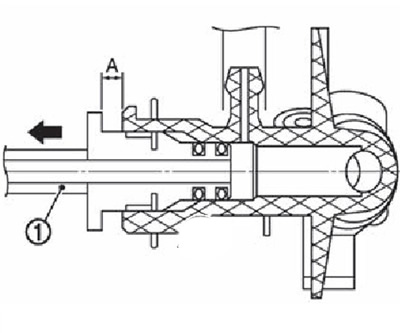
Version RS5F92R
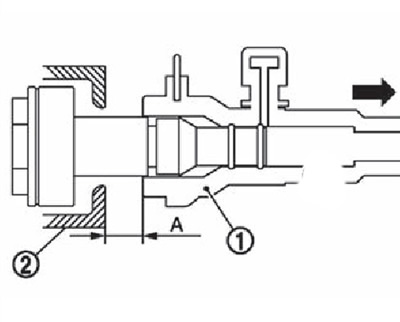
RS6F94R and RS6F52A versions:
1. Clutch pipe. 2. Clutch housing.
Note.
Size "A":
- RS5F92F: 2mm.
- FS6F94F and FS6F52A: 10mm.
6. Press the clutch pedal all the way down again and, holding it in this position, release air through the tube.
Caution: Support the tube to prevent it from coming off the bleed nipple when pressurizing the line.
7. Return the locking pin and clutch pipe to their original position.
8. Release the clutch pedal and wait 5 seconds.
9. Repeat steps 3 through 8 until no more air bubbles appear in the liquid flowing through the transparent hose.