


Components of the master cylinder of vehicles without VDC
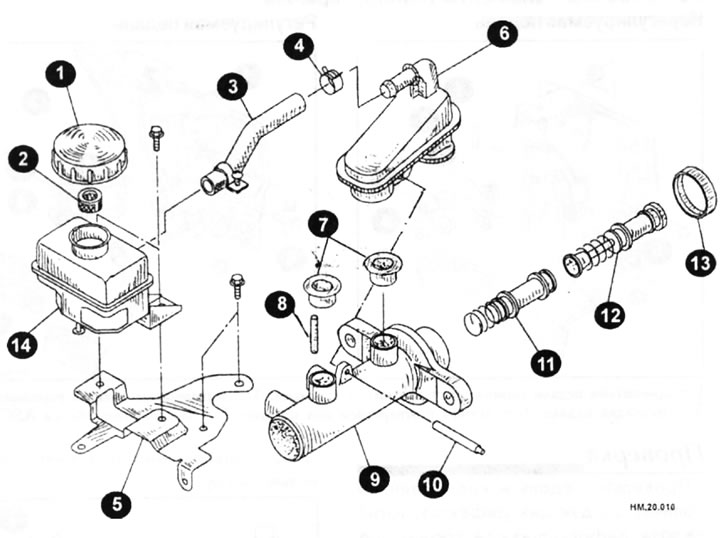
1 - tank lid; 2 - mesh filter; 3 - hose and clamp; 4 - clamp; 5 — bracket; 6 — tank; 7 — bushing; 8 — piston stopper; 9 — main brake cylinder housing; 10 — pin; 11 — second piston assembly; 12 - first piston assembly; 13 — stopper cap; 14 - additional tank.
Components of the brake master cylinder of vehicles with VDC
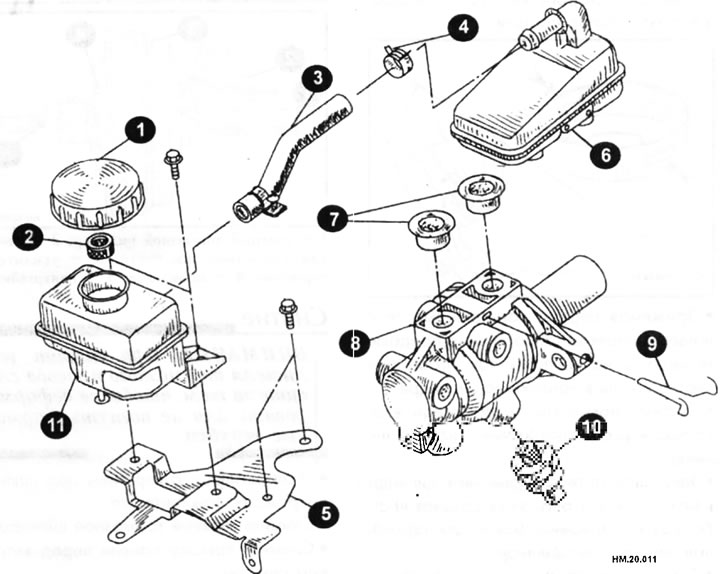
1 - tank lid; 2 - mesh filter; 3 - hose and clamp; 4 - clamp; 5 — bracket; 6 — tank; 7 — bushing; 8 — master brake cylinder; 9 - clamp; 10 — pressure sensor; 11 - additional tank.
Removal
Caution: If fluid leaks from the master cylinder, disassemble it and check the piston seals for deformation or scoring. Replace defective parts.
- Place vinyl tubes over the bleeder valves and bleed the brake fluid from the system by depressing the brake pedal until the master cylinder is empty.
- Remove the air cleaner and duct.
- Disconnect the brake fluid level sensor and pressure sensor wiring harness connectors (vDC models only).
- Using a special slotted wrench for union nut, disconnect the brake lines from the master cylinder.
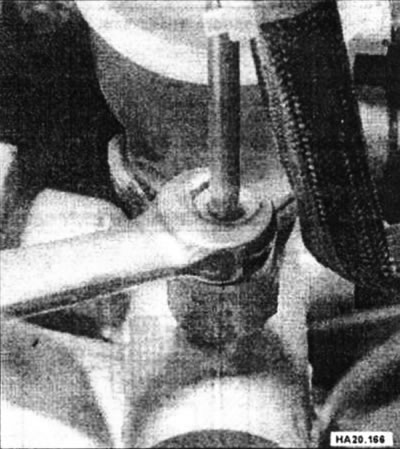
- Remove the brake master cylinder mounting nut, the brake fluid reservoir mounting bolt and remove the brake master cylinder from the vehicle.
Disassembly
Caution: The tank should only be removed if absolutely necessary.
Models without VDC
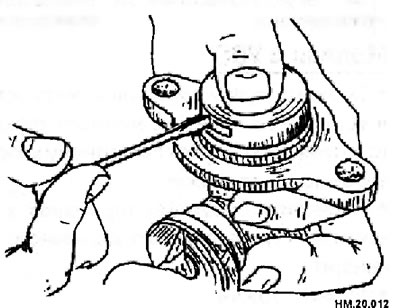
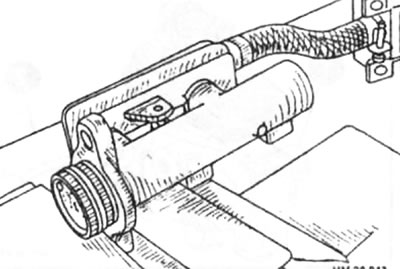
- Using a flat-head screwdriver, bend the tabs on the retainer cap as shown in the illustration and remove the retainer from the master cylinder. In this case, the piston located inside the master cylinder may jump out of the cylinder, so the cap must be held.
- Place the side flange of the cylinder body with the bevel around the pin hole facing upward and clamp the master cylinder securely in a vice.
Caution: When clamping the brake master cylinder in a vice, do not tighten the vice too tightly.
- To protect the cylinder body, use copper pads or rags.
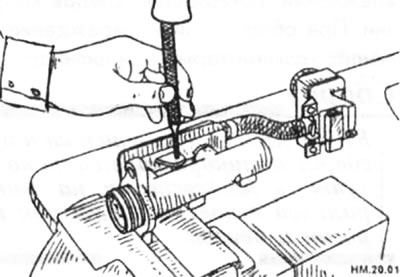
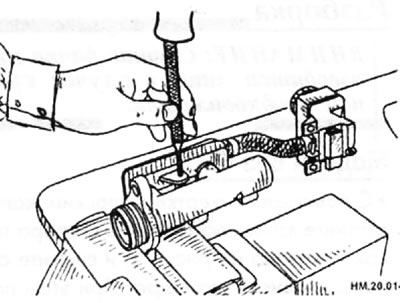
- Using a punch (diameter about 4 mm) knock out the tank mounting pin.
- Remove the master cylinder from the vice.
- Remove the reservoir and bushings from the cylinder body.
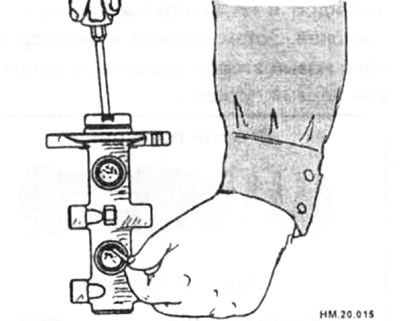
- Using a flat-head screwdriver, press the piston inward and remove the piston stop from the cylinder body.
- Carefully pull the first piston out, being careful not to damage the inner cylinder walls.
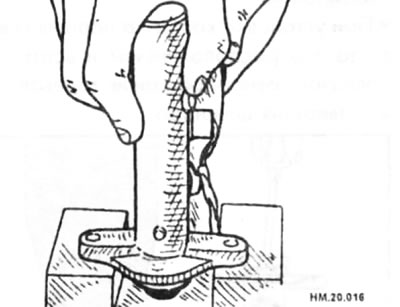
- Tap the master cylinder flange on a block of wood and carefully pull out the second piston so as not to damage the inner walls of the cylinder.
Models with VDC
- The master brake cylinder cannot be disassembled.
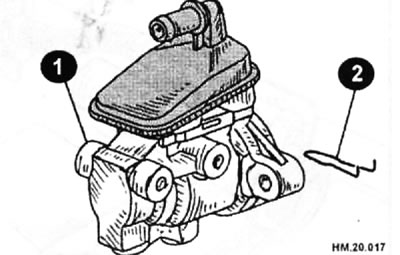
- Remove the clamp (2) (see figure HM.20.017).
- Remove the brake fluid reservoir and bushings from the master cylinder housing (1).
Examination
- Check the inner cylinder walls and pin holes for damage, abrasions, and signs of corrosion. If damage is found, replace the master cylinder.
Assembly
Caution: Never use mineral-based fluids such as kerosene or gasoline to clean or assemble the cylinder.
- Check that no foreign particles, dirt or dust have come into contact with the cylinder walls, pistons or cap seal. When assembling, be careful not to damage the parts with tools.
- Do not drop parts. If a part has fallen, do not use it in further assembly.
Models without VDC
- Apply fresh brake fluid to the walls of the master cylinder bore and to the contact surfaces of the pistons. Then insert the new second piston into the cylinder first, and then the new first piston.
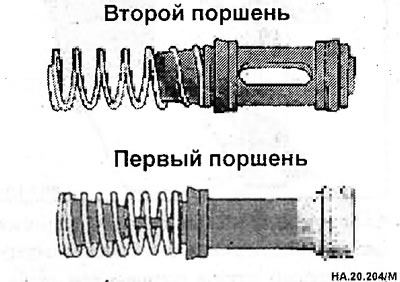
- Replace the cylinder parts with new ones without disassembling them.
- When installing the piston cap, pay attention to its position and insert the cap evenly so that it does not touch the wall of the cylinder bore.
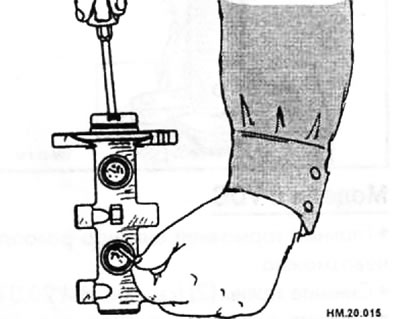
- Visually check the movement of the second piston through the opening for the brake fluid reservoir located on the "second" side of the cylinder body, and insert the piston stop.
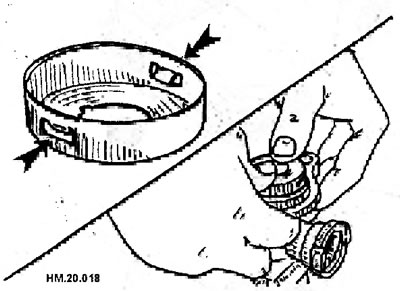
- While pressing the first piston together with the new stopper cap down, press the projections on the cap so that they fit tightly into the grooves on the cylinder.
- Lubricate the new bushings with brake fluid and install the bushings into the cylinder body.
- Clamp the master cylinder in a vice as described in the Disassembly section and install the brake fluid reservoir onto the cylinder.
- Using a punch (diameter about 4 mm) drive the new brake fluid reservoir retaining pin into the pin hole so that it is positioned equally on both sides of the cylinder.
Caution: The brake fluid reservoir sleeve is not reusable.
Models with VDC
- Lubricate the bushing with brake fluid and insert it into the master cylinder body. The sleeve cannot be reused.
- Install the brake fluid reservoir onto the master cylinder body.
- Insert the clamp.
Installation
- Installation is carried out in the reverse order of removal.
- After installation, fill the brake fluid and bleed the brakes.
Caution: Fill the reservoir with only fresh brake fluid of the "DOT3" specification. Brake fluid that has been drained from the system cannot be reused.