2. Place a drip tray or a rag.
3. Loosen the tubing fittings on the master cylinder (photo).
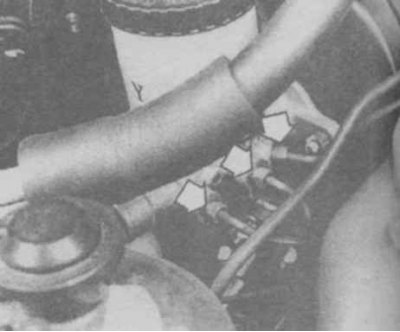
10.3 Union nuts on master cylinder (it is recommended to release with a gas wrench)
4. Turn away nuts of fastening of the cylinder to the vacuum amplifier.
5. Carefully remove the cylinder from the studs, unscrew the union and plug the holes. Take out the cylinder.
6. Plug the hydraulic pipes.
Disassembly
7. Prepare the master cylinder repair kit.
Attention! In the main cylinder of the cars in question, Nabco and Tokico repair kits are used, which are not interchangeable. Therefore, first purchase the correct repair kit.
8. Clean the cylinder and drain the fluid.
9. Remove the cap, remove the lock washer (if provided, the first piston and spring (photo).
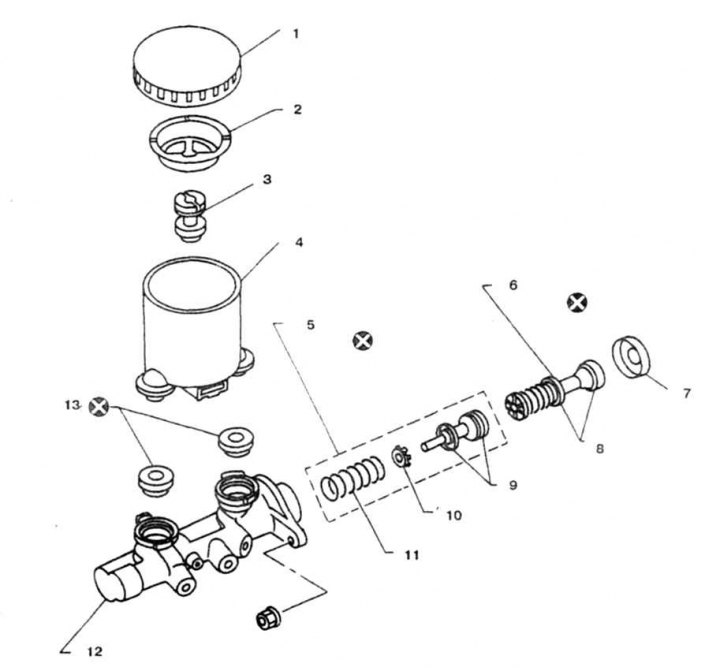
10.9 Brake master cylinder parts
1. Cork; 2. Filter; 3. float; 4.bottle; 5. Secondary piston assembly; 6. Primary piston; 7. cap; 8, 9. Cuffs; 10. Support washer; 11. Spring; 12. Cylinder; 13. Seals; 14. When assembling, lubricate with liquid
10. Remove the secondary piston by tapping the cylinder on a block of wood.
11. Check up a condition of the cylinder. If scratches or painted areas are found, replace the cylinder.
12. Disassemble the secondary piston (primary non-separable).
13. Wash all parts in alcohol or brake fluid.
14. Remove the tank only if necessary.
15. Put the cuffs on the piston, making sure their orientation is correct.
16. Dip parts in brake fluid.
17. Assemble all the parts in the order of their previous installation, bend the ears on the cap (photo) and install on the cylinder. If the cap is damaged, replace it.
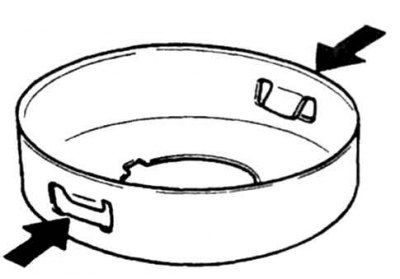
10.17 Bend the lugs on the cap before assembling the master cylinder
Installation
18. Before installation, it is recommended to fill the cylinder with liquid and remove air. This measure will shorten the bleeding time of the brakes.
19. Close the threaded plug holes for the fitting, secure the cylinder and fill the cylinder reservoir with fluid.
20. Turn away one of plugs, press pistons, wrap a plug and release pistons.