Clutch Master Cylinder Assembly Components
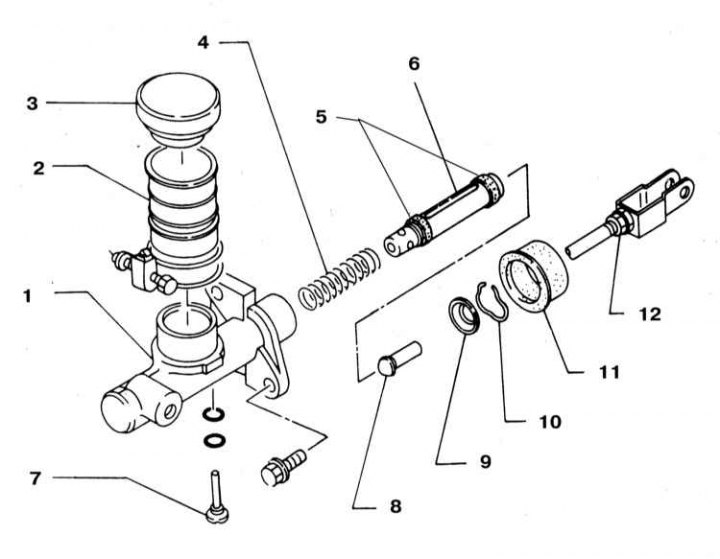
1 - Housing; 2 - Hydraulic fluid reservoir; 3 - Tank cover; 4 - Return spring; 5 - Sealing cuffs; 6 - Piston; 7 - Valve stop (removed when dismantling the spring and piston, 1.5÷2.9 Nm); 8 - Pusher; 9 - Emphasis; 10 - Retaining ring; 11 - Anther; 12 - Locknut (8÷11 Nm)
Removing
1. The design of the clutch master cylinder is shown in the illustration.
2. Disconnect the negative cable from the battery.
Attention! If the stereo system installed in the car is equipped with a security code, before disconnecting the battery, make sure that you have the correct combination to activate the audio system!
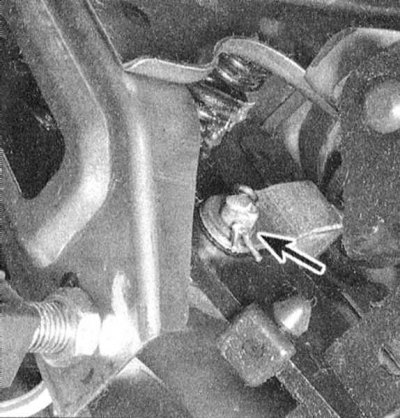
3. Under the instrument panel, remove the fixing pin and disconnect the split finger of the pusher of the main hydraulic cylinder from the clutch pedal lever.

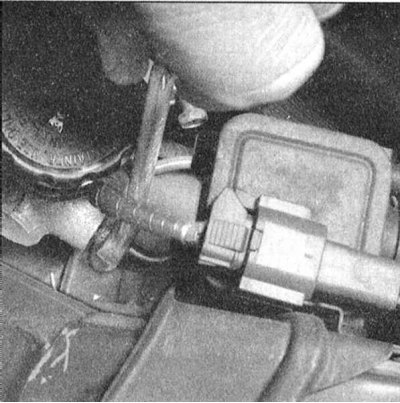
4. Remove the automatic speed control pump (ASCD). Disconnect the hydraulic line from the clutch master cylinder assembly - in order to avoid rounding of the nut slots, it is reasonable to loosen the fitting assembly using a special ring wrench with a split head. Prepare a rag to catch spilled hydraulic fluid.
Attention! To avoid damage to the paintwork, do not allow brake fluid to come into contact with painted body surfaces.
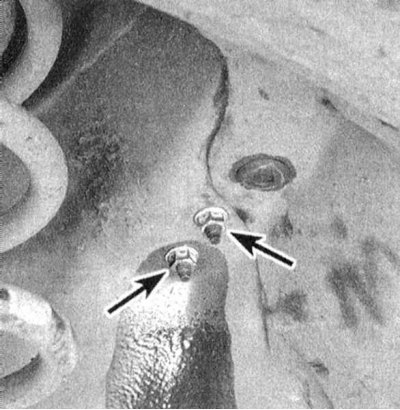
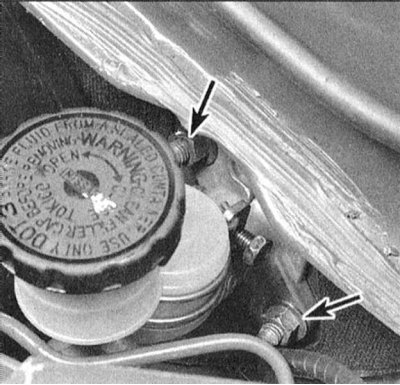
5. Give nuts of fastening of the main cylinder on a back bulkhead of an impellent compartment. Remove master cylinder assembly (try not to spill the brake fluid).
Installation
1. Place the master cylinder assembly in its proper place and secure it with nuts, hand-tightening the latter.
2. Connect the hydraulic line to the master cylinder, - try not to distort the union nut of the union connector in order to avoid irreversible damage to the latter due to thread stripping.
3. Firmly tighten the mounting nuts and hydraulic line fitting.
4. Connect the cylinder pusher to the clutch pedal and fix the split finger with a new pin.
5. Fill the reservoir with the required amount of DOT 3 brake fluid (see chapter Settings and ongoing maintenance), then remove air plugs from the tract (see Section Removal of air from the hydraulic path of the clutch release drive).
6. Check that the height and free play of the clutch pedal are set correctly and correct if necessary (see Section Clutch pedal adjustment).