Removing
1. Unscrew the plug and remove the liquid from the nutrient tank (or deflate by unscrewing the fitting on the wheel).
2. Disconnect the wires from the fluid level sensor.
3. Clean the fittings on the master cylinder.
4. Designate the fitting in order to attach to the original places during assembly.
5. Unscrew the union nuts, carefully remove the tubes and plug the holes.
6. Wipe up spilled liquid immediately.
7. Turn away nuts and remove the main cylinder from the vacuum amplifier.
8. Remove the gasket from the cylinder.
Disassembly
Attention! Before disassembly, purchase a repair kit for the type of cylinder that is installed on your car.
1. Remove the nutrient tank, remove the tank seal (if provided).
2. Bend the ears and remove the cap.
3. On vehicles with ABS, push in the first piston with a wooden drift and remove the locking bolt.
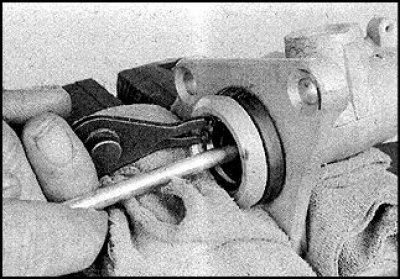
4. Take out the retaining ring (if provided).
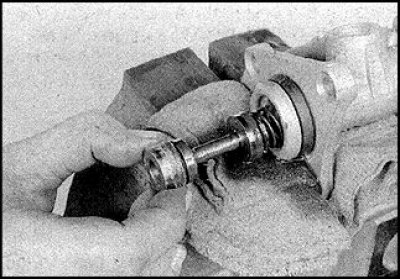
5. Remove the washer, pistons, springs and plates from the cylinder, remembering the order of their installation. If necessary, push the piston out with a jet of compressed air while clamping the cylinder in a vise.
6. Wash all parts thoroughly in alcohol or brake fluid and dry immediately.
7. Check the condition of the parts, if wear or damage is found, replace. Keep in mind that the master cylinder repair kit includes pistons with seals, seals are not supplied separately as spare parts.
8. If the cylinder and piston are scored, scratched, or corroded, replace the cylinder assembly.
9. Before assembly, lubricate the piston, cuffs and cylinder with brake fluid.
10. Install all parts in the cylinder in the same order.
11. Insert the piston in a circular motion so as not to damage the cuff.
12. Install the washer on the end face of the first piston. On vehicles with ABS, the locking bolt must align with the groove in the second piston.
13. On vehicles with ABS, compress the pistons and tighten the retaining bolt.
14. Compress the pistons and secure with a new cap (supplied in repair kit).
15. Bend the ears of the cap.
16. Check the condition of the tank seals, replace if necessary.
17. Put on the seals and install the tank.
Installation
1. Wipe the surfaces of the cylinder and vacuum booster and put on a new gasket.
2. Install the cylinder on the vacuum booster, making sure. that the booster pusher enters the cylinder in the center.
3. Tighten the nuts to the specified torque.
4. Install the tubes according to the marked marks, wrap and tighten the fitting.
5. Pour fluid into the reservoir and bleed the air from the hydraulic actuator.
6. Before leaving, check the operation of the brakes.