


Removal
1. Raise the rear of the vehicle and support it on stands.
2. Remove the wheel.
3. Release the handbrake.
4. If the drum cannot be removed, then bring the pads together as follows.
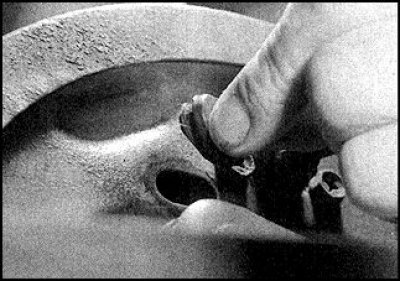
5. Remove the plug from the hole in the brake shield.
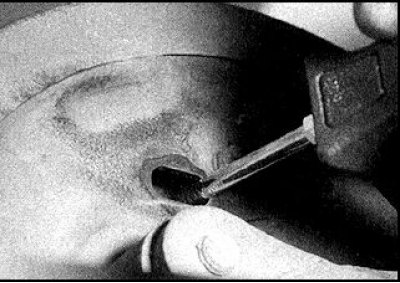
6. Insert a screwdriver into this hole, then pass the screwdriver through the hole in the shoe until it stops against the handbrake lever. Tap the screwdriver lightly to release the adjuster mechanism, then push the shoes together.
7. If a removable drum is to be installed, apply installation marks.
8. Remove the drum from the wheel studs.
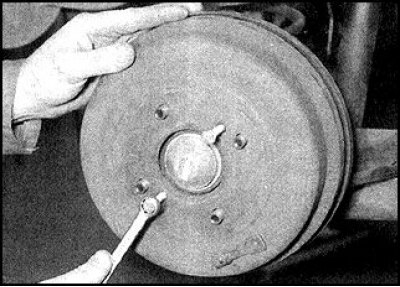
9. If the drum still cannot be removed, then move it by evenly screwing the M8 bolts into the special threaded holes.
Examination
Attention! Drums are changed only in pairs and with a set of pads.
1. Carefully clean the drum from dust and dirt.
2. Check the drum for cracks and signs of wear (pay special attention to the areas around the stud holes).
3. Check the condition of the inner surface; if there are signs of deep wear, the drum must be replaced.
4. If a ridge has formed on the inner surface of the drum due to wear, the drum must be replaced. A ridge formed due to corrosion or dirt deposits must be removed with fine sandpaper.
5. Check the drum ovality by measuring the diameter in two mutually perpendicular directions. The ovality is corrected by turning, if after processing the drum diameter does not become less than the limit.
Installation
1. Remove the preservative from the new drum.
2. Reduce the length of the spacer by turning the toothed nut to install the drum.
3. Install the drum by aligning the marks applied (if a removed drum is installed).
4. Press the brake pedal several times.
5. Adjust the handbrake.
6. Install the wheel, lower the car.
7. Check the operation of the brakes before leaving.