2. Remove rear wheels.
3. Disconnect the handbrake cable first from the bracket, then from the caliper lever.
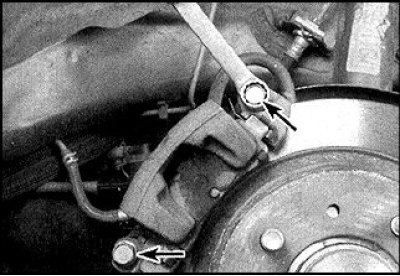
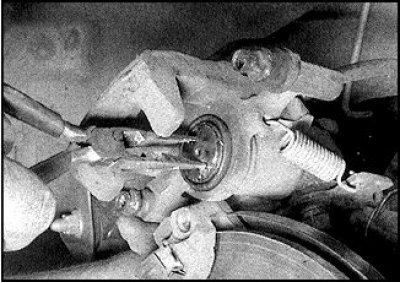
4. Unscrew the caliper pins.
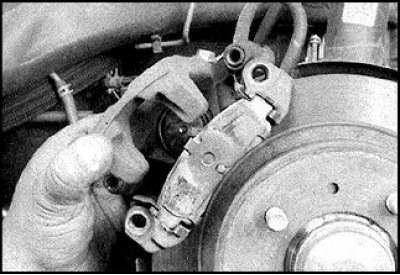
5. Remove the caliper body.
6. After disassembling the caliper, do not press the brake pedal.
7. Fasten the caliper so that the hose is not stretched.
8. Remember the orientation of the side and noise pads on the pads (anti-noise pads are provided for parts of cars and are located on the upper and lower ends of the blocks).
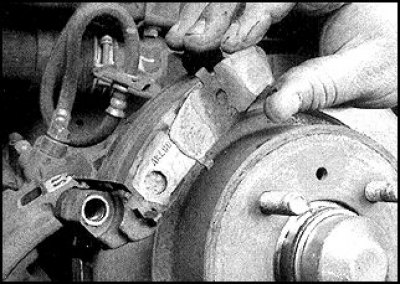
9. Remove the pads.
10. Remove pads.

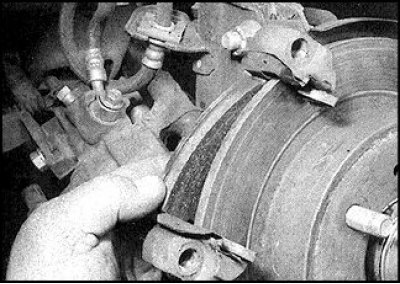
11. Remove the spring clips.
12. Check the thickness of the friction linings.
13. If the thickness of at least one lining is less than the norm, or the pads are very dirty, then replace all the pads in the set with one axle.
14. Find and eliminate the cause of contamination.
15. It is forbidden to rearrange the pads in order to compensate for wear.
16. If the condition of the pads is satisfactory, then clean them by removing stubborn dirt and large particles.
17. Clean the pad spaces in the caliper.
18. Before assembly, check the freedom of movement of the fingers in the bracket and caliper, as well as the integrity of the rubber boots.
19. Check the condition of the piston seals, the presence of corrosion on the piston and signs of leakage.
20. If the pads are changed, then the piston should be drowned into the cylinder, for which turn the piston with round-nose pliers clockwise, while pressing it into the cylinder.
21. When the piston is displaced, monitor the fluid level, excess fluid above the MAX mark on the tank should be removed with a rubber bulb or syringe.
22. Lightly lubricate the shoe plates, shims and spring clips with a special anti-noise lubricant.
23. Keep in mind that new pads come with anti-noise coating and do not require lubrication.
24. Install anti-noise brackets, pads and pads in their original places (brackets and pads are provided on parts of cars).
25. Install the caliper body. The protrusion on the back of the pads should go into the piston recess.
26. Tighten the piston if necessary.
27. Lubricate the lower caliper pin with a fixing compound, wrap the pins and tighten to the specified torque.
28. Check the freedom of movement of the caliper on the fingers.
29. Attach the handbrake cable in the reverse order of removal, install the cable bracket and spring clip (if provided). The protrusion on the bracket should fit into the recess on the body of the caliper.
30. Repeat the above steps for the brake on the other rear wheel.
31. Adjust the handbrake.
32. Press the brake pedal several times.
33. Install the wheels, lower the car.
34. Check fluid level.
35. Before leaving, check the operation of the brakes.