Attention! Pads are changed only as a set for one axle. When cleaning the pads, remove dust and dirt by wiping with a rag soaked in alcohol; blowing is prohibited.
1. Loosen wheel nuts, raise vehicle and place on stands. Remove wheels.
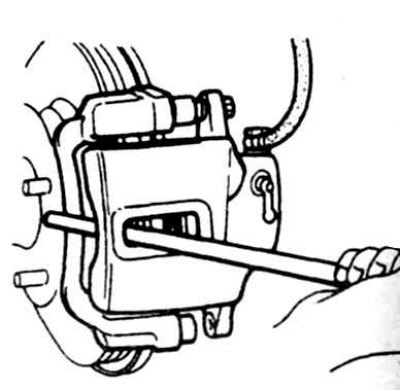
2. Turn away a bolt of the lower axis of the cylinder (photo).
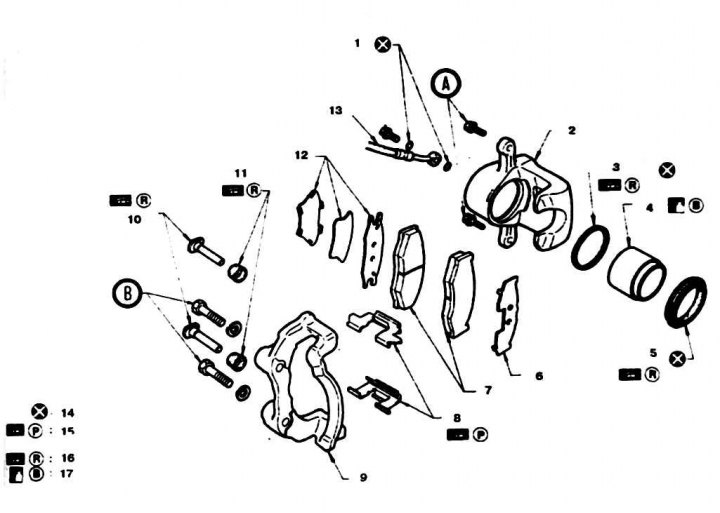
2. 2a Disc toomosis CL25VA (rear-wheel drive vehicles with 4-cylinder engines)
1. Copper gaskets; 2. Cylinder; 3. Cuff; 4. Piston; 5. Case; 6. Outer gasket; 7. Pads; 8. Holders; 9. Caliper; 10. Finger. Lubricate the sliding part; 11. Caps

2.2b Disc brake CL25VD (all four-wheel drive vehicles and all vehicles with V6 engines)
1. Hose; 2. cap; 3. Fitting for pumping; 4. Cylinder; 5. Cuffs; 6. Piston; 7. Case; 8. Outer gasket; 9, 17. Block; 10. Holders; 11. Caliper
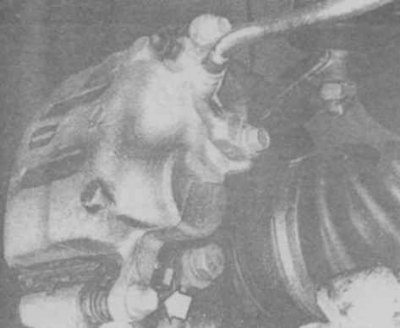
2.2v Lower axle bolt
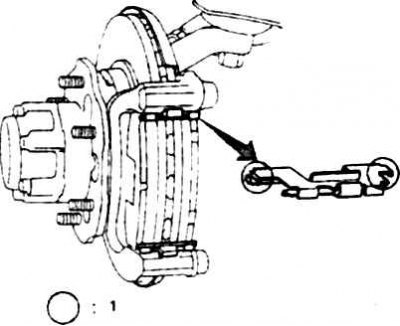
3. Tilt the caliper up (photo).
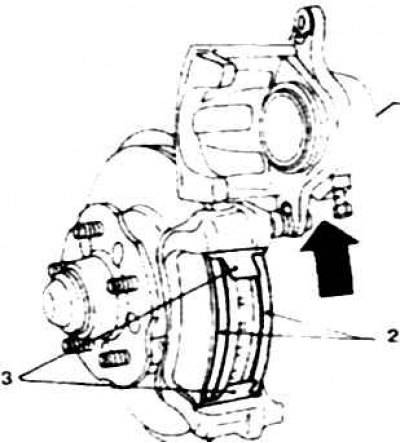
2.3 Folding out the caliper to access the pads
1. Cylinder; 2. Block; 3. Holders
4. Remove the holders, gaskets and pads. Pay attention to the original location of the parts.
5. Lubricate the contact surfaces of the caliper with silicone grease (photo).
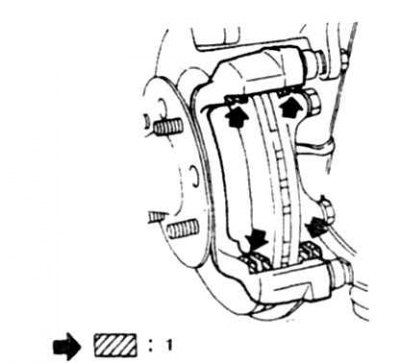
2.5 Silicone lubrication points 1. Lubrication point
6. Install new inner pads and gaskets.
7. Lower the caliper and slide it out (photo).
2.7 Caliper offset for installation of outer gaskets
8. Raise the caliper again and install new outer pads and spacers (photo).
2.8 Lubricating shoe holders
1. Lubrication point
9. Lower the caliper and tighten the axle bolt to the specified torque.
10. Further operations are carried out in reverse order. Check fluid level, refill if necessary. Check the operation of the brakes.