Removing
1. Remove the rear brake disc.
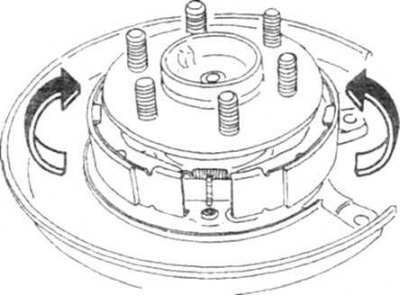
2. Remove the shoe pressure springs by pressing the cap and turning it 90° (photo).
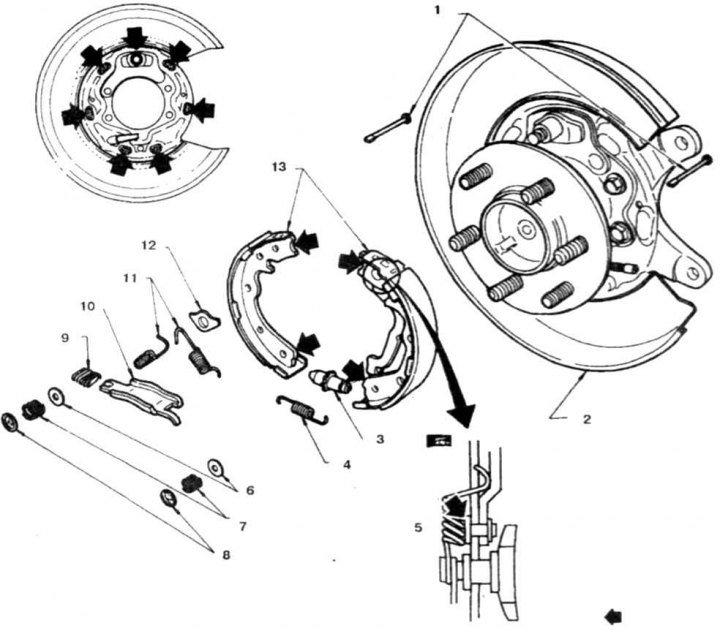
9.2 Parts of the rear disc brake handbrake
1. Fingers of clamping springs; 2. Brake shield; 3. Regulator; 4. Adjusting spring; 5. Contact surfaces; 6. Support washer; 7. Spring; 8. Clamping spring cap; 9. Spring; 10. Strut
3. Move the pads away from the brake shield (photo), remove the two springs, guide and spacer.
4. Separate the pads in the upper part and remove from the axle shaft flange, disconnect the handbrake cable from the lever
5. Remove spring and adjuster, wash parts in solvent, and lubricate threads with grease.
6. If blocks change, then establish the conducted lever of a manual brake on a new block.
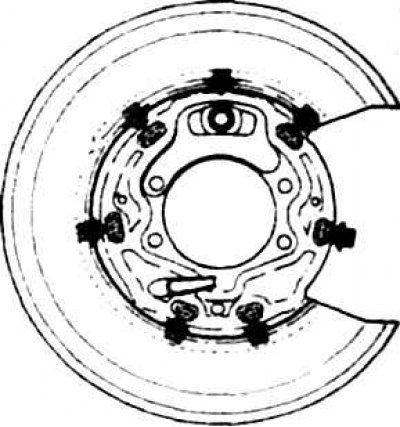
9.3 Release the pads, push back and remove the return springs
Installation
7. Hook the regulator spring on the block and install the regulator. Make sure the grooves on the adjuster fit into the ends of the pads.
9.7 Lubrication points on the brake shield
8. Lightly lubricate those places of the pads that are in contact with the brake shield (photo).
9. Attach the cable to the lever on the block.
10. Separate the pads and install, pressing the brakes against the shield. Install the spacer.
11. Install the shoe pressure springs, secure with caps by turning them 90°.
12. Install springs and guide.
13. Install the disc on the axle shaft flange and secure by screwing the two wheel nuts. Install the cylinder and caliper.
Adjustment
14. Check that the handbrake is fully released. Remove the plug in the shield and inserting a screwdriver, turn the adjuster by the teeth until the block comes into contact with the disc drum (photo).
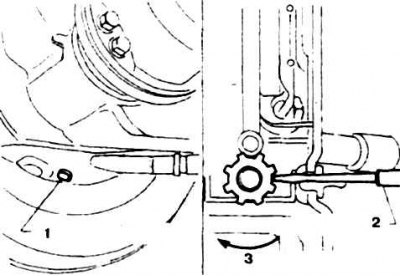
9.14 Remove the plug and use a screwdriver to turn the adjuster by the teeth until the shoe contacts the disc drum, then unscrew the adjuster in the opposite direction by 7-8 clicks
1. Regulator plug; 2. Screwdriver
15. Turn the adjuster back 7-8 clicks and make sure that the disc rotates freely without hitting the block.
16. Replace the plug.