Details of the wheel cylinder of drum brakes
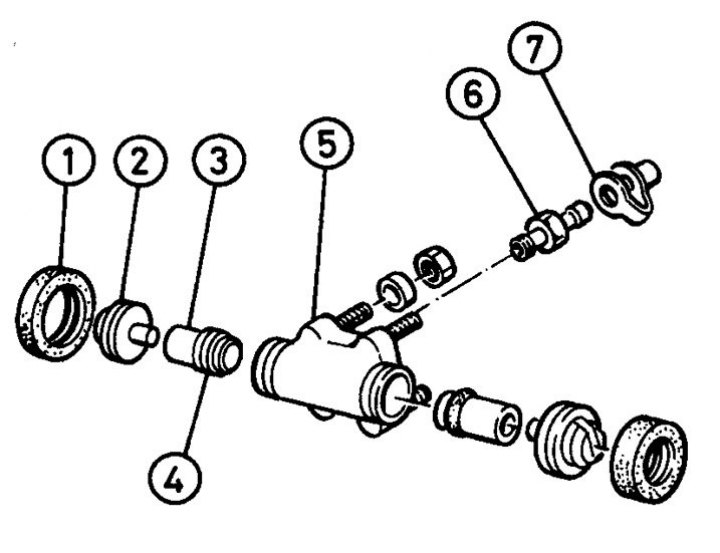
1. Case; 2. Piston head; 3. Piston; 4. Piston collar; 5. Cylinder; 6. The union for removal of air; 7. Cap
Wheel cylinder fitting and bolts
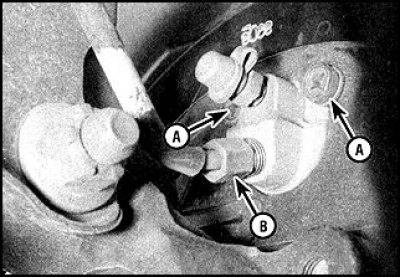
A. Bolts
B. Fitting
Removing
1. Remove drums.
2. Remove pads.
3. To reduce fluid loss, tightly wrap the tank cap by laying a plastic film, or pinch the hoses.
4. Clean the bolts securing the cylinder to the brake shield and the fitting.
5. Turn away the union and muffle a tube and an opening in the cylinder.
6. Turn away bolts and remove the cylinder.
Disassembly
1. Clean dust and dirt from the cylinder by wiping with a rag soaked in alcohol.
2. Remove covers.
3. Apply identification marks to the cylinders.
4. Remove pistons and spring.
5. All cylinder seals must be replaced.
6. Check up a condition of the piston and an internal surface of the cylinder.
7. If there are defects on these parts, replace the cylinder assembly.
8. Before assembly, thoroughly clean all parts, pistons, springs and cuffs, lubricate with brake fluid.
9. Put the cuffs on the pistons.
10. Carefully insert the first piston into the cylinder, guided by the marks made during disassembly.
11. Install the spring and second piston.
12. Put covers on the cylinder, having greased their edges with a brake fluid.
Installation
1. The cylinder is installed in reverse order.
2. Bleed only hydraulic wheel brake (if the integrity of other circuits was not violated).