Removing
1. Disconnect the master cylinder pusher from the clutch pedal.
2. Disconnect the hydraulic line from the cylinder and drain the fluid.
3. Turn out bolts of fastening and remove the cylinder (photo).
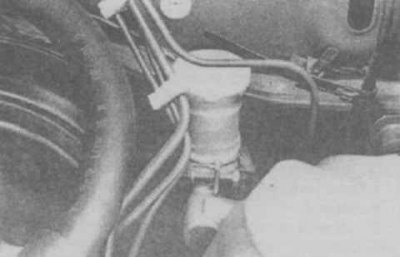
3.3 The master cylinder is attached to the bulkhead of the engine compartment
4. Drain remaining fluid from reservoir and clean cylinder.
5. Remove the dust cover of the cylinder and remove the restrictive ring (photo).
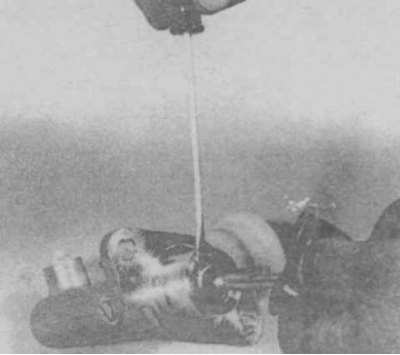
3.5 The restrictor ring can be removed with a narrow screwdriver
6. Get a pusher.
7. Push the piston into the cylinder and remove the stop bolt (photo).
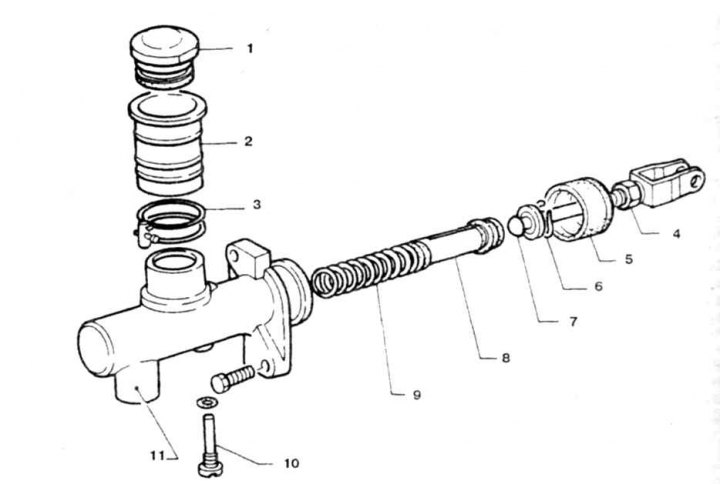
3.7 Clutch master cylinder
1. Tank cover; 2. Nutrient tank; 3. Collar; 4. Locknut; 5. Dust cover; 6. Restrictive ring; 7. Pusher; 8. Piston; 9. Return spring
8. Remove the piston assembly with the spring.
Attention! The piston design is non-separable.
9. Replace the hydraulic reservoir only if the reservoir is damaged. The removed tank must be replaced.
10. Check up a condition of an internal surface of the cylinder. If scuffing, scratches or painted areas are found, replace the cylinder.
11. If the inner surface is in good condition, then replace only the seals.
12. Before installing parts, they must be lubricated with brake fluid.
13. Use your fingers to install the piston cups into the appropriate grooves, making sure they are oriented correctly (photo).
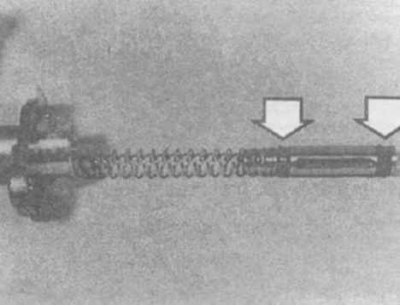
3.13 Correct installation of piston cups (indicated by arrows). The working edges of the cuffs must face in the indicated direction
14. Assembly of the cylinder is carried out in the reverse order.
15. Installation is carried out in the reverse order. Check clutch pedal height and free play (Ch. 1), bleed the air from the hydraulic drive (see below).