


Table of contents: Removal ↓ Installation ↓
Removal
Rear Anti-Roll Bar Disconnect Actuator Components
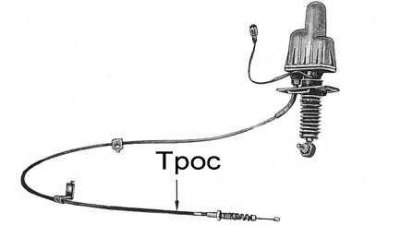
1. Jack up the rear of the vehicle and place it on supports placed under the axle housing. Move the anti-roll bar disconnection control handle to the "On" position.
2. Loosen the ball joint nut of the right anti-roll bar strut and disconnect the strut from the rod.
3. Disconnect the electrical connector of the test lamp.
4. Disconnect the front drive cable from the rear at the adjuster. Using pliers, remove the cable lock plate on the adjuster bracket.
5. Loosen the cable clamp bolts and loosen the assembly mounting bolts. Remove the anti-roll bar disconnect assembly from under the vehicle.
6. If necessary, you can remove the front drive cable with the control handle, for which:
- Loosen the tie bolts securing the cable to the vehicle chassis.
- Loosen the nuts securing the control handle to the bulkhead.
- Unscrew the bolt securing the handle to the instrument panel and remove the handle with the cable from the vehicle.
7. Check the anti-roll bar disconnect assembly for signs of damage. Pull the assembly's drive cable by hand to check the stabilizer bar disconnect function. When the cable is released, the bar should lock securely in the assembly. Replace if necessary.
Installation
Installation is carried out in reverse order.
1. Adjust the length of the cable to achieve a free play of 0.2÷0.7 mm.
2. Make sure that the test lamp connector is securely fastened.