


Table of contents: Removal ↓ Installation ↓
Removal
1. Jack up the rear of the car and place it on supports placed under the rear axle housing.
2. Loosen the nuts securing the rod struts to the chassis brackets and remove the washers and rubber bushings (see accompanying illustration).
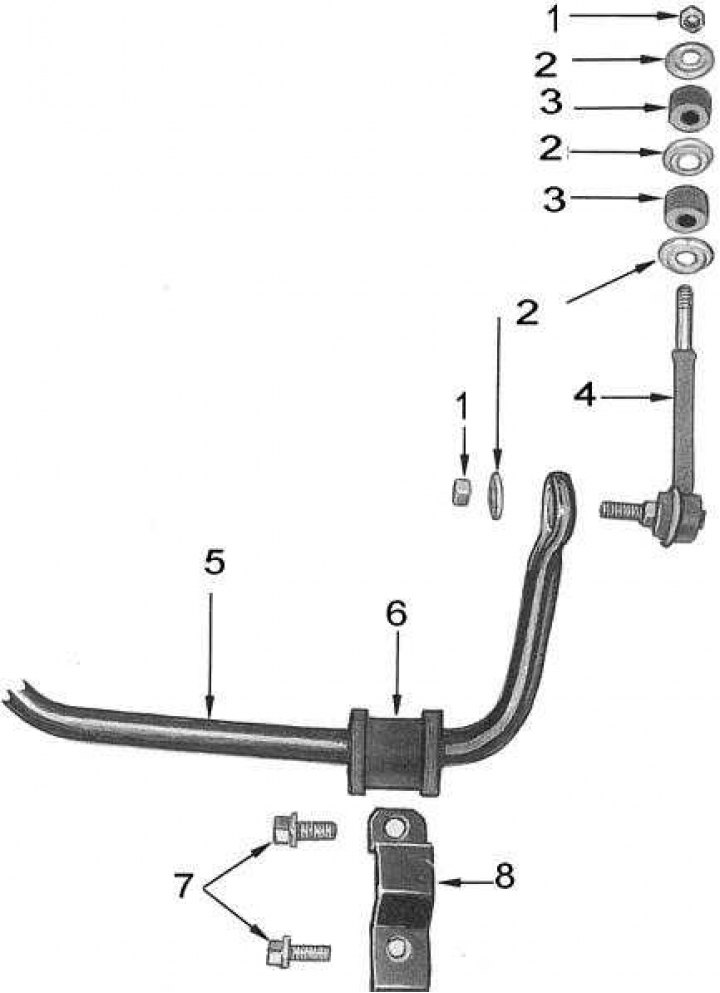
1 - nut; 2 - washer; 3 - rubber bushing; 4 - rack; 5 - stabilizer bar; 6 - rubber cushion; 7 - bolts; 8 - bracket
Note: On models equipped with a rear stabilizer bar disconnect mechanism, the right strut is part of the disconnect mechanism. The procedures for removing and installing the stabilizer bar disconnect assembly are described in the following Section (Steering).
[The article was obtained from the portal www.NissanBook.ru]
13. Loosen the nuts of the ball joints of the anti-roll bar struts and remove the struts from the car.
14. Loosen the bolts securing the stabilizer bar support brackets to the rear axle housing. Remove the brackets from the vehicle.
15. Remove the anti-roll bar from under the vehicle.
Installation
Installation is carried out in reverse order.
1. Check the condition and ensure that the rubber cushions are seated correctly in the brackets. Tighten the mounting bolts to 25÷32 Nm. When the bolts are tightened correctly, the paint marks on the anti-roll bar should protrude evenly on both sides.
2. Check the condition of the rubber bushings and ball joints of the anti-roll bar struts, ensure that the components are seated correctly. Tighten the nuts of the ball joints with a force of 25÷32 Nm.