


Removal
1. Raise the front of the vehicle and support it on stands.
2. Remove the wheel.
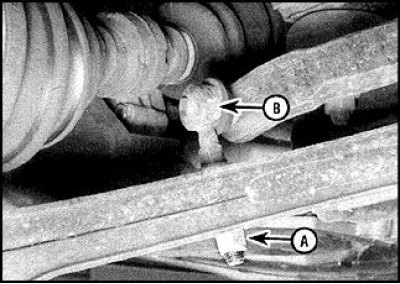
3. Loosen the nut securing the link to the stabilizer cross member (A – nut securing the link to the lower arm, B – nut securing the link to the stabilizer cross member), remove the washer.
4. Repeat the steps on the opposite end of the stabilizer.
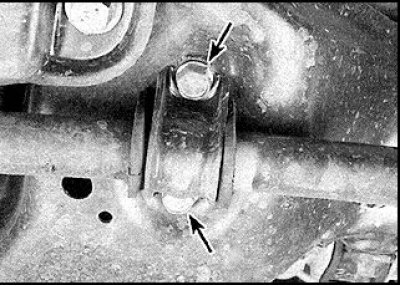
5. Unscrew the bolts (indicated by arrows) stabilizer clamps.
6. Remove the stabilizer.
Installation
1. If damage is found on the rubber buffers, replace the buffers, installing them so that the painted belt on the stabilizer cross member faces the inside of the buffer.
2. The stabilizer is installed in the reverse order.
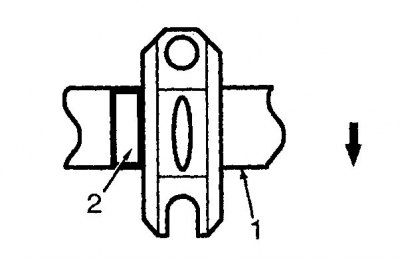
3. The groove for the bolt on the clamp should be facing the rear of the car (the direction is indicated by the arrow, 1 - stabilizer, 2 - mark (painted belt)).
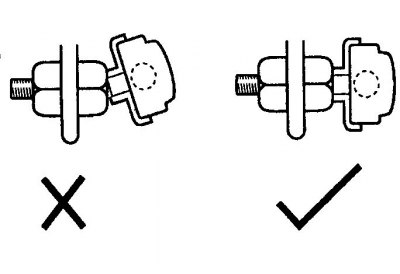
4. The stabilizer rod hinge must be located in the center of the arc described by the rod when it is displaced. In this position, the hinge must be completely unloaded (left - incorrect orientation, right - correct).
5. Tighten all nuts and bolts only after removing the vehicle from the jack and settling the suspension.
Stabilizer link
Removal
1. Raise the front of the vehicle and support it on stands.
2. Remove the wheel.
3. Unscrew the nut securing the rod to the stabilizer crossmember and remove the washer.
4. Unscrew the nut securing the rod to the suspension arm, remove the bushing and washer.
5. Remove the rod, bushings and washers.
Installation
1. Replace the tie rod bushings if necessary.
2. The rod is installed in the reverse order.
3. Replace the tie rod nuts, install the washer with the convex side facing the bushing.
4. The stabilizer rod hinge must be located in the center of the arc described by the rod as it moves.