


Removal
1. Raise the rear of the vehicle and support it on stands.
2. Remove the wheel.
3. Loosen the stabilizer link nut on the strut.
4. Disconnect the ABS system wiring from the rack.
5. Remove the bracket and disconnect the brake hose from the strut.
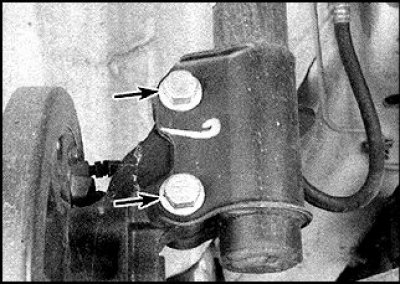
6. Unscrew the two nuts (indicated by arrows) fastening the rack to the hub body and disconnect the rack.
7. To access the upper pillar mount, disassemble the rear seatback (see subsection 13.23).
8. On sedans, remove the rear shelf.
9. Remove the mat cover.
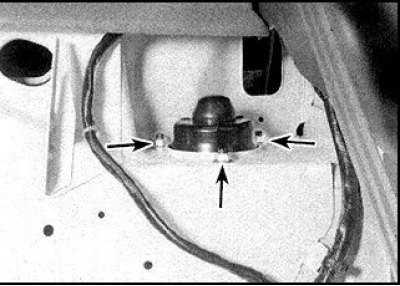
10. Pry up and remove the plastic cover of the rack mount (the arrows indicate the nuts of the upper mounting of the rear pillar).
11. Have an assistant support the rack from below, unscrew the three rack mounting nuts, lower and remove the rack.
Disassembly
1. Clamp the bottom of the rack in a vice using spacers.
2. Screw the nuts onto the studs, rest the lever against the studs, and loosen the upper nut of the shock absorber rod. Do not unscrew the nut completely.
3. Compress the spring with the fixture so that the top plate can be rotated by hand.
4. Unscrew the stem nut while holding the stem from turning.
5. Remove the washers, gasket, top cap and spring retainer.
6. Remove the spring, dust cover and rubber buffer.
7. Check the condition of the parts, replace worn and damaged parts.
8. Check for leaks from the shock absorber and the condition of the rod along its entire length.
9. Check the body for cracks and damage.
10. Check the operation of the rack by first extending the rod to its full length, and then pushing the rod in and out by 50–100 mm. You should feel a smooth resistance to the movement of the rod.
11. If there are signs of leakage, mechanical damage, and the movement of the rod is accompanied by "jerks", then the rack is subject to replacement. The spring and all parts can be installed on a new rack.
12. Inspect the spring.
13. If severe corrosion of the spring, cracks in the coils, deformations or any signs of questionable condition are found, then replace the spring.
14. Clamp the stand in a vice and install the rubber buffer and dust cover.
15. Compress and install the spring so that the color marking is facing down. The end of the spring coil should fit into the recess in the plate.
 |
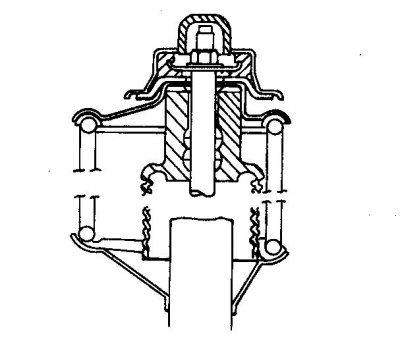 |
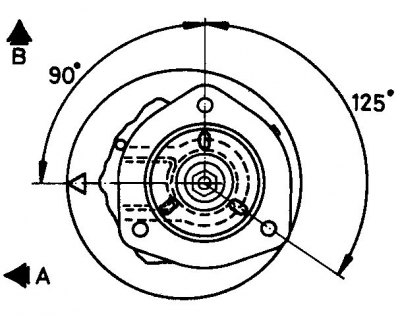
16. Install the upper buffer and plate, correctly positioning the spring coil in the plate. When installing the rack, the arrow on the upper plate should be facing transversely outward (A - transverse direction, B - towards the front part).
17. Assemble the upper strut mount in the correct order and install the new rod nut.
18. Tighten the nut to the specified torque while holding the rod.
19. Remove the spring compressor.
Installation
1. Install a new upper strut mount gasket.
2. Install the rack so that the studs enter the holes in the body and the groove on the upper plate is facing transversely outward.
3. Replace and tighten the nuts to the specified torque.
4. Align the holes in the strut and hub housing, tighten the new nuts and bolts to the specified torque (the nuts must be facing the direction of the vehicle).
5. Attach the stabilizer link and tighten the new nut to the specified torque.
6. The stabilizer rod hinge must be located in the center of the arc described by the rod when it is displaced. In this position, the hinge must be completely unloaded.
7. Install the wheel and lower the vehicle.