


Table of contents: Removal ↓ Installation ↓
Layout diagram of air intake tract components
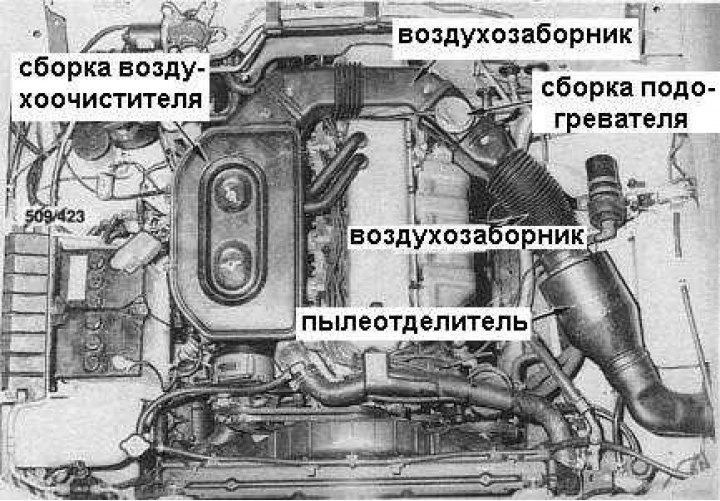
Removal
1. Remove one or more wing nuts securing the upper air cleaner assembly cover (the 4.2L engine air cleaner components are shown in the accompanying illustration).
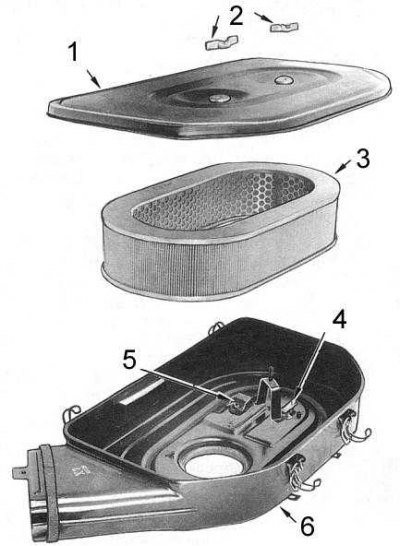
1 - top cover; 2 - wing nuts; 3 - filter element; 4 - device for leaning the mixture at idle speed with a warm engine; 5 - thermostatic valve; 6 - body
2. Release the cover fastening clamps.
3. Remove the top cover and remove the filter element from the air cleaner housing.
4. Loosen the air cleaner air intake mounting bolt to the heater assembly.
5. Disconnect the air cleaner ventilation hose from the cylinder head cover.
6. Remove the air cleaner bracket mounting bolts.
7. Lift the air cleaner, then disconnect the vacuum hoses from it, after marking them with identification marks.
8. Remove the air cleaner assembly from the vehicle.
9. Loosen the dust separator air duct clamp.
10. Loosen the mounting bolts and remove the heater assembly from the vehicle.
11. Loosen the bolts securing the dust separator to the mudguard. Remove the dust separator from the vehicle.
Installation
Installation is carried out in reverse order.
1. If necessary, service the air cleaner according to the instructions.
2. Make sure that the vacuum hoses are connected in accordance with the identification marks applied during dismantling.