


2. Remove the lower part of the oil pan:
Loosen the mounting bolts in the reverse order to that shown in the figure.
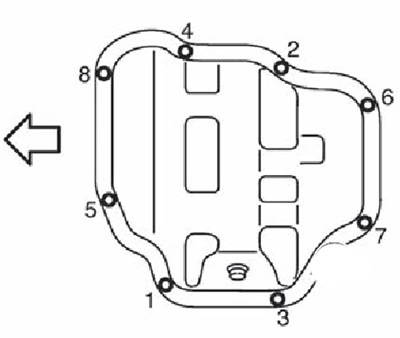
Note. The arrow points to the front of the engine.
Insert cutter (A) (KV10111100) between the top and bottom of the oil pan.
Attention.
- Be careful not to damage the contact surfaces.
- Do not use a screwdriver as it will damage the contact surfaces.
Move the cutter by tapping it with a hammer.
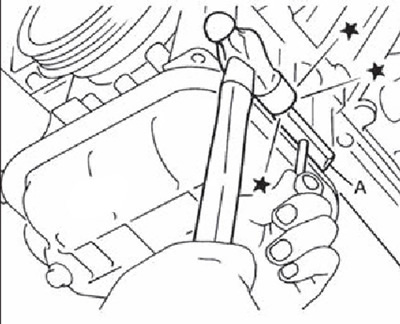
Remove the lower part of the oil pan.
3. Remove the oil pump sprockets and crankshaft together with the drive chain as described in chapter 6a.
The oil pickup and oil pump are included in the top of the oil pan. Removal individually is not allowed.
4. Remove the upper part of the oil pan:
Loosen the upper oil pan bolts in the reverse order to that shown in the figure.
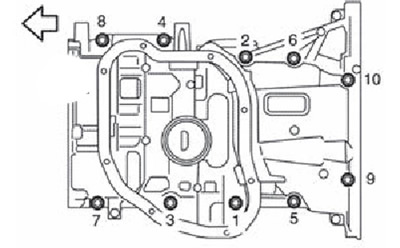
Note. The arrow points to the front of the engine.
Inserting a flathead screwdriver into the places indicated by the black arrows in the figure, pry off the upper part of the oil pan to disconnect it from the cylinder block.
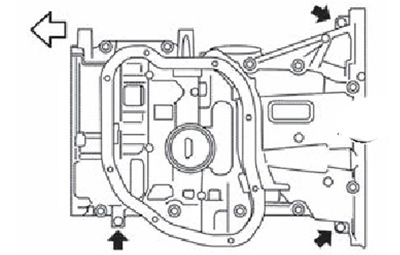
Note. The white arrow points to the front of the engine.
Insert cutter (KV1011100) between the top of the oil pan and the cylinder block. Move the cutter by tapping it with a hammer.
Attention.
- Be careful not to damage the contact surfaces.
- Sealant has been applied in some places to meet certain operational needs and does not need to be removed, so the sealant only needs to be cut at the points shown in the figure.
- Do not remove the oil pump and oil pickup from the top of the oil pan.
5. Remove the crankshaft rear oil seal from the engine.