


2. Remove the air filter or intake cable depending on the model.
3. Disconnect the upper radiator tank hose from the intake manifold.
4. Disconnect the vacuum booster hose and other vacuum hoses from the intake manifold.
5. Disconnect the accelerator cable.
6. Unscrew the bolt with the ground cable from the cylinder head (photo).
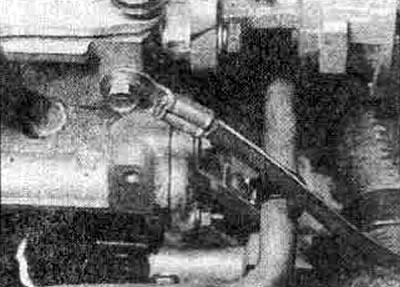
6.6A Main earth cable on the cylinder head at the front...
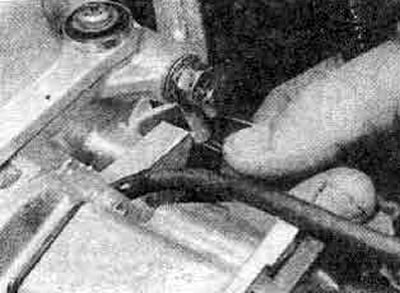
6.6V... and rear, on some models
7. Remove the distributor if the head needs to be removed.
8. On carbureted models, remove the fuel pump.
9. On Turbo and 2.0L fuel injected models, remove the fuel injection system components.
10. Disconnect the hot air hose from the exhaust manifold (carburetor models).
11. Unscrew the nuts and separate the exhaust distribution pipe from the manifold or turbo generator.
12. Disconnect the wiring from the coolant temperature sensor and the carburetor, or from the fuel injection system equipment (Section 3).
13. Remove the spark plugs, unscrew the screws and remove the valve cover.
14. Remove the timing belt as described in Chapter 5.
15. If the cylinder head is to be removed, slightly loosen the camshaft pulley bolt, fuel pump cam bolts and rocker shaft bolts (see Chapter 17).
16. Loosen the cylinder head mounting bolts in the sequence shown (Figure 1.10), gradually by half a turn. Remove the bolts.
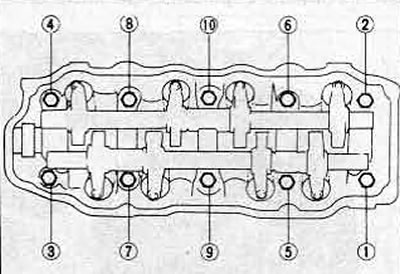
Figure 1.10 Sequence of loosening the cylinder head mounting bolts
17. Remove the cylinder head.
18. If the cylinder head is to be removed and processed, remove the intake and exhaust manifold bolts (see Chapter 17).
[The text is published on the website www.nissanbook.ru]
19. Before installation, the mating surfaces of the cylinder head and cylinder block must be completely clean and free of old gasket parts. When cleaning the head, do not scratch the surface. Clean the bolt holes in the cylinder block from dirt and oil. Install the manifolds together with new gaskets (photo).
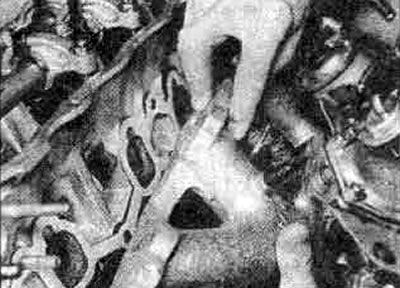
6.19 A. Installing the carburetor and intake manifold
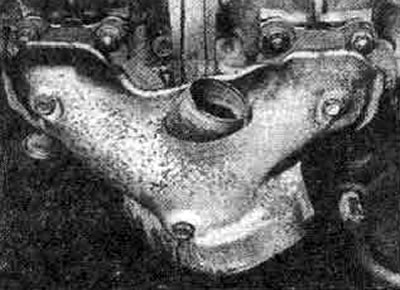
6.19 B. Exhaust manifold and heat shield
20. Position the new head gasket on the cylinder block (photo).
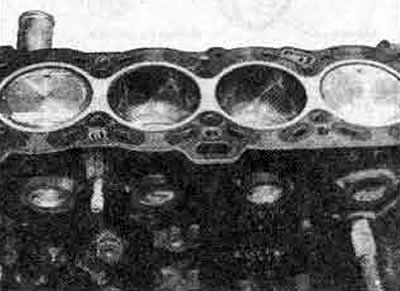
6.20 New cylinder head gasket
21. Check that piston No.1 is at TDC and that the valves of cylinder No.1 are closed.
22. Lower the cylinder head into place, screw in the lightly greased bolts. Make sure each bolt has a gasket.
23. Tighten the cylinder head bolts to the torque specified in the Specifications in the sequence shown (Figure 1.11) stages given in Specifications.
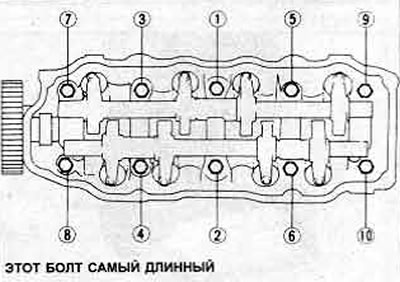
Figure 1.11 Sequence of tightening the cylinder head bolts
24. Bolt the timing pulley to the camshaft.
25. Install the toothed drive belt as described in Chapter 5.
26. Adjust the valve clearances as described in Chapter 4.
27. Install the spark plugs.
28. Reconnect the wiring, exhaust outlet pipe and hot air duct.
29. Install the fuel pump or fuel injection components.
30. Install the distributor and grounding wiring.
31. Connect the accelerator cable, vacuum booster hose and other vacuum hoses, as well as the upper radiator hose.
32. Install the air filter or air intake duct.
33. Fill the cooling system and connect the battery wiring.
34. Start the engine and warm it up to normal operating temperature, recheck and, if necessary, adjust the valve clearances.
35. After 1000 km the cylinder head bolts must be re-tightened with the engine cold. To do this, remove the valve cover, then in the sequence for tightening the bolts, loosen each bolt by half a turn and re-tighten them to the maximum tightening torque.