


2. Check the condition of the gear teeth and bushings.
3. Check the shafts (backlash, wear).
4. Check the bearings by spinning them quickly with your fingers. If they wobble or rattle, or show visible signs of wear or damage, replace them.
5. If the measured clearance of the mechanism gear is outside the specified limits, check the working surfaces of the mechanism bearing, the shaft and the synchronizer hub, the fit of the mechanism on the bearing or bushing. Replace worn components.
6. Wear in synchronizers is accompanied by noise when selecting a gear. Note that it is considered good practice to replace the locking rings, especially if the car has high mileage (photo).
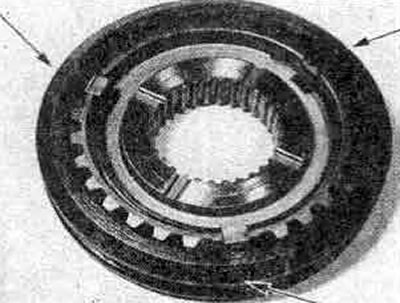
9.6. Checking the synchronizer wear - pay attention to the indicated places
7. Disassemble the synchronizers, marking the location of the components with paint. Using Figure 6.12, remove the spacer springs, push the hubs out of the bushings, and remove the travel inserts from the hub.
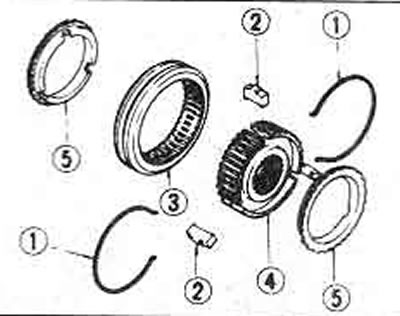
Figure 6.12. Synchronizer parts: 1. Spacer spring; 2. Shifting insert; 3. Bushing; 4. Hub; 5. Blocking ring
8. Check the synchronizer components, the installation locations of the locking rings. Check with a feeler gauge that the gap between the mechanism and the locking ring is not less than a certain value (Figure 6.13). If necessary, replace the locking ring.
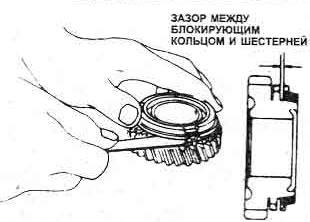
Figure 6.13. Checking the wear of the locking ring
9. When assembling the synchronizers, make sure that the spacer springs are installed facing each other when viewed from each side of the block, and that the ends of the springs enter the retaining inserts (figure 6.14).
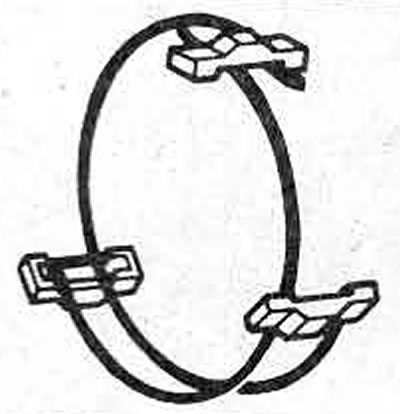
Figure 6.14. Direction of installation of synchronizer spacer springs
10. Replace all O-rings, seals, roll pins or fastening buttons and thrust rings that were damaged during reassembly; never reuse them.