


Table of contents: Removal ↓ Installation ↓
Removal
Note: On 2WD vehicles, the oil pan can be removed without removing the engine from the vehicle. To remove the oil pan on all-wheel drive vehicles, you must first remove the engine from the vehicle as described in chapter "Engine overhaul".
- Remove the right mudguard.
- Remove the right front wheel.
- Drain the engine oil.
- Drain the coolant.
- Remove the oil filter as described in the Vehicle Maintenance chapter.
- Disconnect the coolant pipes from the oil cooler.
- Remove the drive belts.
- Remove the air conditioning compressor along with the pipes connected to it and temporarily secure it to the side.
- Remove the front exhaust pipe.
- All-wheel drive vehicles: Remove the engine assembly from the vehicle and separate the front suspension beam, variator with drive axle and transfer case from the engine, as described in the relevant chapters.
- Remove heated oxygen sensor #2 (second row of cylinders) and remove the three-way catalytic converter (second row of cylinders) from the exhaust manifold.
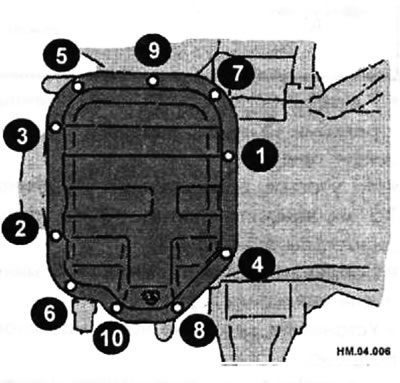
- Evenly loosen and remove the oil pan lower mounting bolts in the sequence shown in the figure.
- Insert a seal cutter between the top and bottom of the oil pan to cut the seal.
Caution: Be careful not to damage the mating surfaces. Do not insert a sharp screwdriver between mating surfaces, as this may damage them.
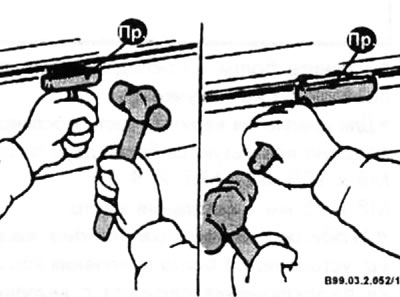
- Move the fixture by tapping its side with a hammer. After cutting the seal, remove the lower part of the oil pan.
- Remove the oil pickup inside the pan by unscrewing the two bolts that secure it. Clean it from any stuck particles.
- Remove the oil pressure sensor.
- Remove the crankshaft position sensor (POS). Be careful not to damage the sensor edges or the sensor plate teeth.
Caution: Do not disassemble the sensor. Do not allow metal parts to stick to the magnetized tip of the sensor.
- Do not place the sensor in places where it may be affected by magnetic fields.
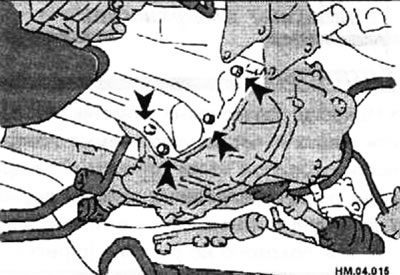
- Two-wheel drive models: Remove the four bolts securing the automatic transmission (CVT) and drive axle to the engine (arrows).
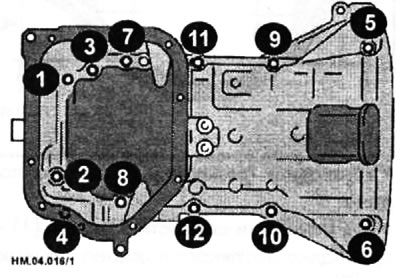
- Remove the top part of the oil pan. Loosen the bolts in the sequence shown in the figure.
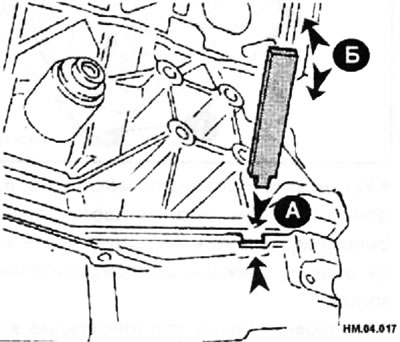
- Insert a suitable sized tool into the recess on the top of the oil pan as shown in the figure (arrow A). Pry up the top of the oil pan using the tool as a lever as shown in the figure (arrow B).
- Remove the sealing rings from the bottom of the cylinder block and the oil pump housing.
- Remove the oil pan gaskets.
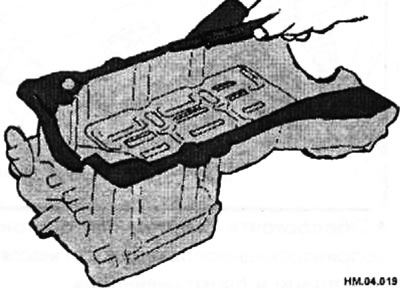
- Clean the mating surfaces of the oil pan and cylinder block from the sealing compound using a triangular scraper or razor blade.
- Clean the cylinder block, crankshaft and oil pump thoroughly. Remove any remaining sealant from the bolt holes and threaded holes.
Caution: When cleaning off old sealant residue, be careful not to scratch or damage the mating surfaces.
Installation
- Apply RTV or equivalent silicone sealant to the sealing surfaces of the front camshaft timing chain housing and the rear crankshaft oil seal retainer as shown in the illustration (arrows).
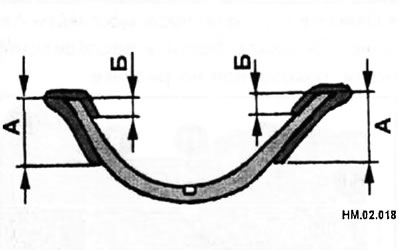
- Install the oil pan gasket.
- To install, align the protrusion (1) on the oil pan gasket with the recesses (2) on the front of the camshaft drive chain housing and the rear crankshaft oil seal holder.
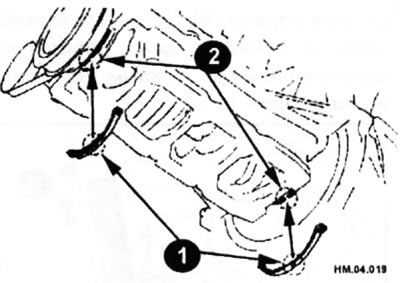
- Install the oil pan gasket so that the smaller arc faces the front of the timing chain housing.
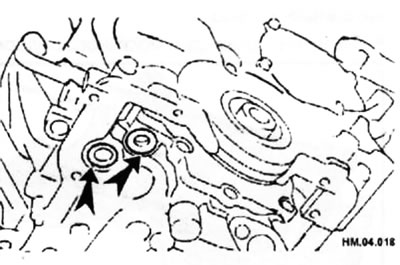
- Install new sealing rings (arrows) on the cylinder block and on the oil pump.
- Treat the contact surfaces of the oil pan and cylinder block with alcohol or acetone.
- Apply a continuous bead of sealant 3.5-4.5 mm in diameter to the surface of the cylinder block that mates with the top of the oil pan. To do this, you need to use a silicone sealant such as RTV or similar.
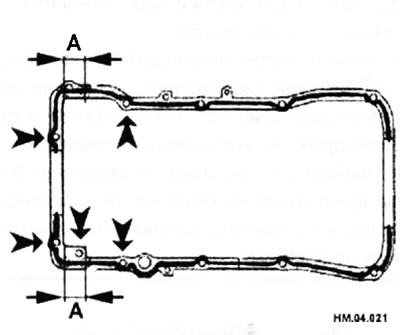
- At the bolt holes indicated by arrows (5 locations), apply sealant around the holes.
- On the areas marked (A) with a length of 35 mm, apply a thicker layer of sealant with a diameter of 4.5-5.5 mm.
- Connect the parts within 5 minutes after applying the sealant.
- Install the top of the oil pan.
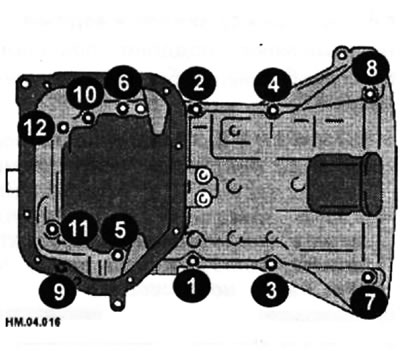
- Tighten the bolts in the sequence shown in the figure.
- There are two types of bolts used to secure the top of the oil pan. M8x100 mm-No. 5, 7, 8, 11 M8x25 mm - other places.
- 2WD models: Install the 4 bolts securing the transaxle to the engine.
- Install the oil pick-up on the oil pump.
- Remove any remaining old sealant from both the mating surfaces of the top of the oil pan and the bottom of the oil pan.
- Apply a continuous bead of sealant 4.5-5.5 mm in diameter to the surface of the lower part of the oil pan. Use a silicone sealant such as RTV or similar.
- Connect the parts within 5 minutes after applying the sealant.
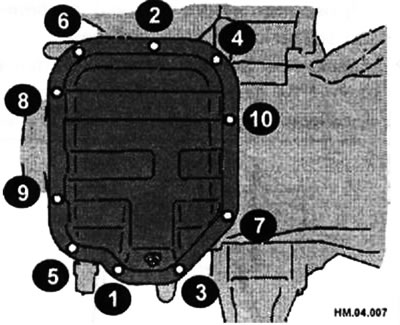
- Tighten the lower oil pan bolts in the sequence shown in the illustration.
- Install the oil drain plug.
- Further installation is carried out in the reverse order of removal.
- Engine oil can be added no less than 30 minutes after installing the oil pan.
The text was copied from the portal [NissanBook.ru]