


Table of contents: Examination ↓ Installation ↓
Attention: It is impossible to remove the variator assembly with the drive axle separately from the vehicle. Remove the CVT assembly with the drive axle and engine from the vehicle.
- Using the tool, remove the front exhaust pipe.
- Remove the dust cover (boot) from the torque converter housing.
- Turn the crankshaft clockwise when viewed from the front of the engine and remove the 4 drive plate and torque converter mounting nuts.
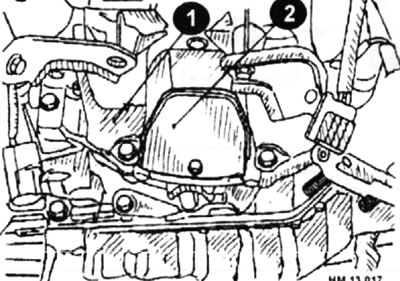
1 - engine oil pan; 2 - dust cover.
- Unscrew 4 bolts (arrows)
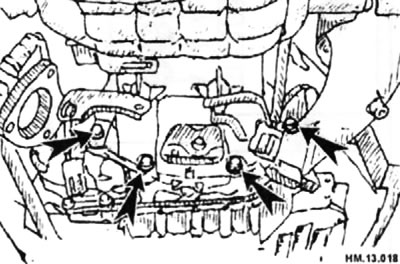
- Remove the CVT with the drive axle and engine from the vehicle as described in the relevant section.
- Remove the drive shafts.
Caution: Replace the differential side seal whenever the drive shaft is removed.
- All-wheel drive models, remove the transfer case bracket.
- All-wheel drive models, remove the transfer case.
Caution: Whenever the transfer case is removed, replace the differential side seal on the torque converter housing side only.
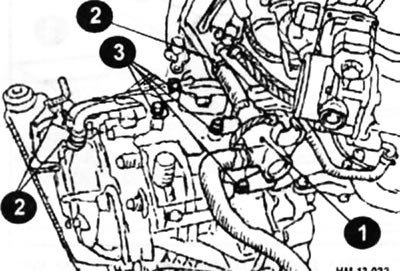
- Remove the tube for filling with working fluid (1) by unscrewing the two bolts that secure it (2).
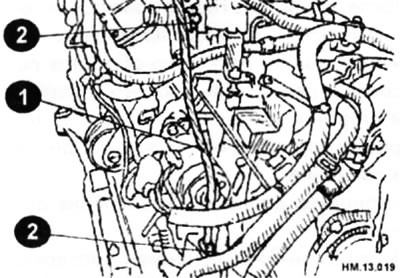
- Disconnect the plug and wire harness
- Carefully remove the POS sensor (1) from the engine by unscrewing its mounting bolt (2). Do not knock the sensor or drop it.
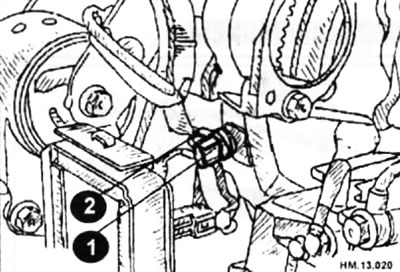
- Do not disassemble the sensor. Do not allow metal filings or small metal particles to enter the magnetic area located at the front of the sensor. Do not place the sensor near magnets.
- Remove the starter.
- On models with a CVT fluid radiator pipe and a heater hose, disconnect the hoses from the CVT fluid radiator valve (1) by removing the clamps that secure them (2), 3 in number.
- After unscrewing the 4 bolts securing it (3), remove the CVT working fluid radiator valve.
Variator mounting elements
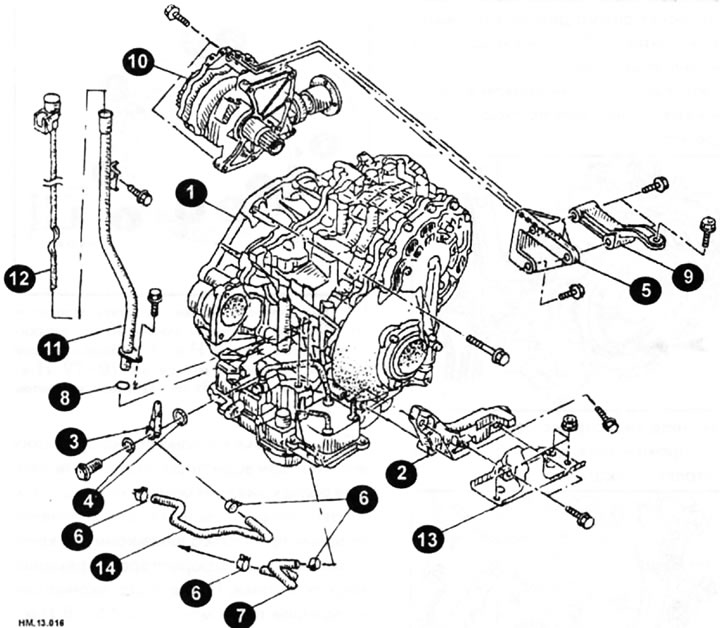
1 - CVT with drive axle; 2 — left engine support bracket; 3 — CVT working fluid radiator tube; 4 - copper washer; 5 — transfer case angle; 6 — hose clamp; 7 — CVT working fluid radiator hose; 8 — sealing ring; 9 - rear corner; 10 — transfer case; 11 — tube for filling with working fluid; 12 - dipstick for determining the level of working fluid; 13 — left engine mount insulator; 14 — CVT working fluid radiator hose.
- Install the mounting bracket (1) into the starter installation hole (2) and the mounting bracket (3) on the variator with the drive axle.
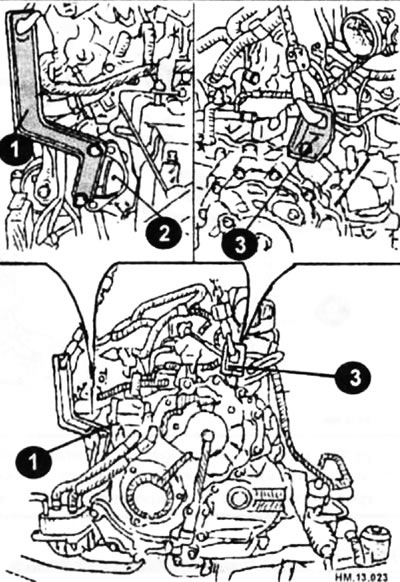
- Remove the rear corner.
- Remove the left engine mount bracket and the left engine mount insulator.
- Remove the front suspension beam from the variator with the rear axle and the engine.
- Unscrew the bolts securing the variator to the drive axle.
- Using a lift, remove the CVT with the drive axle from the engine. To do this, insert a lift mount into each bracket as shown in the figure.
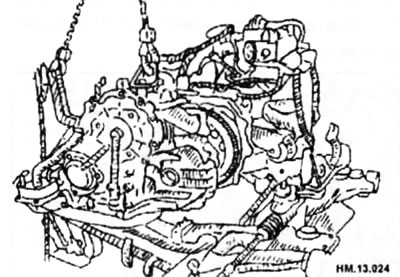
Caution: To prevent the torque converter from falling, it must be secured.
Examination
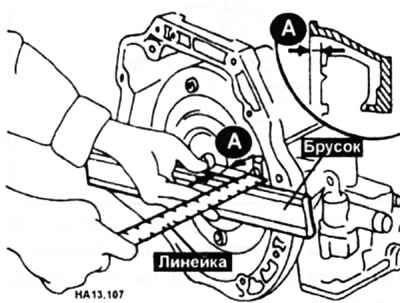
After installing the torque converter on the CVT with the drive axle, check whether the value of dimension A is within the permissible limits. To do this, place a block on the variator housing and a ruler on top of it so that its end rests against the plate. Then measure the distance from the plate to the block, it should be at least 14.0 mm.
Installation
Install the removed parts in the reverse order of removal, paying attention to the following operations:
- Screw and install the guides onto the torque converter mounting studs (arrow).
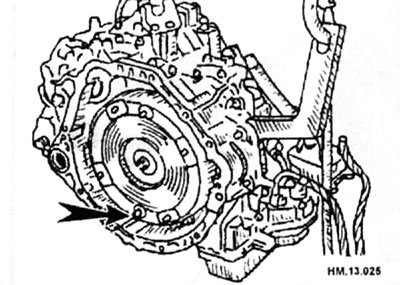
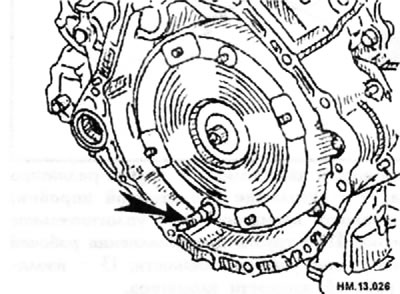
- Rotate the torque converter so that the drive plate guide (arrow) is at the bottom.
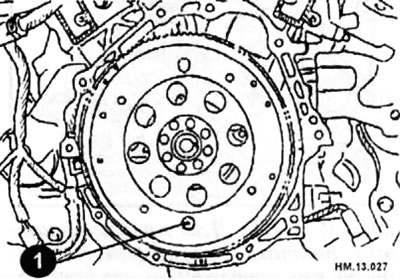
- Check the drive plate so that the hole for the guide (1) is at the bottom.
- Install the CVT with the drive axle on the engine using a lift.
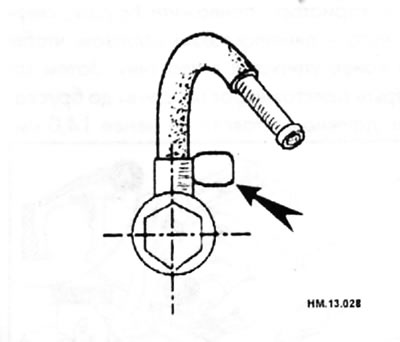
- When installing the working fluid radiator tube on a CVT with a drive axle, the tube must be aligned with the protrusion (arrow).
- When installing the CVT with the drive axle on the engine, install and tighten the mounting bolts in the order shown in the figure.
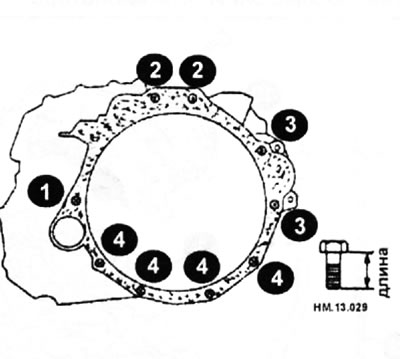
1 - 52 mm long bolt, tighten to 70-79 N·m; 2 - bolts 36 mm long, tighten to 70-79 N·m; 3 - bolts 105 mm long, tighten to 70-79 N·m; 4 - bolts 35 mm long, tighten to 42-52 N·m.
The article was obtained from the portal NissanBook.ru
- When installing the CVT fluid cooler valve on the engine, tighten the mounting bolts to a torque of 28-32 N·m.
- Align the drive plate nut studs with the torque converter nut studs and temporarily tighten the nuts. After this, finally tighten the nuts to a torque of 44-58 N·m.
Caution: The crankshaft should rotate clockwise when viewed from the front of the engine.
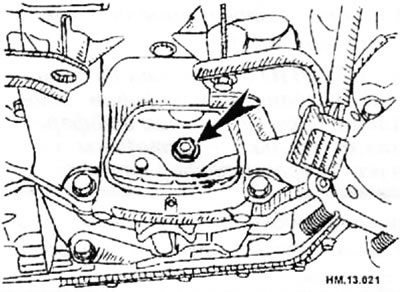
- When tightening the torque converter mounting nuts after installing the crankshaft pulley mounting bolts, make sure the crankshaft pulley mounting bolts (arrow) are tightened to the correct torque.
- After installing the torque converter on the drive plate, rotate the crankshaft a few revolutions clockwise when viewed from the front of the engine and check that the CVT rotates freely and without binding.
- Install the POS sensor by securing it with a bolt.
- After installation is complete, check for leaks, fluid level, and CVT ranges.
- When replacing the CVT, erase the data in the reprogrammable memory of the TCM control module.