


Table of contents: Preparatory operations ↓ Installation ↓
Installation is carried out in the reverse order of removal, taking into account the points below.
Attention.
- Do not allow engine oil to come into contact with the engine mounting insulators. Be careful not to damage the engine mounting insulators.
- Make sure that the mounting insulators are seated correctly, then tighten the mounting nuts and bolts.
Preparatory operations
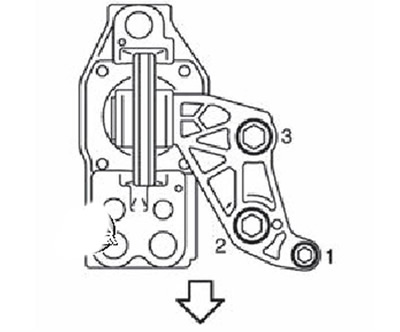
1. Install the rear mounting bracket onto the engine:
To bait (but do not tighten it completely) bolt no.1 (see picture).
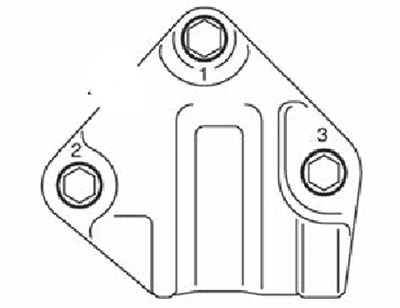
Tighten bolts No.2 and No.3 in sequence to the specified tightening torque.
Tighten bolt No.1 to the specified tightening torque.
2. Install the left engine mounting bracket to the transmission:
To bait (but do not tighten it completely) bolt no.1 (see picture).
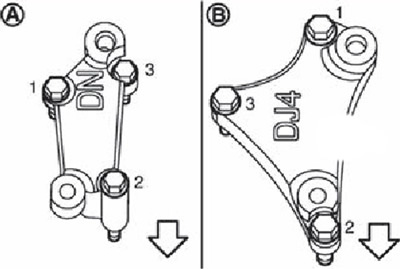
A. Modifications with manual transmission.
B. Modifications with automatic transmission. The arrow indicates the front side of the engine.
Tighten bolts No.2 and No.3 in sequence to the specified tightening torque.
Tighten bolt No.1 to the specified tightening torque.
3. Install the left engine mounting insulator to the body:
To bait (but do not tighten it completely) bolt no. 7 (see picture).
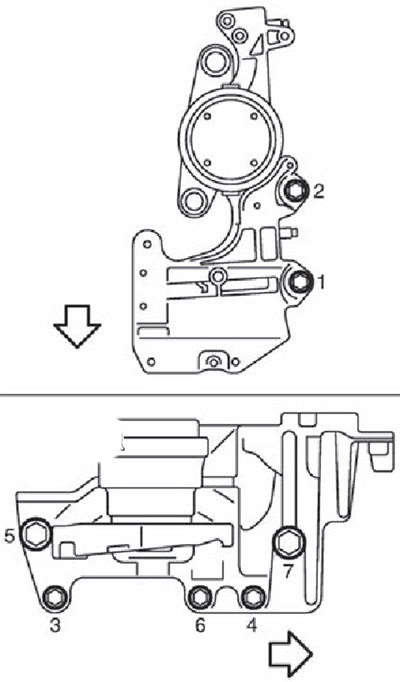
The arrow points towards the front of the car
Tighten all mounting bolts in the sequence shown in the figure to the specified tightening torque.
4. Temporarily install the right mounting insulator and upper reaction rod onto the engine.
Installation
1. Tighten the rear torque rod mounting bolt to the specified tightening torque.
2. Install the left engine mounting insulator from the gearbox side:
To bait (but do not tighten it completely) bolt no.1 (see picture).
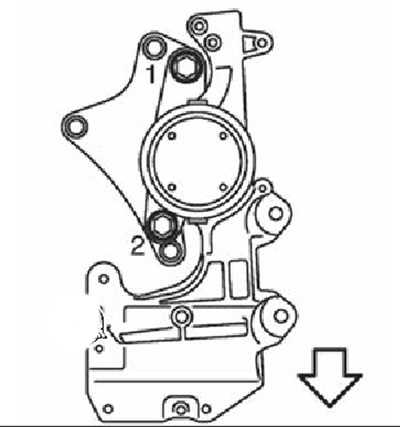
The arrow points towards the front of the engine.
To bait (but do not tighten it completely) bolt no.2 (see picture).
Tighten bolt No.1 to the specified tightening torque.
Tighten bolt No.2 to the specified tightening torque.
3. Install the right mounting insulator on the engine side:
To bait (but do not tighten it completely) bolt #3 (see picture).
The arrow points towards the front of the engine
Tighten all mounting bolts in the sequence shown in the figure to the specified tightening torque.
4. Tighten the bolts securing the right engine mounting insulator to the body to the specified tightening torque.
5. Tighten the upper reaction rod mounting bolts to the specified tightening torque.