


Table of contents: Removal ↓ Installation ↓
Selector details
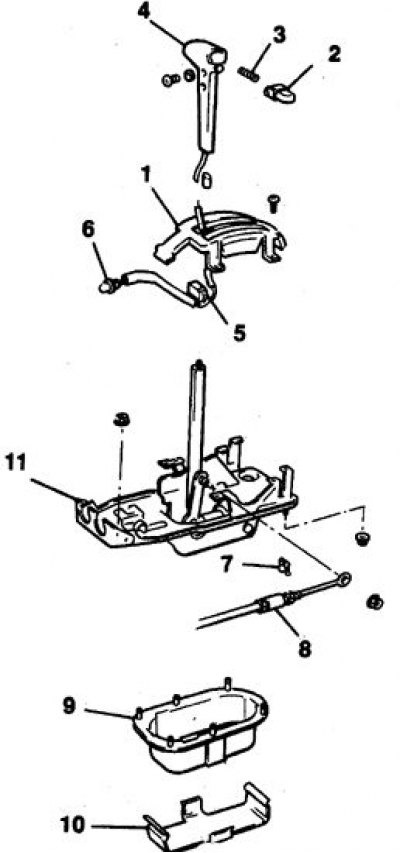
1. Overlay indicating the selector position; 2. Button; 3. Spring; 4. Handle; 5. Connector; 6. Control lamp; 7. Cable sheath bracket; 8. Cable; 9. Lid; 10. Bracket; 11. Selector mechanism assembly
Removal
1. Raise the front of the vehicle and support it on stands.
2. Move the selector to position P.
3. Remove the center section of the front panel.
4. Loosen the nut, remove the cable sheath bracket and disconnect the cable from the selector.
5. Disconnect the connectors from the overload switch and from the test lamp.
6. Loosen the screws, press the button and remove the selector handle.
7. If necessary, the button and switch spring can be removed.
8. Unscrew the nuts (access is provided from below and from inside the cabin) and remove the selector mechanism.
9. The selector mechanism is a non-disassemblable unit and cannot be repaired.
Installation
1. Install the selector mechanism and tighten the nuts.
2. Install the spring and button into the selector handle.
3. Correct the wiring and put the handle on.
4. Tighten the screws and check the selector lock.
5. Connect the connectors.
6. Attach the cable and secure the sheath to the bracket, tighten the nut and insert the bracket.
7. Adjust the selector cable and install the center section of the front panel.