2. While holding the roller, carefully remove the 2 extreme bolts, allowing the springs to straighten.
3. Remove the rocker arms and mark them so that they can be installed in their original places during assembly.
4. Replace rollers if they show signs of wear.
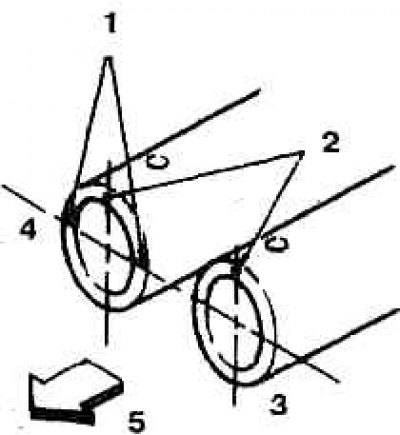
6.5a Orientation of the rocker rollers during assembly (Z24 engine)
1. Grooves; 2. Punching; 3. Roller exhaust valves; 4. Roller inlet valves; 5. To the front of the engine
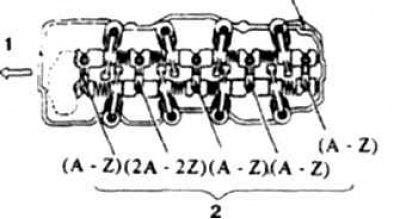
6.5b Mounting marks on the roller brackets and on the cylinder head
1. To the front of the engine; 2. Tags on brackets; 3. Labels on the cylinder head

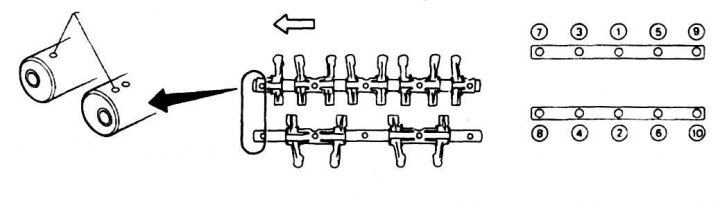
6.5c Orientation of brackets when assembling rollers with rocker arms (K24 engine)
1.2. Neckline; 3. From the intake valves; 4. Exhaust side
5. Install the roller in the front bracket, align the holes and insert the bolts. Grooves are provided on the intake valve shaft. When assembling, install the rollers so that the punches on their ends are facing upwards. Install the brackets according to the marks (photo).
6. Put on the rocker arms, compress the spring and install the rear brackets, insert the bolts. Install rollers and cover in reverse order.