


Table of contents: Removal ↓ Installation ↓
Removal
1. Raise the rear of the vehicle.
2. Remove the wheels.
3. Remove the brake drum (Ch. 10).
4. Disconnect the parking brake cable and the hydraulic line (Ch. 10).
5. Unscrew the brake shield nuts.
6. Remove the axle shaft assembly with the brake (photo). If you cannot remove the axle shaft by hand, you must use an impact puller with an adapter that is installed on the wheel mounting studs.
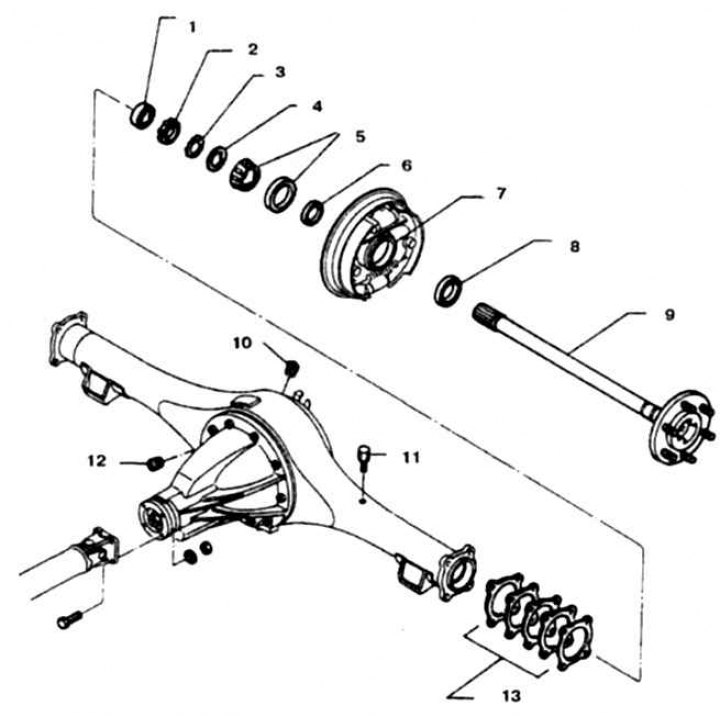
14.6a Half shaft and rear axle
1. Seal; 2. Wheel bearing nut; 3. Wheel bearing lock washer; 4. Washer; 5. Wheel bearing; 6. Separator sleeve; 7. Bearing race; 8. Seal; 9. Half shaft; 10. Filling hole; 11. Sapun; 12. Drain plug
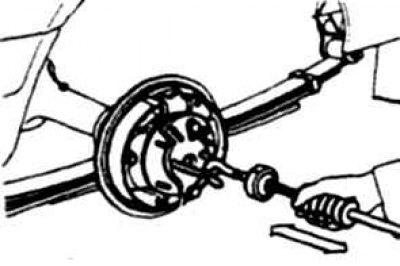
14.6b Removing the rear axle shaft using an impact puller
7. Pry up and remove the outer seal (photo). The seal should be changed every time the axle shaft is removed. Press in the new seal using a mandrel of the appropriate diameter.
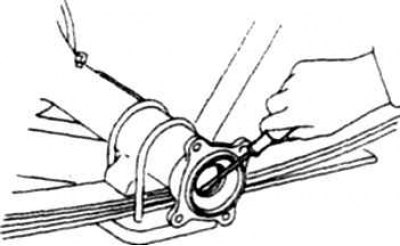
14.7 Removing the seal
8. Press the bearing off the axle shaft. It is recommended that this operation be performed at a car service center, as a puller or press is required. If these devices are available, then do the following.
9. Bend back the teeth of the bearing nut lock washer (photo).
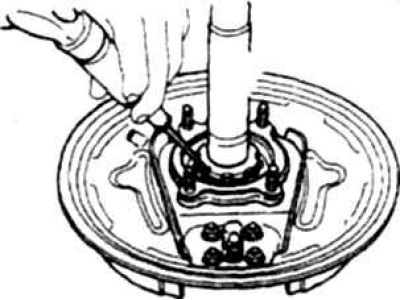
14.9 Unlock the rear wheel bearing nut by bending back the washer teeth
10. Unscrew the bearing nut with a wrench (photo), for which clamp the axle shaft in a vice through a soft spacer.
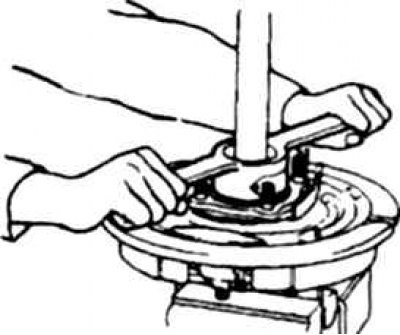
14.10 Unscrewing the rear wheel bearing nut
11. Using a press or puller, remove the axle shaft from the bearing and brake shield.
12. Knock out the seal from the bearing shell (the seal needs to be replaced).
13. If there is damage on the outer bearing race, replace the bearing. To do this, knock the race out of the shell using a brass punch (photo).
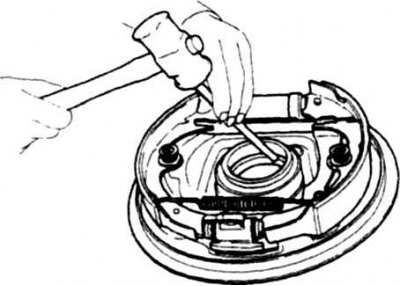
14.13 Removing the outer bearing race
Installation
14. Using a mandrel of suitable diameter, press a new bearing seal into the shell. Lubricate the working edges of the seal with consistent grease.
15. Carefully press in the outer bearing race by hitting the brass mandrel with a hammer.
16. Install the spacer sleeve on the axle shaft so that the chamfer on the hole faces the axle shaft flange (photo).
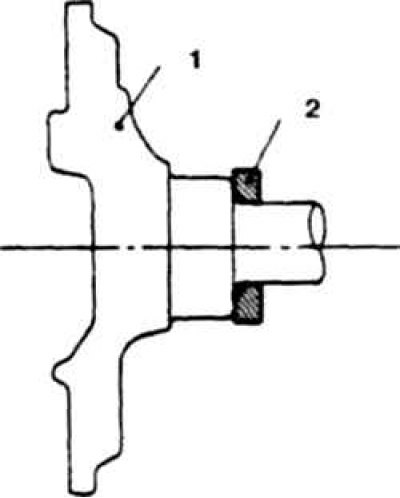
14.16 Orientation of the bearing spacer sleeve when mounting on the axle shaft
1. Half shaft flange; 2. Bushing
17. Using a brass mandrel, carefully press in the bearing.
18. Install the ring and lock washers, orient them correctly and tighten the bearing nut.
19. Lock the nut by bending the teeth of the lock washer.
20. Apply grease to the bearing and into the groove on the end of the rear axle beam.
21. Lubricate the axle shaft splines with transmission oil, apply consistent grease to the working edges of the oil seal.
22. Install all removed adjusting shims (photo).
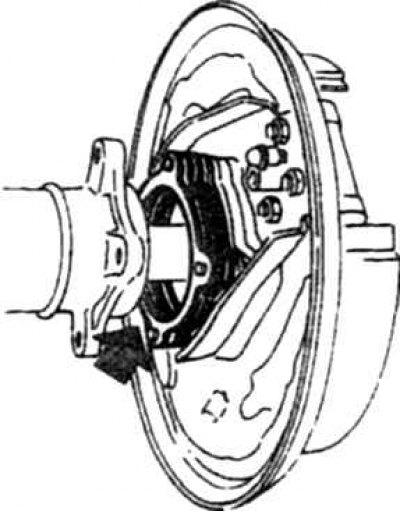
14.22 Adjusting linings are installed between the end of the rear axle beam and the bearing housing and provide the necessary longitudinal clearance of the axle shaft
23. If both axle shafts were removed, install one of them. Measure the longitudinal play of the axle shaft (photo), which should be 0.3-0.9 mm. If the play is not within the norm, adjust it by removing the axle shaft and adding or removing adjusting shims (the thickness of the gaskets is specified in the Technical Data).
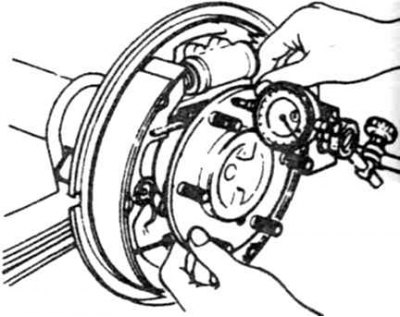
14.23 Checking the longitudinal play of the axle shaft
24. Install the second axle shaft (if it was filmed) and adjust the clearance by selecting shims.
25. Then assembly is carried out in reverse order.