


Table of contents: Checking the play ↓ Removal and installation the…↓ Checking the steering column ↓
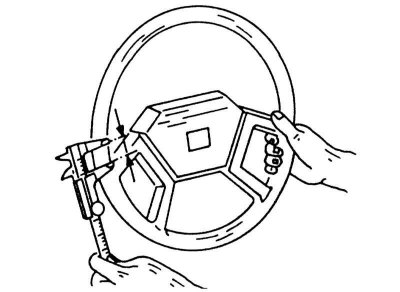
Move the steering wheel from side to side and measure the play in the steering wheel using a caliper.
Checking the play
The tests described apply to both mechanical steering and power steering: Hold the steering wheel in opposite places with both hands and move it from side to side. If the backlash measured as shown in the illustration is more than 35 mm, the steering should be adjusted. If the steering wheel moves up and down and from side to side, it means that the bearing in the steering column is broken or the steering shaft cardan joints have too much play. The steering column support must be replaced in a Nissan workshop.
To check the steering adjustment, a dynamometer is used (with servo control installed):
1. Place the car on a dry, level surface and apply the handbrake. The tire pressure should be at the required value so that you do not have to overcome unnecessary friction.
2. Start the engine.
3. Warm up the hydraulic power steering fluid to operating temperature. To do this, you can turn the steering wheel from side to side several times.
4. Attach the dynamometer to a steering wheel spoke as shown in the illustration below.
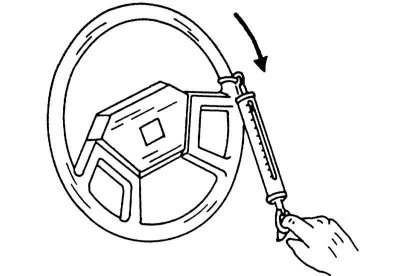
Checking the power steering force.
5. Pull the dynamometer and turn the steering wheel a full turn. Check that the reading does not exceed 4.5 kg.
6. If the value does not correspond to the required value, check the ball joints of the steering rods. If they are in good condition, you need to remove the steering gear to adjust the damper. Since this requires disassembling the steering, this work should be done in a special workshop. In the worst case, the steering gear needs to be replaced.
Removal and installation the steering column (including steering wheel)
To remove the steering wheel, you will need a special puller. The steering wheel hub has two threaded holes into which the puller is screwed.
1. Support the front of the vehicle and disconnect the battery.
(See the original on the resource: «nissanbook.ru»)
2. Carefully pry the horn button from the center of the steering wheel as shown in the illustration below. Use a small screwdriver to do this.
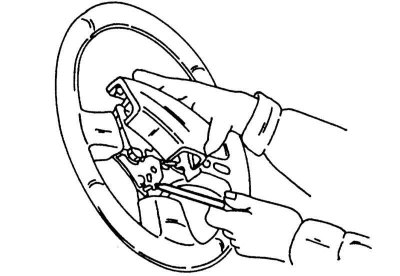
Removing the horn key (steering wheel pads).
3. Mark the position of the steering wheel hub relative to the steering shaft (use the center punch carefully).
4. Loosen the steering wheel nut. Hold the steering wheel while doing this. Do not latch the steering column lock to lock the steering shaft, as this may strip the locking pin.
5. Unscrew both halves of the steering wheel trim and disconnect the combination switch wires. The switch remains on the steering column.
6. Unscrew the trim from the bottom and bend it back.
7. Loosen the steering universal joint clamp bolt between the steering column and the universal joint and knock it out.
8. Loosen both upper steering column mounting bolts on the instrument panel.
9. Remove the two lower steering column mounting nuts.
10. Remove the steering column from the vehicle, while simultaneously disengaging the lower end from the cardan joint. Installation is performed in the reverse order. First, install the cardan joint onto the steering shaft and tighten the bolt.
11. Install the upper and lower mounts and tighten the bolts. Place the steering wheel on the shaft according to the marks and tighten the steering wheel nut to 30 - 40 N·m while holding the steering wheel. After installing the steering wheel, take a test drive and check that the steering wheel spokes are in the correct position. If not, remove the steering wheel again and move it one or two teeth.
Checking the steering column
If there is a suspicion of deformation of the steering column (for example, after an accident), you can measure the steering shaft pipe. To do this, measure the dimension "A" (see illustration below). If this dimension is outside the range of 556.2 - 557.8 mm, the steering column is deformed and must be replaced.
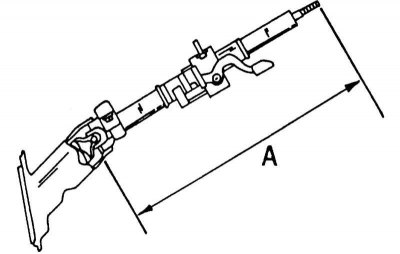
Measure the steering column between arrows "a".
When folding, the upper support of the steering column is also deformed. In the normal case, the threaded inserts are located flush with the mounting clamp. If they are shifted, the column is deformed.