


Examination
The injectors can be checked using a test light (you can use a headlight bulb), which is inserted into the electrical plug of the injector. When the light comes on, it indicates that voltage is being supplied to the injector.
- Start the engine and listen to each injector in turn. The injectors should make clicking sounds when operating.
- Turn off the engine.
- Disconnect the electrical connectors from any injectors that are not making a clicking sound.
- Measure the resistance between the terminals.
Compare the resistance value of the injector being tested with the resistance value of a known good injector. The resistance values should be approximately the same, 13-16 ohms at 20°C. In this case, proceed to the next step. If the resistance values differ greatly, replace the injector.
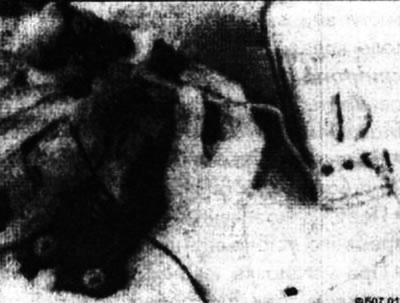
- Check the integrity of the injector electrical circuit by connecting a voltmeter to its contacts.
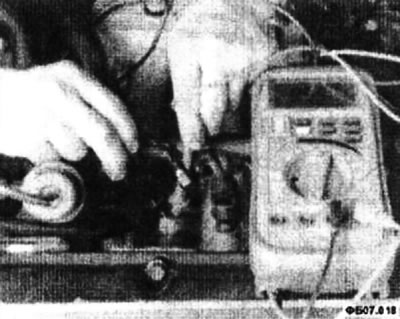
- Check the electrical resistance between each injector terminal and ground. If the ohmmeter shows some finite resistance, the injector must be replaced.
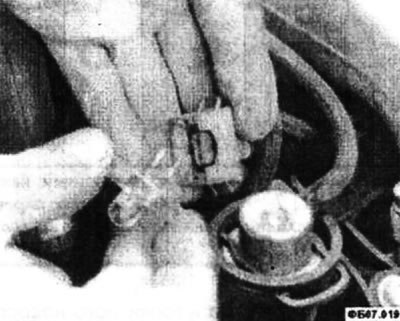
- Disconnect the plug from the injector and insert the test lamp into the plug of the wiring harness. Turn the engine over with the starter and observe the light. Perform this test on at least two injectors. If the test light does not flash, check the voltage supply circuit to the injector and the ground circuit. If the light is flashing, proceed to the next step.
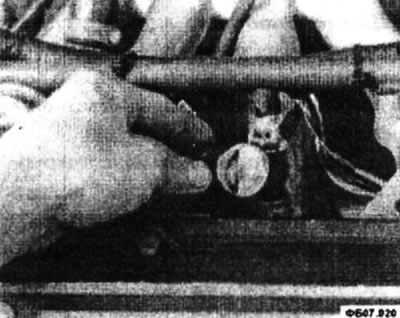
- If the light is flashing, remove the fuel rail from the engine and check the injector operation using the following instructions.
♦ Electric injectors cannot be tested on a work bench, but instead they can be removed from the intake manifold and run without disconnecting the fuel lines.
♦ Use wire to secure the injector to the fuel rail.
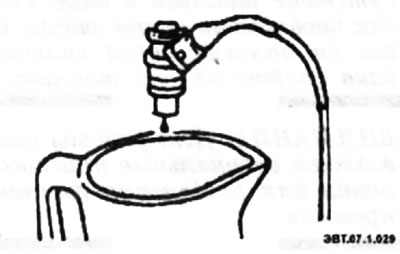
♦ Position the injection line with the injection nozzles over a suitable container.
Caution: Before performing this test, please observe the safety precautions for working with fuel. Make sure the container you use is suitable for storing fuel and that the nozzle is securely fastened above it. Avoid using glass containers as they can easily break or become damaged, which could cause a fire.
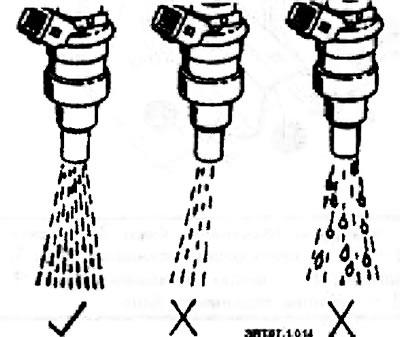
- Turn on the fuel pump and monitor the operation of the injector. Check the correct fuel spray cone of the injector during operation.
♦ A uniform cone-shaped stream of fuel should emerge from the injector; all injectors should deliver the same amount of fuel.
♦ After completing this check, leave the fuel rail under pressure and check for fuel leakage from the injectors, which should not be more than one drop per minute.
- If you suspect that the nozzle is dirty and the jet pattern is abnormal, try cleaning the end of the nozzle with a solvent. Also look into the cylinder head and check for any obstructions that can be cleaned or removed. If the injector continues to malfunction, replace it with a new one.
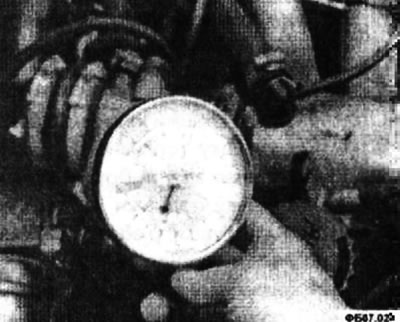
- Before replacing the injectors, check the fuel pressure as described above in the relevant section.
Removal
Caution: When removing the injectors, be very careful not to damage the electrical connector contacts and the injector nozzle. The injector is serviced as a single unit. Since the nozzle is an electrical part, do not immerse it in cleaning liquid.
Injector mounting elements
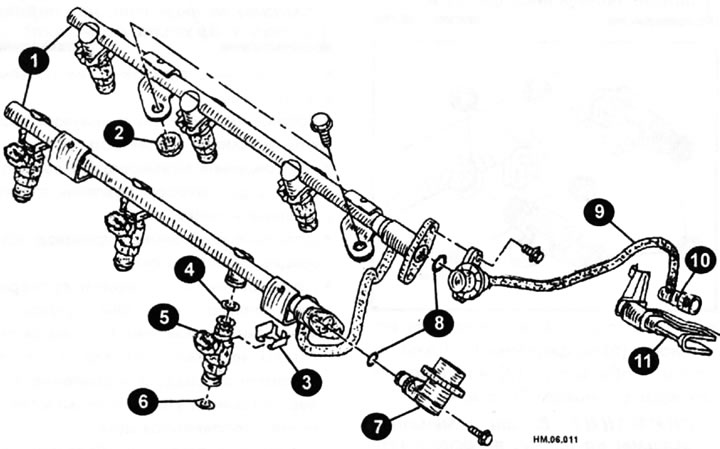
1 - fuel rail; 2 - insulator; 3 - clamp; 4 - sealing ring (black); 5 — nozzle; 6 - sealing ring (green); 7 — fuel pressure regulator; 8 — sealing ring; 9 — fuel supply hose (with fuel pressure regulator); 10 - quick-release connector; 11 — quick-release connector cap
Caution: To prevent burns, never drain coolant from a hot engine.
- Relieve fuel pressure in the fuel system as follows:
♦ Locate the fuel pump fuse in the fuse box and remove it (arrow).
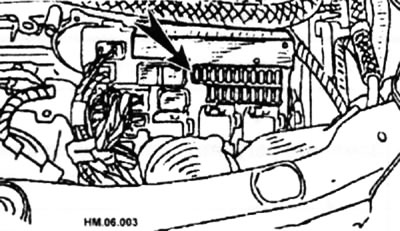
♦ Start the engine and let it run until it stops.
- Remove the intake manifold.
Caution: Move the upper part of the intake manifold pipe to the side together with the coolant hoses connected to it.
- Disconnect the fuel supply hose together with the fuel pressure regulator from the fuel rail.
Caution: Gasoline is highly flammable, so avoid open flames and smoking, and prepare a suitable container and rags in advance, as fuel will leak when disconnecting the hoses.
- The ends of disconnected fuel lines must be covered or wrapped with film to prevent dirt from getting into them. When removing and installing, do not bend or twist the fuel hoses.
- Disconnect the electrical connectors from the injectors.
- Loosen the fuel rail mounting bolts (arrows) and remove them together with the injectors.
Caution: Do not tilt the parts, otherwise the fuel remaining in the fuel rails will leak out.
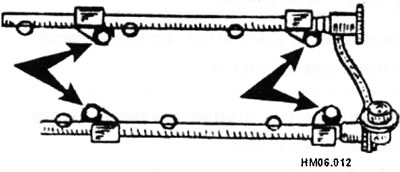
- Remove the injectors from the fuel rails as follows:
♦ Remove the injector mounting clamp from the injector.
♦ Remove the injector from the fuel rail by pulling it out. Be careful not to damage the injector nozzle, and do not knock, drop, or disassemble the injectors.
Caution: Be careful as any remaining fuel may spill out of the fuel rail.
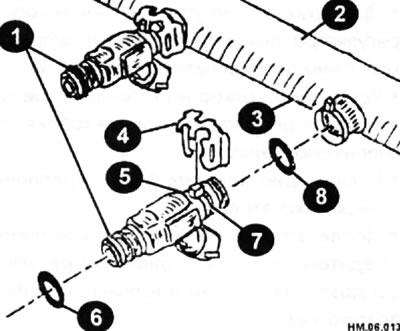
1 — nozzle; 2 - fuel rail; 3 - ledge; 4 - clamp; 5 - ledge; 6 - sealing ring (green); 7 — groove for clamp; 8 - sealing ring (black).
- Remove the fuel pressure regulator from the fuel rail (if necessary).
Please note: Different models of injectors are calibrated for different fuel flow rates. When purchasing new injectors, make sure that the identification numbers of the new and old injectors match each other.
Typical arrangement of numbers on the injector
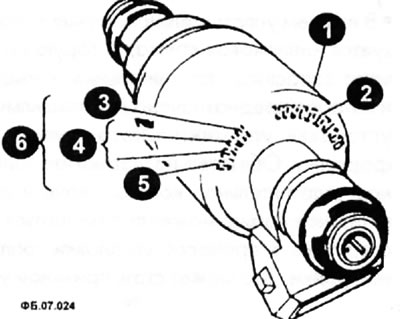
1 — nozzle; 2 - part identification number; 3 - year; 4th day; 5 - months with numbers from 1 to 9 (january-September), letters O, N, D (october, November, December); 6 — release date code.
Installation
- Each injector uses two sealing rings (1).
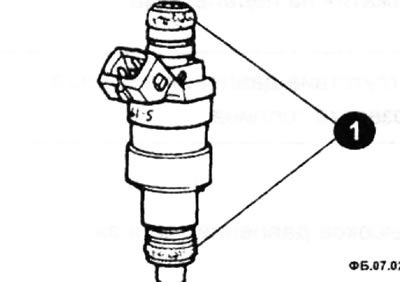
Caution: Always replace the O-rings with new ones and be sure to lubricate them with clean engine oil before installation. Never handle rings with gloves or clean them with solvent. Also, do not scratch (even with nails), do not twist or stretch the rings. If the ring was stretched during installation, do not install it immediately after stretching.
- Check that the fuel pressure regulator O-ring and mating parts are free of foreign particles.
- Install the ring onto the fuel rail.
- Install the fuel pressure regulator onto the fuel rail.
- Tighten the mounting bolts evenly in several stages.
- After tightening the mounting bolts, make sure that there is no gap between the fuel pressure regulator flange and the fuel rail.
- Install the sealing rings on the injectors.
Caution: To reduce the risk of fire and injury, always install the nozzle O-rings in the correct positions. The upper and lower sealing rings have different colors: the upper one (from the fuel rail side) - black, and the bottom one is green. Set the black ring to the top position, and the green ring to the bottom position. The sealing rings are the same size but made of different materials.
- The lower o-ring uses a nylon bushing called the spare o-ring, which is designed to properly install the o-ring onto the injector. Be sure to install a spare O-ring, otherwise the O-ring may move around on the injector during fuel rail installation. This can cause vacuum leaks and subsequent engine performance problems.
- Lubricate new O-rings with clean engine oil and install two O-rings on each injector.
Caution: Do not use silicone grease as it will clog the injector holes.
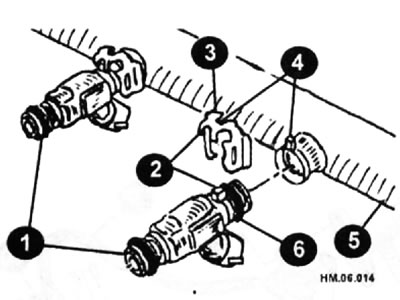
- Insert the clamp (3) into the clamp mounting groove (6) on the injector (1) so that the protrusion (2) on the injector aligns with the recess (2) on the clamp.
Caution: Always replace the clamps with new ones, do not reuse them. If, when installing the clamp, the clamp rests against the sealing ring, the ring must be replaced with a new one.
- Insert the injector into the fuel rail (5) together with the attached clamp so that the protrusion (4) on the fuel rail aligns with the recess (4) on the clamp.
- Check that the fuel rail flange is securely fastened in the retaining groove on the clamp and that the injector does not rotate or move.
- Tighten the fuel rail mounting bolts in two stages:
Stage I: 9.3-10.8 N·m
Stage II: 20.6-26.5 Nm.
Caution: Be careful not to let the injector nozzles come into contact with other parts.
- Connect the electrical connectors to the injectors.
- Install the upper and lower intake manifold pipes.
- Connect the fuel supply hose together with the fuel pressure regulator to the fuel rail.
- Further installation is carried out in the reverse order of removal.
- After installation is complete, check for fuel leaks as follows:
♦ turn on the ignition (without starting the engine) several times. Once pressure is built up in the fuel lines, check for fuel leaks at the fuel line connections;
♦ start the engine. After increasing the engine speed, check again for fuel leaks at the connections.
Caution: Use a mirror to check for leaks in hard to reach areas. Do not touch the engine immediately after it has stopped, as the engine will be very hot.