2. Jack up the rear of the car and place it on supports placed under the rear axle assembly.
Note: To avoid false readings when measuring fluid levels, try to keep the vehicle in a completely horizontal position.
 |
 |
 |
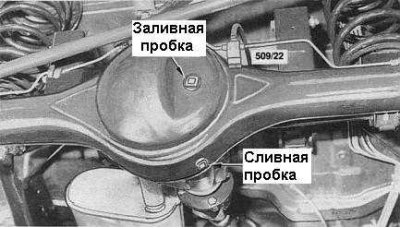 |
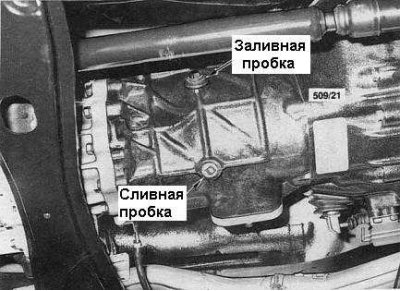
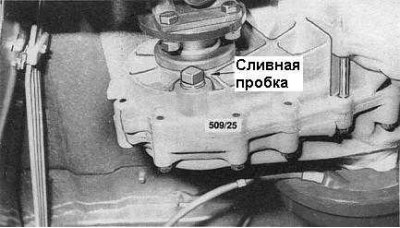
3. Using a wire brush and rag, clean the areas around the engine oil pan drain plug, manual transmission drain plug, transfer case drain plug, axle differential drain plug, steering knuckle grease nipple, and driveshaft grease nipple.
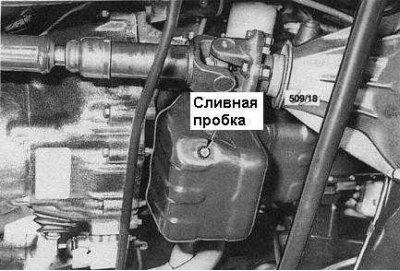
4. Place a drain pan under the engine oil pan, remove the plug and completely drain the engine oil.
Note: It is best to drain the engine oil at normal operating temperature. However, care should be taken to avoid burns. Replace the plug and tighten it securely. Wipe the area around the plug.
Note: Before screwing in the drain plug, check the condition of its sealing gasket and replace it if necessary.
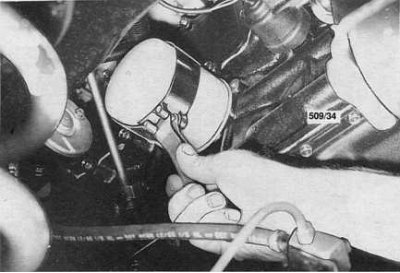
5. If the oil filter needs to be replaced, remove it using a special key (see accompanying illustration) and empty into a drain pan. Lightly lubricate the sealing gasket of the new filter with clean oil, clean the mounting surface on the engine block and screw the filter in by hand following the instructions provided.
Note: Before installing the new filter, make sure that the sealing gasket of the old one is not stuck to the surface of the block. If this happens, remove the old gasket.
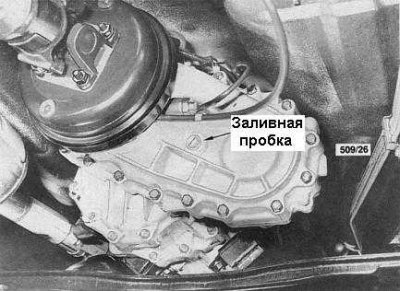
6. Remove the filler/inspection plugs from the manual transmission housings, transfer case and differentials. Use your finger or a bent piece of wire to check the oil levels in the above units - the level should reach the lower edge of the filler hole. If the level is above the norm, check the oil for traces of water, drain the excess, and replace if necessary. If the level is insufficient, add oil using a syringe oiler, using the required grade of oil.
After checking that the oil levels in all units comply with the regulatory requirements, screw the filler plugs back in place and tighten them securely. Wipe the surfaces of the crankcases around the plugs.
7. Remove the plugs from the steering link joints and screw the grease nipples into the holes.
8. Fill the steering rod and cardan shaft joints with special chassis grease using a grease gun. Do not overdo it - make sure that the covers and sealing gaskets are not forced out of their seats.
9. Unscrew the grease nipples and install the plugs in their places in the steering rod joints.
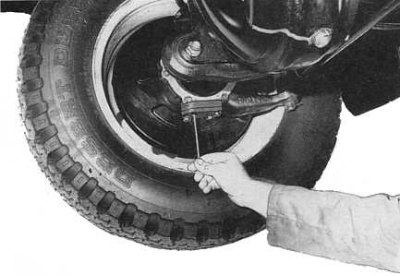
10. Remove the bolt from the flange of each steering knuckle assembly and probe the holes with a piece of wire to check for water in the knuckles (see accompanying illustration).
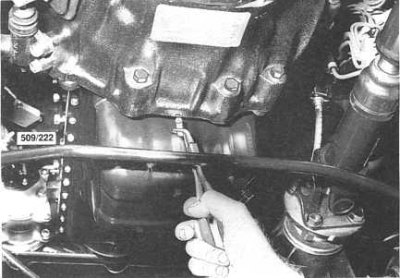
11. Remove the plug from the bottom of the clutch dome (see accompanying illustration) and check the clutch for water ingress. Replace the plug, tightening it securely.
12. Using a funnel, pour the required amount of oil of the required grade into the engine. Start the engine and wait until the oil pressure indicator lamp goes out, then turn off the engine again and, after a few minutes, check the oil level on the dipstick. Add if necessary.
Note: To avoid initial overfilling, first fill in half a liter less oil than the norm (see size and adjustment tables at the end of the Manual). Add finally after the initial engine start.
13. Carefully inspect the oil filter mounting points for signs of leaks (if it was replaced) and the oil pan drain plug.
14. Lower the vehicle to the ground and check the units for lubricating fluid leaks by performing road tests.
Note: Lubricate and inspect all components in accordance with the vehicle's routine maintenance schedule.
The original is available on the web page: www.NISSANBOOK.ru
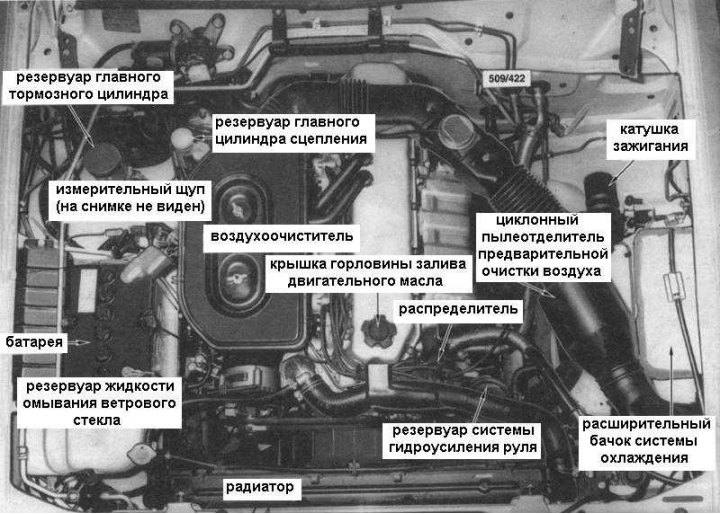
Engine compartment components requiring service are shown in the accompanying illustration.