Removing
1. Versions with automatic transmission or CVT: move the selector lever to the driving position ("D").
2. Remove the front mounting screws and clips of the center console.
3. Remove the cup holder by pulling it up to release the clips from the center console.
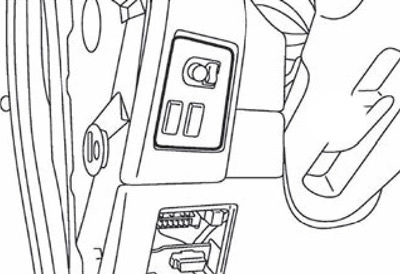
4. Disconnect all wire connectors and remove the switch panel from the center console as shown.
5. To remove facing of the forward console from the bottom surface of the console of switches.
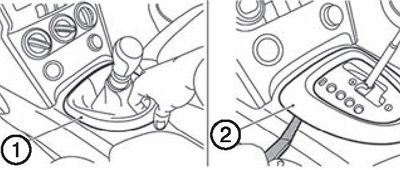
1. Facing the front console (versions with manual transmissions).
2. Facing the front console (versions with automatic gearboxes and CVTs!).
6. Remove cover D of the dashboard:
Using a camcorder or similar tool, pry the metal clips of the instrument panel cover from the bottom up from the instrument panel.
Disconnect wire connector.
Attention. Special care must be taken when working with soft-touch painted surfaces. In this case, it is necessary to use a screwdriver wrapped in a cloth to prevent damage to the surfaces.
7. Screwdriver (A) unscrew the screws (IN) front side of the center console.
8. Remove bottom side covers (left and right):
Pull the bottom side cover at the back to release the latches (1) and clamps (2). Use a flathead screwdriver or similar suitable tool to pry off the top metal clips (3).
Pulling back, unhook the lower side covers from the dashboard.
Attention. When removing the lower side covers, be careful not to damage these parts.
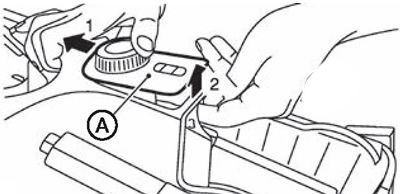
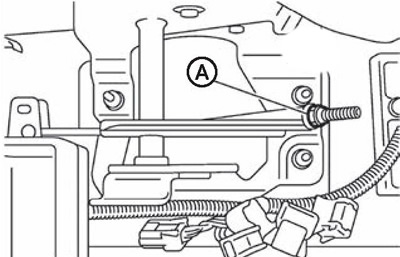
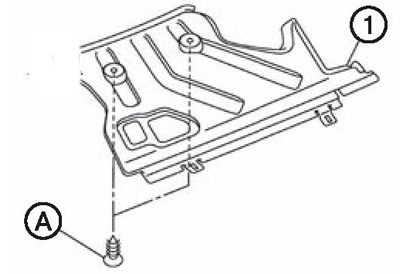
9. Remove adjusting nut (A) parking brake cable to loosen the drive cable sufficiently.
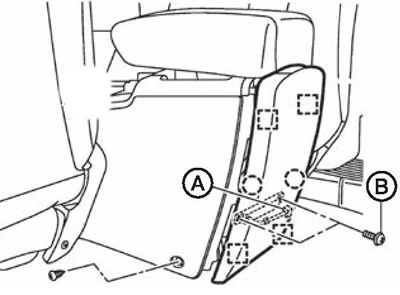
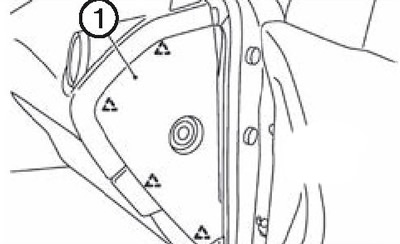
10. Remove the rear trim of the center console:
Pulling back, unhook the metal clips from the center console.
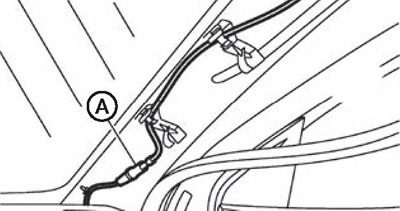
Disconnect internal connector (A) key antennas.
Disconnect the wire connector retaining clip.
Loosen the screw (IN) key antenna mounts.
11. If necessary, move the front seats forward, and unscrew the rear screws securing the center console.
12. Remove the center console assembly.
Attention. Be careful not to damage the seats and other components when removing the center console.
13. Remove the display unit.
14. Remove the cover from the dashboard.
Attention. Special care must be taken when working with soft-touch painted surfaces. In this case, it is necessary to use a screwdriver wrapped in a cloth to prevent damage to the surfaces.
Versions equipped with cover C type 2:
Using a screwdriver, remove the bezel of the display unit (if equipped).
Loosen the fixing screws.
Pull up to release the clips.
Remove the display unit cover from cover C.
Loosen the display unit bracket screws.
Disconnect wire connector.
Remove the display unit from the dashboard.
All other versions:
Pull the cover off the dashboard from the bottom up.
Using a flathead screwdriver and other suitable tool wrapped in cloth, unhook the metal clips.
Disconnect all wire connectors.
Remove the alarm button.
Remove removable compartment.
Remove indicator block.
Remove the center deflector assembly.
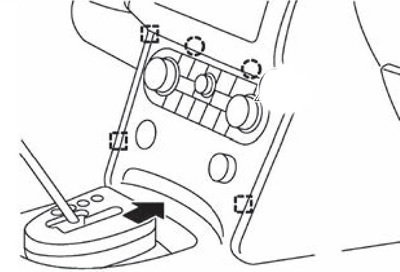
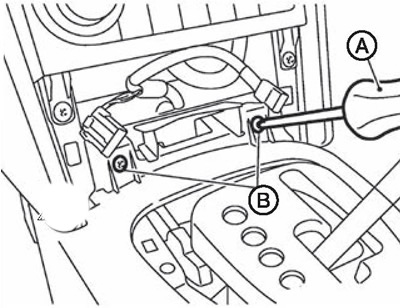
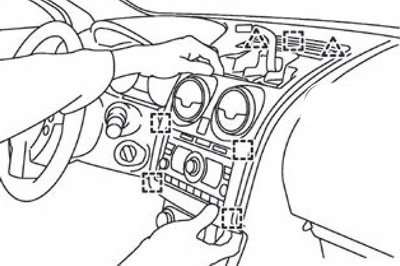
15. Loosen the mounting screws and remove the climate controls from the dashboard.
16. Remove the audio unit:
Loosen the fixing screws (A).
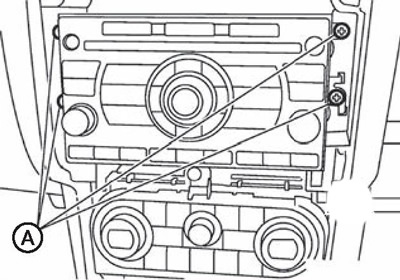
Disconnect wire connector.
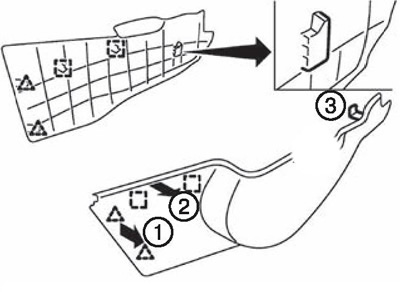
17. Remove the front part of the edging of the left front doorway.
18. To remove facing of the left forward rack.
19. Remove the side trim of the dashboard on the driver's side:
Insert the puller into the lower space.
Pull the puller across the cladding.
20. Remove the lower trim of the dashboard on the driver's side:
Loosen the bolts securing the hood release levers and the fuel filler flap (A).
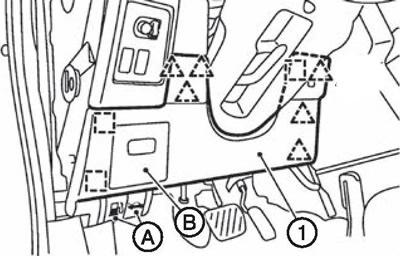
Remove cover (IN) fuse block.
Remove data bus connector.
Pull the lower trim of the dashboard towards you (1) from the driver's side.
Disconnect wire connectors.
Remove the A/C sensor.
Disconnect the data bus connector and remove it from the lower trim of the instrument panel.
21. Remove the steering wheel (see chapter 18 "Steering").
22. Remove the steering column covers:
Release the steering column lever.
Remove shield (1) steering column.
Loosen the fixing screws (5) and remove the front bottom cover (2) steering column.
If equipped, remove front bottom guard (3) steering column.
Pull the top cover of the steering column (4).
Unhook the fixing clips from the lining (6) steering column and remove the upper steering column cover.
Versions with encoder "D" automatic transmission: disconnect the sensor connector.
23. Remove contact disc.
24. Remove the sub-switch block.
25. Remove the switch panel ESP and adjustment of the left / right exterior mirrors.
26. Remove cover A of the dashboard.
27. To turn away screws of fastening and to remove a combination of devices. Pulling the instrument cluster, disconnect the wire connectors.
28. Remove the left window grille:
- Pull up to release the fasteners.
- Disconnect wire connector.
29. Remove the right window grille:
- Pull up to release the fasteners.
- Disconnect wire connector (if equipped).
30. Remove the front part of the edging of the right front doorway.
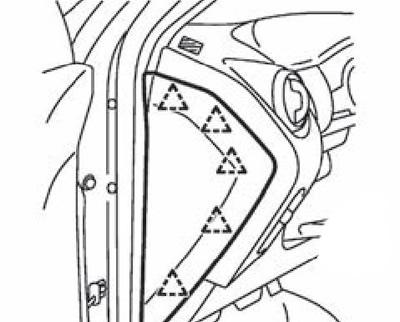
31. Remove the lining of the right-hand front pillar.
32. Remove the side trim of the dashboard on the passenger side (1):
- Insert the puller into the lower space.
- Pull the puller across the cladding.
33. Remove the lower trim of the dashboard on the passenger side:
Remove rear fixing clip (A).
Pull down to release the latches.
Pull out the bottom cover (1) dashboard on the passenger side.
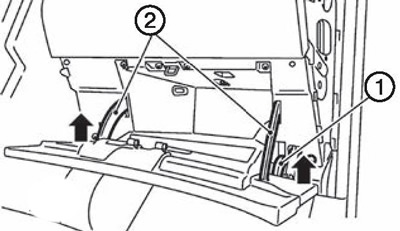
34. Remove the glove box assembly:
Open glove box.
Loosen the fixing screws (A).
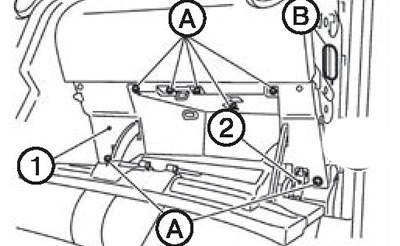
Gently pull the glove box assembly (1) back to unhook the clips from the dashboard.
Remove the glove box latch.
Disconnect the glove box lamp wire connector through the left hole (IN) dashboard.
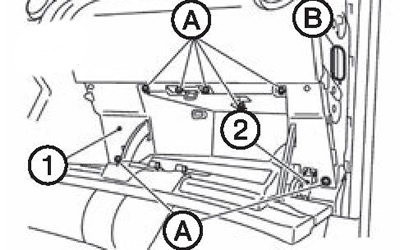
Disconnect wire connector.
Pull the glove box and remove the fuse box cover (only Euro 5 versions).
Remove the glove box assembly from the dashboard.
Remove pressure sensor assembly (only Euro 5 versions).
Remove the glove box air vent (if equipped).
Remove glove box damper assembly (2).
Unhook the lower hinges individually (1), while pressing the edge of the glove box door evenly up, then remove the glove box door.
Remove lower glove box damper (2).
Unhook cover guides (2) from the glove box door.
Remove latch.
35. Remove the right tweeter grille:
Disconnect the tweeter wire connector.
Disconnect the sunlight sensor (if equipped).
36. Remove the lower trim of the dashboard on the passenger side:
Loosen the screws securing the lower instrument panel trim on the passenger side.
Disconnect wire connector.
Pull the lower instrument panel trim towards you.
Disconnect the sensor wire connector.
Remove the environmental sensor.
37. Disconnect the front passenger airbag module connector.
38. Remove the bolt securing the front passenger airbag module.
39. Remove the front passenger airbag module.
40. Disconnect connectors (A) antenna wires and remove the wiring clamps from the A-pillar:
Unhook the passenger side lower insulator from the lower instrument panel trim.
Unhook the electrical wiring clips from the dashboard.
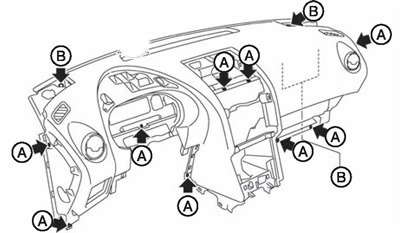
41. Loosen the screws (ABOUT) and bolts (IN) and remove the instrument panel assembly.
Attention. Two people are required to remove the instrument panel to prevent it from falling.
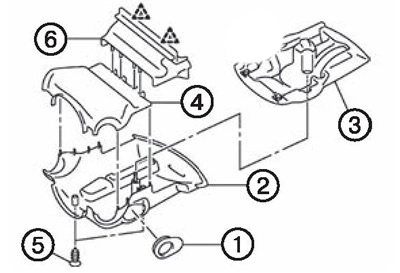
42. After removing the dashboard, remove the following parts:
Side deflectors.
Central deflector.
Side window grilles.
Nozzles for blowing side windows.
Side air ducts.
Installation
Installation is made in an order, the return to removal.