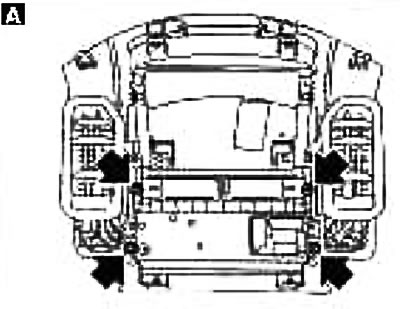
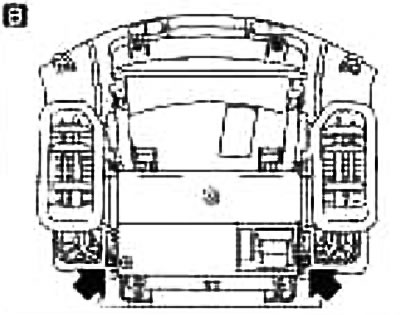
| Component layout | Dashboard | Dashboard overlay (passenger side) | Dashboard overlay (from the driver's side) | Upper section of dashboard | instrument cluster | Audio system | |
| A | Facing of a forward rack | [1] | [1] | [1] | |||
| IN | Upper section of dashboard | [2] | |||||
| WITH | Steering column lock pad | [3] | [3] | ||||
| D | Dashboard lower trim | [4] | [4] | ||||
| E | Control panel trim | [5] | [5] | ||||
| F | Steering column top cover | [6] | [6] | [1] | [1] | ||
| G | Steering column lower cover | [7] | [7] | [2| | [2] | ||
| H | combination switch | [8] | [8] | ||||
| I | Overlay A of a combination of devices | [9] | [9] | [9] | [3] | ||
| J | instrument cluster | [10] | [10] | [4] | [4] | ||
| TO | trim C instrument cluster | [1] | |||||
| L | Control panel trim air conditioned | [12] | [12] | [6] | |||
| M | Dashboard overlay (from the driver's side) | [13] | [1Z] | [7] | |||
| N | center console | [14] | [14] | ||||
| ABOUT | Dashboard pillar cover | [15] | [15] | ||||
| P | Glove box lid | ||||||
| Q | Glove box body assembly | [16] | |16| | ||||
| R | Dashboard side mask | [17] | [17] | ||||
| S | Steering wheel | [18] | [18] | ||||
| T | Dashboard | [19] | [19] | ||||
| U | Dashboard overlay (passenger side) | [20] | |||||
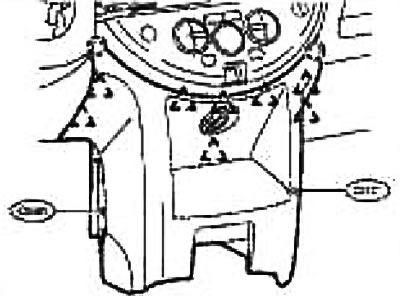
Removing
A. A-pillar trim. See section «exterior trim interior trim».
B. Upper section of instrument panel.
1. Disconnect the connector from the sunlight intensity sensor (if available) and take it off. See chapter Automatic air conditioner.
2. Pry up the top section of the dashboard on one side and disengage the metal clips.
3. Remove the top section of the dashboard.
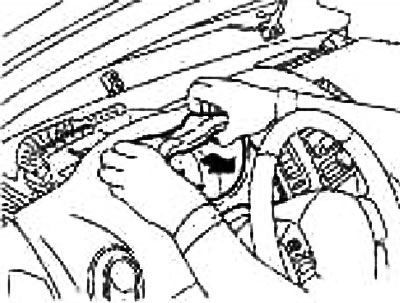
C. Steering column lock trim.
Pull and remove the steering column lock cover from the steering column cover.
Attention: When installing, align the lower protrusion on the end of the lock cylinder with the inner. trim cutout and insert.
D. Dashboard lower trim.
Disengage the upper plastic clips, carefully pull back and remove without touching the adjacent surfaces.
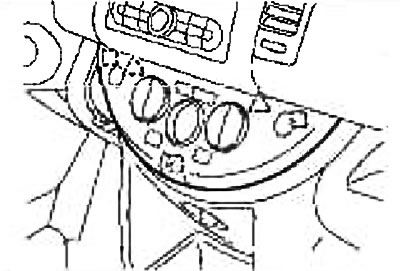
E. Control panel trim.
1. Remove the cover from the fuse box.
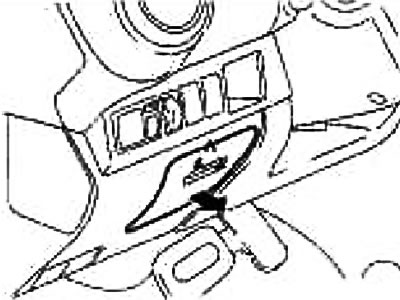
2. Push the control panel trim towards the rear as shown in the illustration.
3. Disconnect the wiring connectors and remove the control panel trim.
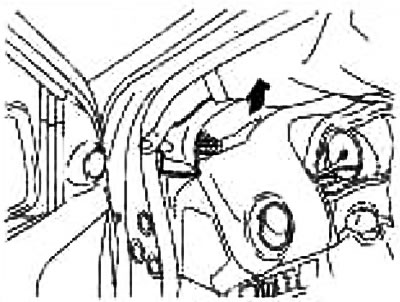
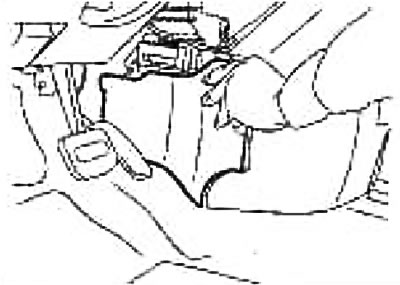
F. Steering column top cover.
1. Tilt the steering column down and remove the screw (1), facing the front of the car.
2. Disengage hooks and remove.
Caution: Remove without touching adjacent components.
G. Steering column lower cover Remove the screws (3), pull down and remove.
Caution: Remove without touching adjacent components.
H. Combination switch. See chapter electrical equipment.
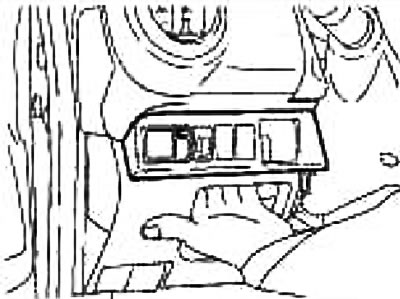
I. Cover A of the instrument cluster.
Pull the trim towards the back and remove.
Caution: Remove without touching adjacent components.
J. Instrument cluster assembly.
1. Remove the screw (1).
2. Pull towards the rear and disengage the plastic clips as shown.
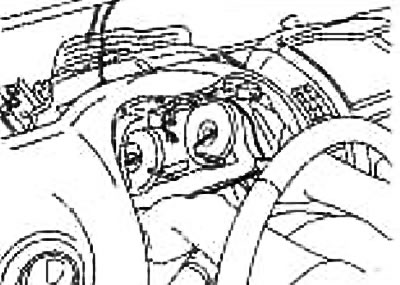
3. Disconnect the wiring connectors.
4. Raise the underside of the instrument cluster and turn it from vertical to horizontal.
5. Take out a combination of devices from an overlay of the dashboard.
K. Overlay From a combination of devices.
1. Remove the top cover mask From the instrument cluster and unscrew the top fixing screws.
2. Remove the bottom mask of a slip From a combination of devices and turn out the bottom fixing screws.
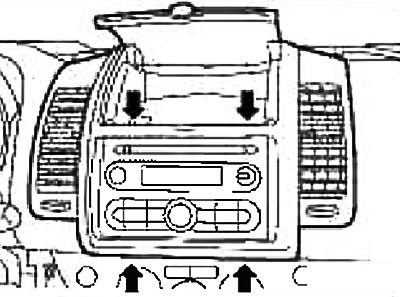
3. Pull back and remove the overlay from the dashboard.
4. Disconnect the antenna connector and audio wiring connector.
After removal:
Separate the central ventilation grill, left and right. See chapter Automatic air conditioner.
On models with audio system (A) remove the screws (4), securing the left and right audio system brackets, and remove the deck and audio system pocket.
On models with audio system (IN) remove the screws (2), securing the left and right audio system brackets, and remove the audio system.
 |  |
L. Air conditioning control panel trim. See chapter Automatic air conditioner.
M. Dashboard Trim (from the driver's side).
Pull back and disengage the metal clips from the dashboard.
Caution: Remove without touching adjacent components.
After removal and if necessary, remove the side ventilation grille. See chapter Automatic air conditioner.
N. Center console. See section «Removal and installation».
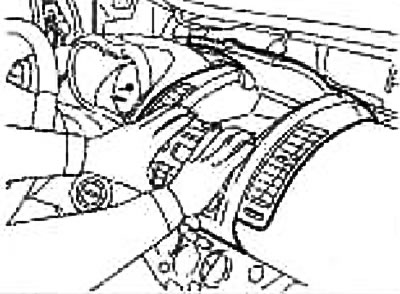
O. Dashboard pillar cover.
1. Remove the dashboard pillar trim.
2. Unfasten the fixing clips on the left and right.
3. Pull the dashboard pillar cover ps towards the rear and disengage the metal clips (see fig.).
4. Disconnect the connector from the power supply or cigarette lighter, if available.
5. Remove the dashboard rack cover.
Once removed, if necessary, remove the screws securing the cup holder to the dashboard pillar cover and remove the cup holder.
R. Glove box lid. See section «Glove box assembly».
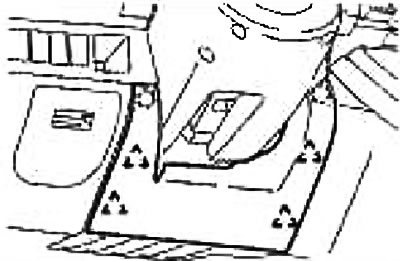
Q. Glove box body assembly.
1. Remove the screws shown in the illustration and remove the glovebox assembly.
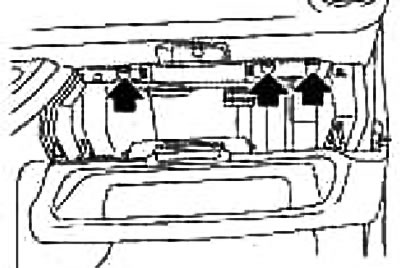
2. After removal, separate the components if necessary. See section «Glove box assembly».
R. Dashboard side mask.
1. Push from inside the dashboard and disengage the latches as shown.
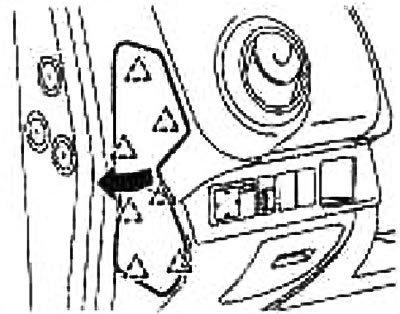
2. Disconnect the airbag cut-off switch from the wiring (passenger side only).
3. Disconnect the airbag cutoff switch from the dashboard side mask (passenger side only).
4. Pull the section of the side mask inserted into the dashboard and remove it from the vehicle.
S. Steering wheel. See chapter Additional passive safety system.
T. Dashboard.
1. Remove the fuel filler cap opener. See chapter Body.
2. Tilt the steering column.
3. Remove the screws, see section «Disassembly and assembly», and move the instrument panel and trims through the passenger door opening.
Note: Perform this operation with a partner.
4. After removal, separate the components. See section «Disassembly and assembly».
U. Dashboard Trim (passenger side).
Loosen the fixing screws (3). attaching the trim to the dashboard, unhook the metal clips and remove the dashboard trim (passenger side) from the dashboard. See section «Disassembly and assembly».
After removal and if necessary, remove the side ventilation grille. See chapter Automatic air conditioner.