Removing
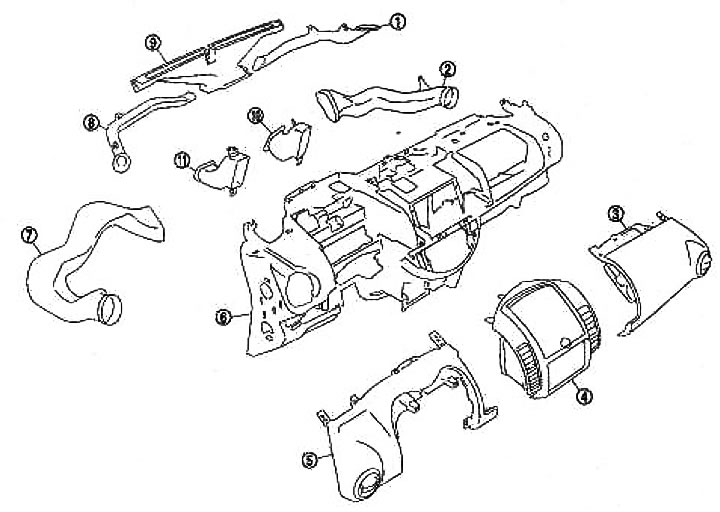
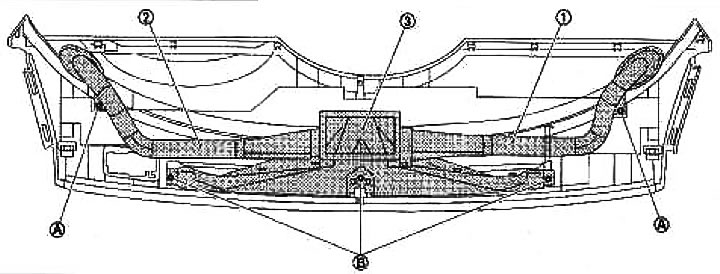
1. Right windshield air duct; 2. Right ventilation duct; 3. Side section of the dashboard (right); 4. Overlay From a combination of devices; 5. Side section of the dashboard (left); 6. Dashboard and overlays; 7. Left ventilation duct; 8. Left windshield air duct; 9. Central air duct blowing the windshield; 10. Central ventilation grille (right); 11. Central ventilation grille (left)
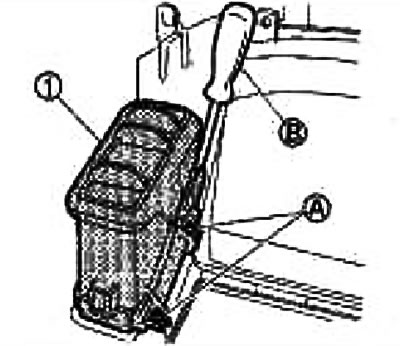
Removing the central ventilation grilles
1. Remove an overlay From a combination of devices. See chapter Body.
2. Remove the fixing screws (A) with a screwdriver (IN) and remove the central ventilation grille (1).
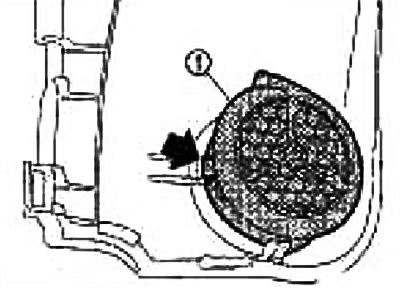
Removing the side ventilation grilles
1. Remove the dashboard trim (left). See chapter Body.
2. Press the side vent latch (left) (1) and take it out.
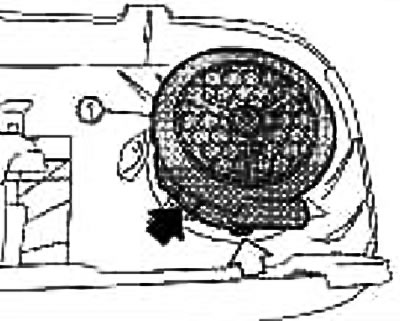
3. Remove the dashboard trim (right). See chapter Body.
4. Press the side vent latch (right) (1) and take it out.
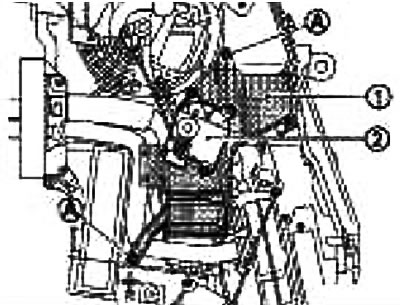
Removal of the central and lateral air ducts of an obduv of a windshield
1. Remove the upper trim of the dashboard. See chapter Body.
2. Remove the fixing screws (A) and remove the side air ducts for blowing the windshield (right) (1) And (left) (2).
3. Remove the fixing screws (IN) and remove the central air duct for blowing the windshield (3).
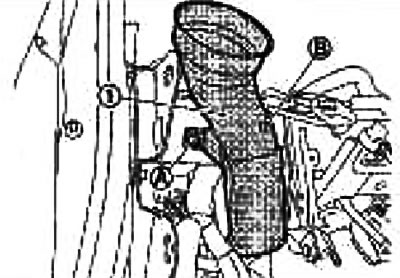
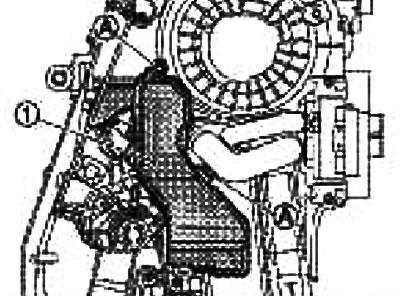
Removing the side air ducts of the ventilation ducts
1. Remove the dashboard and overlays. See chapter Body.
2. Remove the fixing screws (A), remove the clip (IN) and remove the side ventilation duct (left) (1).
3. Remove the fixing screws (A), remove the clip (IN) and remove the side ventilation duct (right) (1).
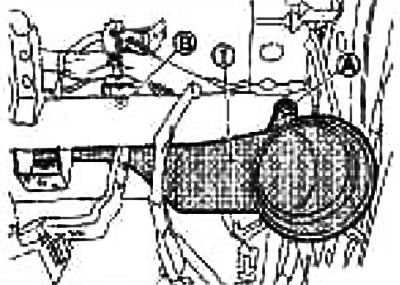
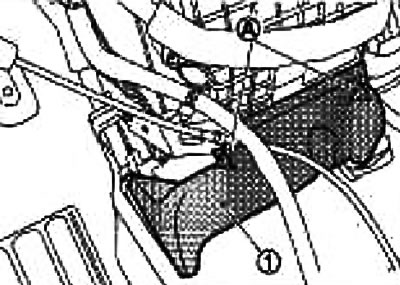
Removing the central ventilation ducts
1. Remove the dashboard and overlays. See chapter Body.
2. Remove the fixing screws (A) and remove the central ventilation ducts (1).
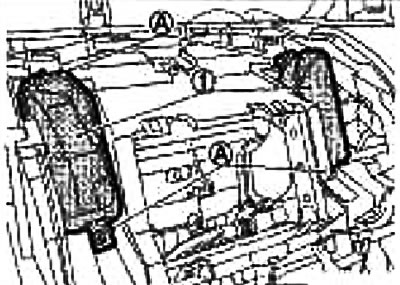
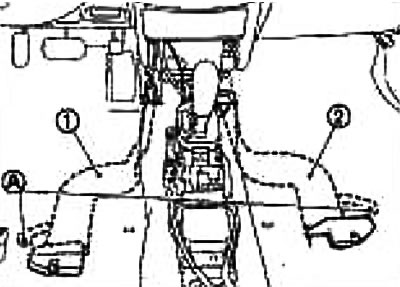
Removing air ducts at leg level
1. Remove the air conditioner assembly.
2. Remove the intake flap motor (2).
3. Remove the fixing screws (A) and remove the air duct at foot level (left) (1).
4. Remove the fixing screws (A) and remove the air duct at foot level (right) (1).
Removing air ducts at floor level

1. Front air duct at floor level; 2. Rear air duct at floor level (left); 3. Clamp; 4. Rear air duct at floor level (right)
1. Remove the front seats
2. Remove the center console assembly. See chapter Body.
3. Pull out the clips (A) out of engagement and remove the front air duct at floor level (1).
4. Roll up the floor covering so that the air duct is visible at floor level.
5. Remove the fixing screws (A) and remove the rear air duct at floor level (left) (1) And (right) (2).
Installation
Installation is basically done in the reverse order of removal.