


Removing
1. Remove the rear driveshaft.
2. Remove the rear drive shafts.
3. Disconnect the 4WD solenoid wire connector.
4. Remove the rear final drive breather rods and the electrically controlled clutch breather hose.
5. Support final drive assembly with a suitable jack.
6. To turn away nuts and bolts of fastening of the main transfer. If necessary, remove final drive mounting bracket.
Attention. When removing, secure final drive assembly on a suitable jack.
Installation
Installation is carried out in the reverse order of removal, taking into account the following:
Attention. Check that there are no pinched or kinked areas in the breather hoses due to kinks or kinks during installation.
Install rear final drive breather hose (1) to the breather connector (2). Install bracket (3) to the breather fitting. Make sure the color mark (A) metal connector (4) towards the front of the vehicle as shown in the illustration.
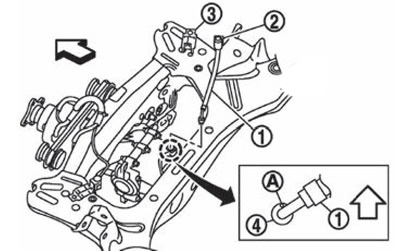
Note. The white arrows in the illustration indicate the front of the vehicle.
Install the electrical clutch breather hose (1) on the metal pipe until it stops up to the edge shown in the figure with a black arrow. Make sure the clutch cover is (2) metal pipe (3) towards the front of the vehicle as shown in the illustration.
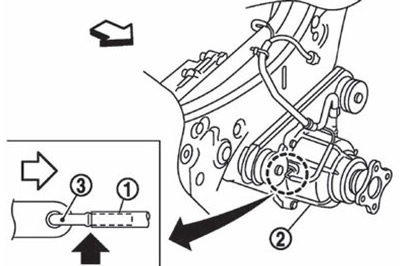
Note. The white arrows in the illustration indicate the front of the vehicle.