


2. Install the cover layout kit (KV389L0010) on the main gear housing:
- Install the cover template gaskets onto the right and left side bearing adjusting shims.
- Temporarily tighten the cover dummy onto the final drive housing.
- Place the lid mockup spacers on the lid mockup.
- Tighten the rear cover mounting bolts to the specified tightening torques.
- Tighten the cover layout spacer mounting bolts evenly to a torque of 5.9 Nm.
3. Apply coloring agent to the gear teeth.
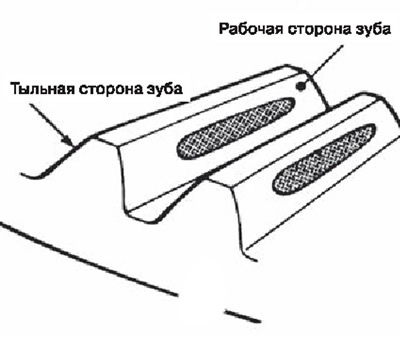
Note: Apply the dye to both surfaces of three or four gear teeth in four positions equidistant from each other around the circumference of the gear.
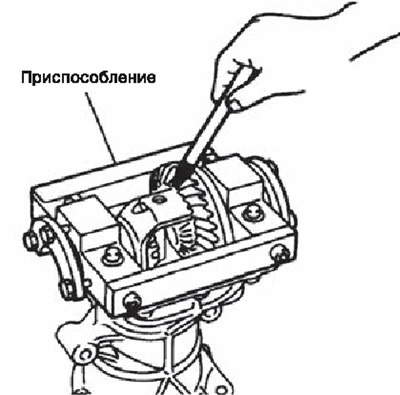
4. Turn the driven gear back and forth several times, then check the contact patch in the engagement of the teeth.
Note: It is necessary to check the contact spot on both the working side of the tooth and the back side.
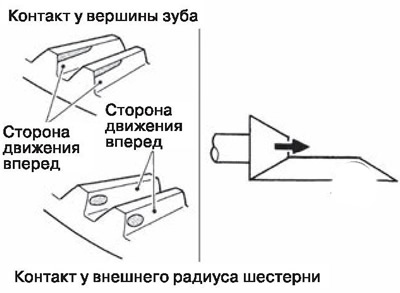
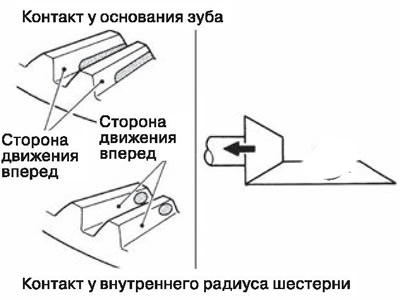
Contact patch evaluation table in engagement
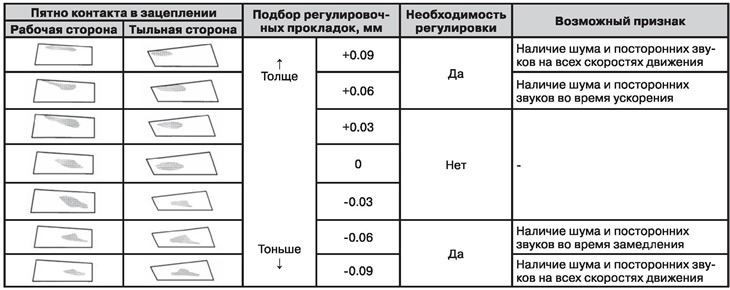
5. If the engagement contact is not within the norm, adjust the height of the drive gear (dimension X).
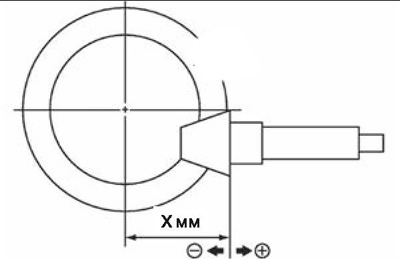
If the contact patch is at the top of the tooth or at the outer radius of the gear, using a thicker shim allows the pinion gear to be moved toward the ring gear.
If the contact patch is at the base of a tooth or at the inside radius of the gear, using a thinner shim allows the pinion gear to be moved away from the ring gear.
Caution: Use only one adjusting shim for adjustment.