


Table of contents: Removal ↓ Installation ↓
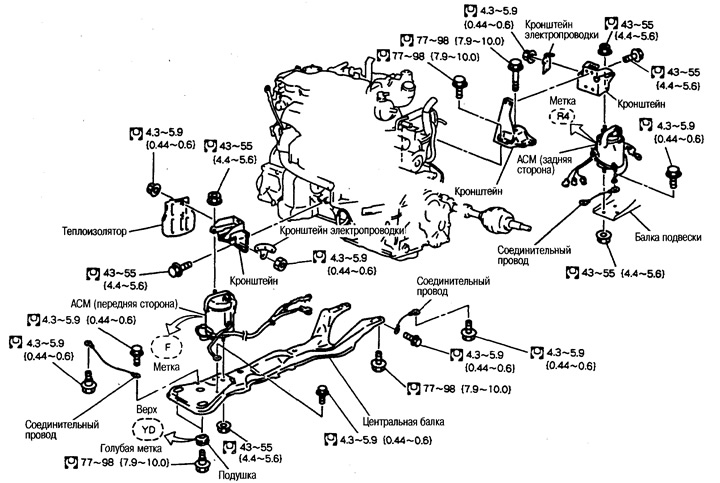
Note: Removal and installation of the ACM from the front side is the same as on 2WD models. The following describes the removal and installation of the ACM from the rear side.
Removal
Description of works
Move the steering rack, unscrew the lower mounting bolts, remove the bracket, then disconnect the ACM.
1. Remove the engine underbody protection and the front exhaust pipe.
2. Remove the center beam as described below.
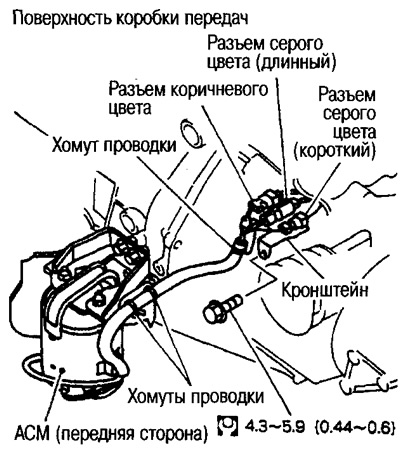
(1) Disconnect the connecting wires from the front and back.
(2) Disconnect the front side ACM connecting wire from the beam.
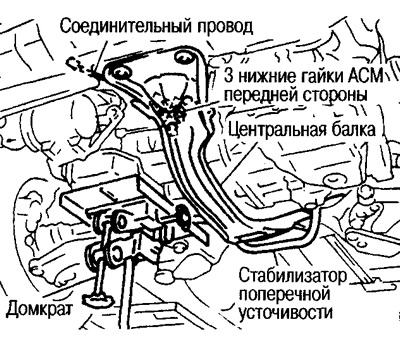
(3) Loosen the three lower mounting nuts of the front side ACM. Do not remove the front side ACM.
(4) Support the engine oil pan with a jack and remove the center beam mounting bolts.
(5) Raise the engine with a jack to provide free space between the anti-roll bar and the transfer case. Remove the center beam.
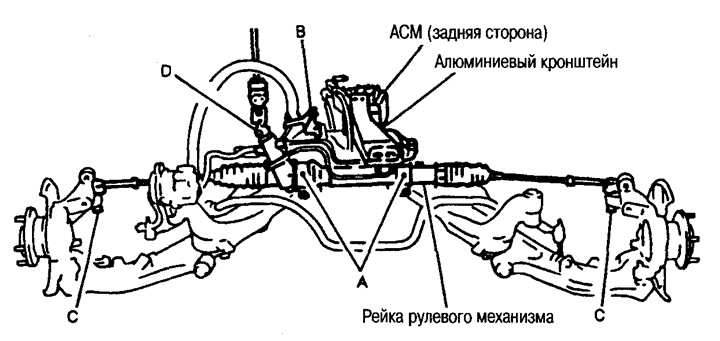
3. Move the steering rack to the position shown below and remove the following parts.
(1) Remove the rack fasteners (A).
(2) Remove the bracket (B) of the power steering high pressure pipe. The bracket is secured to the right rack mounting section.
(3) Disconnect the tie rod ends (C) on the right and left.
(4) Remove the lower steering column joint (D).
Before removal, apply alignment marks for subsequent installation.
4. Press the rack forward, unscrew the two lower nuts of the ACM from the rear side.
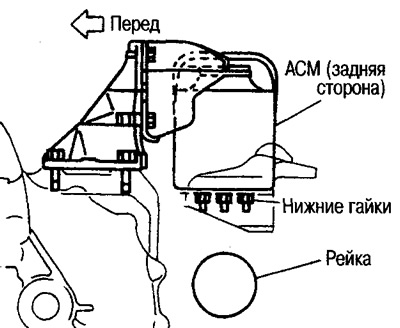
Caution: Do not damage the steering tubes.
5. Press the rack backwards and unscrew the third lower nut (front).
6. Remove the connecting wire from the suspension beam and damper.
7. Disconnect the rear side ACM wiring connectors as described below.
(1) Disconnect the three wiring connectors from the bracket and remove the bracket.
(2) Remove the connectors and wiring clamp from the bracket.
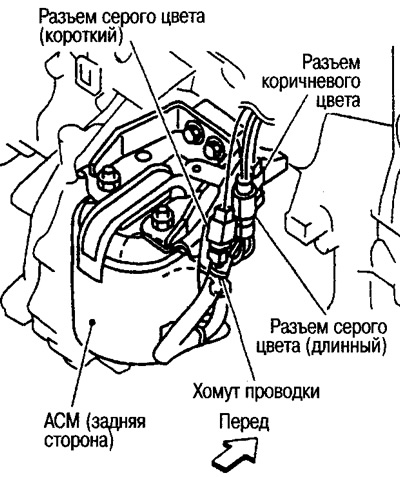
Works from above
8. Remove the air duct, air cleaner housing, battery and intercooler. Then disconnect the automatic transmission control cable from the transmission and move it to the side.
[The original can be read on the website: nissanbook.ru]
9. Unscrew the 2 fastening nuts on top of the ASM.
10. Unscrew the 4 bolts of the aluminum bracket.

Caution: Before loosening the bolts, support the transfer case with a jack.
11. Remove the ACM bracket from the gearbox side.
Remove the aluminum and steel bracket assembly.
12. Remove the ASM from the gearbox side.
Attention:
Do not drop the ASM or subject it to impact. If this happens, replace the ASM.
Do not damage the connector or wiring.
Hold the ASM by the body, not by the wiring or connector.
Installation
Installation is carried out in the reverse order of removal, taking into account the following.
Install the ASM, paying attention to the R4 mark on the right side.
Avoid touching the steering and brake lines when tightening the bolts and nuts.
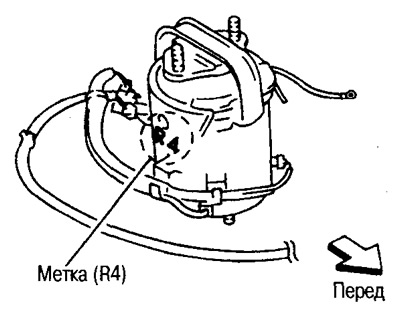
Firmly install and secure the electrical wiring and connectors, see the "Removal" section.
Attention:
Be careful not to damage the wiring or connectors when installing on the bracket or center beam.
After installation, adjust the vibration level.