Outer CV joint
1. Remove the half shaft.
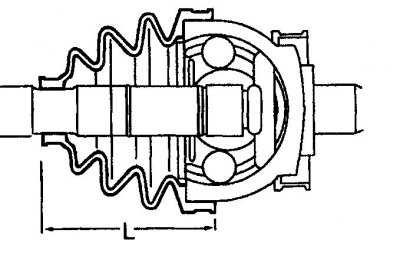
2. Measure length (L) covers are assembled.
3. Remove the clamps and shift the cover to the middle part of the axle shaft.
4. If the CV joint will not change, then mark its relative orientation relative to the axle shaft.
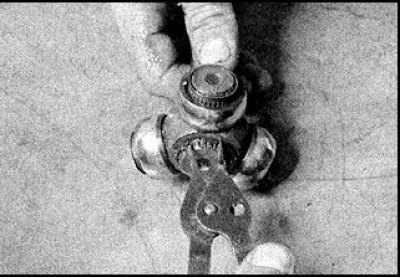
5. Clamp the axle shaft in a vise.
6. Screw the nut onto the axle shaft and use a puller to remove the CV joint without damaging the threads. The CV joint can be removed by hammer blows by driving the retaining ring into the groove.
7. Remove a cover and get a lock ring.
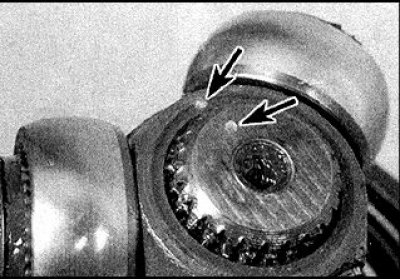
8. Rinse the CV joint in kerosene and dry thoroughly.
9. If you find the slightest signs of wear, replace the CV joint assembly.
10. When assembling, wrap the splines of the axle shaft with tape.
11. Put on a collar and a cover on a semiaxis.
12. Remove the tape and insert a new retaining ring into the axle shaft.
13. Put on the CV joint, aligning the applied marks (if the CV joint has not been changed).
14. Screw on the nut, clamp the axle shaft in a vise and, with light blows of the hammer, upset the CV joint so that the retaining ring enters the groove.
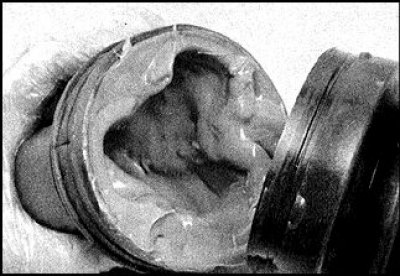
15. Place a special lubricant in the case, twist the case so that the grease enters the folds.
16. Distribute any excess grease inside the boot.
17. Put on a cover on the CV joint, put on a new collar.
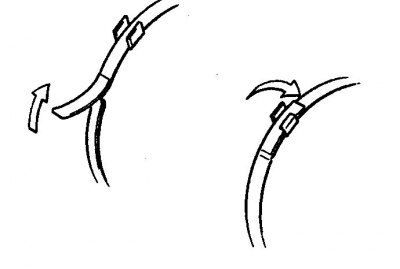
18. Bend the end of the clamp and secure with the ears.
19. Install the cover so that the length measured during disassembly is maintained.
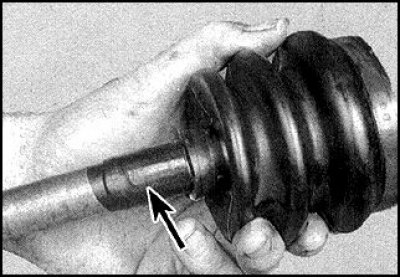
20. Make sure that the edge of the boot is in the groove of the axle shaft.
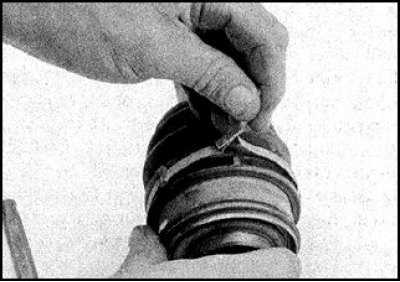
21. Secure the cover with a small tie.
22. Install the axle shaft.
Internal CV joint
Ball joint
1. Follow the steps in pp. 1–18. Keep in mind that the CV joint is removed only by hammer blows on the mandrel, an impact puller is not used.

2. Check length (L) cover.
Three-roller CV joint
1. Remove the half shaft.
2. Measure the length of the cover when assembled.
3. Remove the clamps and shift the cover to the middle part of the axle shaft.
4. If the CV joint will not change, then mark the relative orientation of the CV joint housing relative to the axle shaft.
5. Remove the CV joint housing so the rollers should remain on the hinge tripod.
6. Mark the tripod and axle shaft.
7. Get a lock ring.
8. Remove the swivel tripod.
9. Rinse the CV joint in kerosene and dry thoroughly.
10. Carefully inspect the hinge.
11. If any signs of wear are found, replace the CV joint.
12. A new CV joint is selected according to the marking on the side surface of the hinge to be replaced.
13. Wrap tape around the axle shaft splines.
14. Put on a collar and a cover on a semiaxis.
15. Remove the tape and put on the hinge tripod, aligning the applied marks (if the CV joint has not been changed).
15. Secure the hinge with a new retaining ring.
16. Apply special grease to the hinge body (comes with new hinge), spread the grease around the rollers.
17. Put the hinge body on the tripod, aligning the applied marks of the body and axle shaft (if the CV joint has not been changed).
18. Put a cover on the CV joint housing, put on a new clamp.

19. Tighten the clamp, bend the end of the clamp and secure with the ears.
20. Install the cover so that the length measured during disassembly is maintained.
21. Make sure that the edge of the boot is in the groove of the axle shaft.
22. Secure the cover with a small tie.
23. Install the axle shaft.