Attention! See the warnings at the beginning of the Section Depressurizing the supply system.
1. Relieve the pressure in the supply system (see Section Depressurizing the supply system). To relieve excess pressure in the tank, remove the filler cap.
2. Disconnect the negative cable from the battery.
Attention! If the stereo system installed in the car is equipped with a security code, before disconnecting the battery, make sure that you have the correct combination to activate the audio system!
3. If fuel remains in the tank, pump it out using a special kit (ask at car accessories stores).
Attention! Never suck fuel with your mouth!
4. Remove the rear seat and assembly access cover (am) fuel pump and fuel flow sensor. Disconnect wiring harnesses (see Section Checking the condition and replacing the fuel flow sensor).
5. Jack up the car and put it on stands.
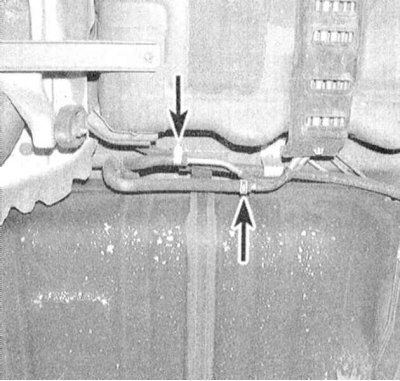
6. Disconnect from unions on a tank of a line of giving and return of fuel.
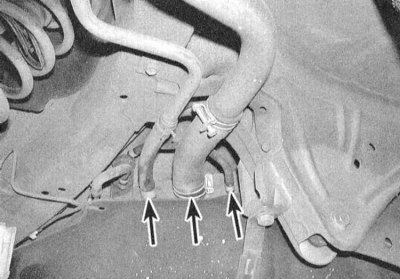
7. Loosen the mounting clamps and disconnect the hoses of the filler neck, ventilation and the fuel vapor recovery system from the tank (EVAP).
8. Support the tank with a trolley jack, laying a wooden block between the head of the latter and the bottom of the tank to distribute the load.
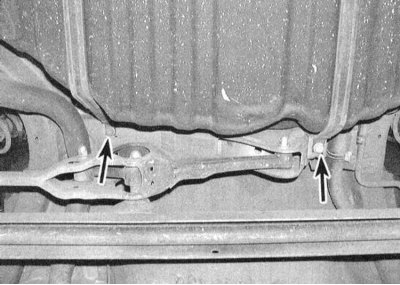
9. Remove two of the four tank mounting bracket bolts - the brackets should drop by hanging on the remaining two bolts.
10. Slowly lower a tank below level of a lining of sections of system of release of the fulfilled gases and take it from under the car.
11. Description of the procedures for cleaning and refurbishment of the tank is given in Section Cleaning and repairing the fuel tank - general information.
12. If necessary, remove the assembly (And) fuel pump/fuel flow sensor (see Section Removal and installation of the fuel pump).
13. Installation is carried out in the reverse order.
Note. Lubricate the intake pipe with clean engine oil to facilitate fitting of the tank filler hose.