


Draining the oil
Before starting this operation, prepare all necessary tools and equipment. You should also stock up on enough rags and old newspapers to wipe up any spilled oil. You will need a drip tray to collect the oil. It should be large enough to hold about 5 liters of oil, and relatively shallow in depth, but wide enough to prevent oil from spilling.
Always drain the oil after the engine has run for some time at normal operating temperature. Hot oil drains more easily and removes more harmful deposits than oil that is drained cold. To change the oil and filter, do the following:
- Warm up the engine to operating temperature (equivalent to oil temperature of +60°C).
Caution: Oil can be pumped out through the dipstick hole.
- Place the car on a level surface and turn off the engine when it has warmed up sufficiently.
- Remove the filler cap.
- Access to the oil pan drain plug and oil filter can be made easier by raising the vehicle on a lift, driving it onto a ramp or inspection pit, or supporting it on stands.
Caution: Do not work under a vehicle supported solely by a hydraulic or rack jack. Always use coasters!
- Raise the vehicle and support it securely on stands. Make sure it is securely fastened.
- If you're changing the oil in your car for the first time, crawl underneath and locate the oil pan drain plug and oil filter. Exhaust system components will be hot during this work, so familiarize yourself with their location to avoid touching them.
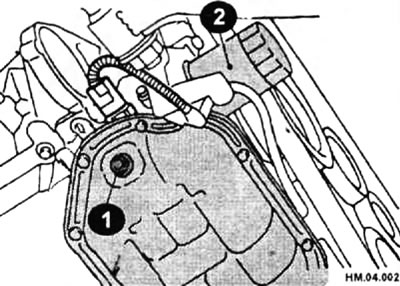
1 - oil pan drain plug; 2 - oil filter.
- Being careful not to touch any exhaust system components, place an oil drain pan under the drain plug. Clean the area around the plug and then remove it.
- Unscrew the oil pan plug using a square socket or open-end wrench. An open-end or adjustable wrench is not suitable as it can strip the edges of the drain plug.
- It is recommended to wear old gloves when unscrewing the last few turns of the cap to avoid getting burned by the hot oil. It is also useful to unscrew the drain plug, leave it on a few threads, and then quickly remove it from the drain hole. This will keep your hands away from the hot oil and prevent the plug from falling into the drain pan.
- It may be necessary to move the drain pan slightly due to the slow drainage of the oil.
- Check the oil for metal particles.
- After all the oil has drained, wipe the drain plug with an old rag. Any small metal particles stuck to the plug can instantly contaminate the new oil.
- Install a new sealing washer under the drain plug.
- Replace the plug and tighten it securely, but do not strip the threads. Tightening torque: 29.4-39.2 Nm.
Caution: If the used oil contains large amounts of metal shavings or wear products, this indicates the presence of scoring, for example, in the crankshaft or connecting rod bearings. To avoid further damage, it is necessary to thoroughly clean the oil passages and hoses. It is advisable to replace the oil radiator.
Replacing the filter
- Move the drain pan under the oil filter.
- Remove the right mudguard.
- Loosen the oil filter by turning the oil filter wrench counterclockwise. Any standard oil filter wrench will work.
[The original is available on the web page: Nissanbook.ru]
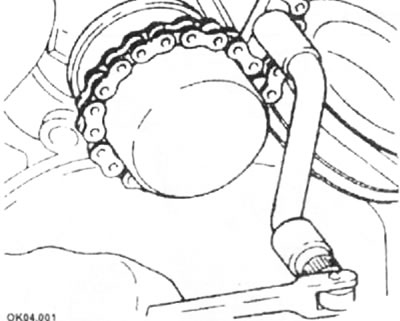
In workshops, a special tool is used for this purpose. If you don't have one, you can use a leather belt or a device you can make yourself from sandpaper.
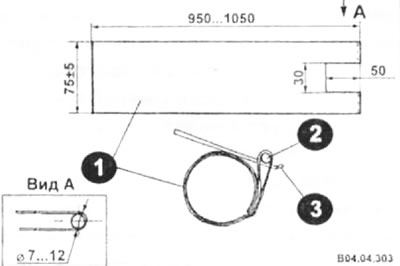
Self-made oil filter unscrewing device 1 - a strip of sandpaper folded in half with a notch; 2 — axis; 3 - lever (screwdriver, etc.)
- Sometimes oil filters are tightened so tight that they cannot be loosened. In this case, pierce the filter with a long screwdriver as close to the engine as possible, and, using it as a T-lever, unscrew the filter. Be prepared for oil to splash out of the filter housing when you puncture it.
- After loosening the filter, unscrew it from the cylinder block by hand. Immediately after disconnecting the filter from the unit, immediately tilt it with the open end upward to prevent any remaining oil from splashing out of the filter.
- Wipe the mounting surface on the cylinder block with a clean cloth.
- Compare the new filter with the old one to make sure they are the same type.
Caution: The oil filter is equipped with a pressure reducing valve. Use only a NISSAN oil filter or equivalent.
- Apply a small amount of engine oil to the surface of the sealing ring (1) of the new filter and screw it into place by hand.
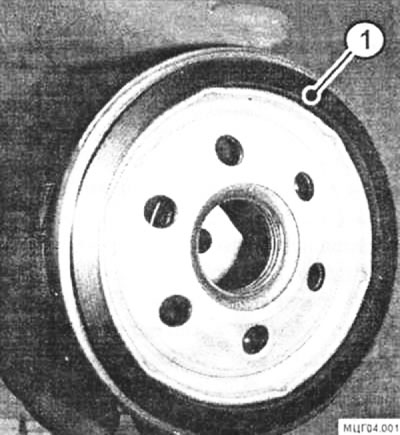
- Overtightening the filter will damage the O-ring, so do not use a filter wrench.
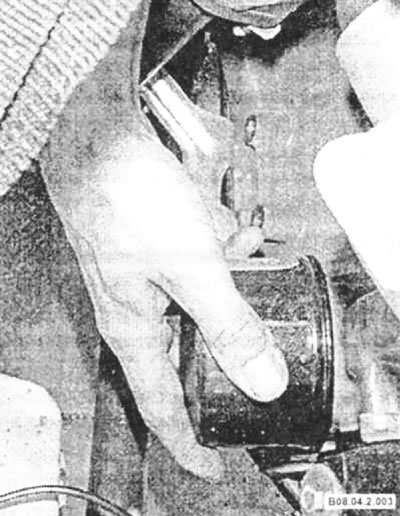
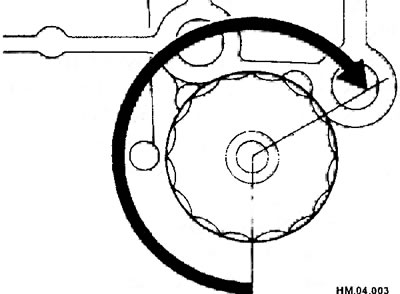
- Tighten the oil filter by hand until it contacts the mounting surface, then tighten it another 2/3 of a turn as shown in the figure, or tighten it to a torque of 14.7-20.5 N·m.
Oil filling
- Remove all tools and materials from under the vehicle, being careful not to spill oil from the drain pan, and then lower the vehicle.
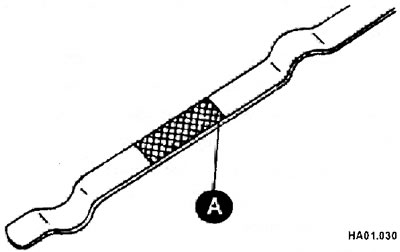
- Add new oil to the engine through the filler neck located in the rocker cover. To prevent oil from splashing onto the engine, use a watering can. Fill the engine with the required amount of fresh oil. Wait a few minutes for the oil to drain into the pan, then check the oil level with the dipstick. If the oil level is within normal limits (And in the picture), then put the filler cap back in place.
- The amount of engine oil to be added depends on the oil temperature and drain time. Use the data provided in the table for reference only.
Quantity of engine oil (approximate value)
| Draining and filling | With oil filter replacement | 4.0 l |
| Without changing the oil filter | 3.7 l | |
| dry engine (after renovation) | 5.0 l | |
- Start the engine and let it run for about a minute. While the engine is running, look underneath the vehicle and check for leaks from the oil pan plug and around the oil filter.
- If either is leaking, stop the engine and tighten the plug or filter slightly.
- Wait a few minutes, then check the oil level again using the dipstick and add the required amount of oil if necessary.
- During the first few trips after an oil change, make it a habit to frequently check your vehicle for leaks and check the oil level.