2. Raise the rear axle with a jack placed under the gearbox housing.
3. Turn away nuts and remove shock-absorbers from the lower hairpins (photo).
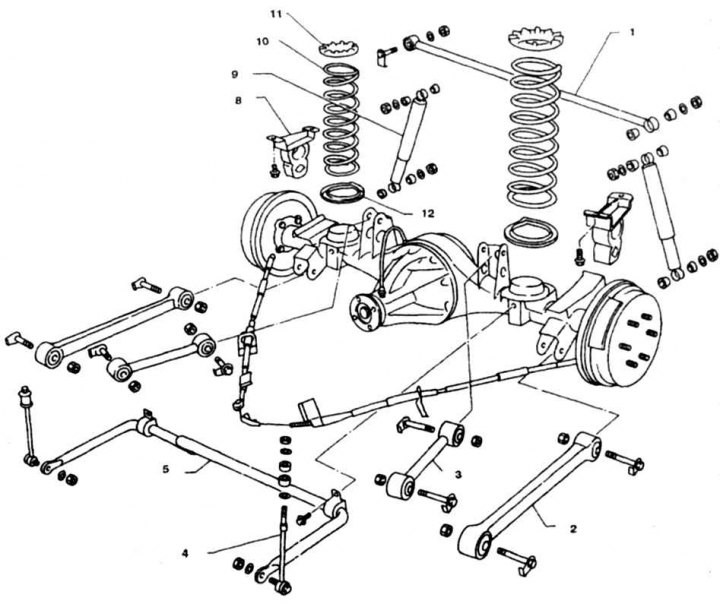
9.3 Rear suspension parts
1. Cross bar; 2. Longitudinal bar; 3. Upper rod; 4. Stabilizer link; 5. Stabilizer; 6. When tightening bolts and nuts, orient them correctly. Bolts and nuts must comply with those specified by the manufacturer.
4. Carefully lower the rear axle until the springs are completely unloaded.
5. Remove springs and cups. Inspect cups, replace if damaged.
6. Installation is carried out in the reverse order. When installing, orient the springs so that the mark is directed towards the rear of the vehicle (photo). Finally tighten the shock absorber nuts after lowering the vehicle onto the wheels.
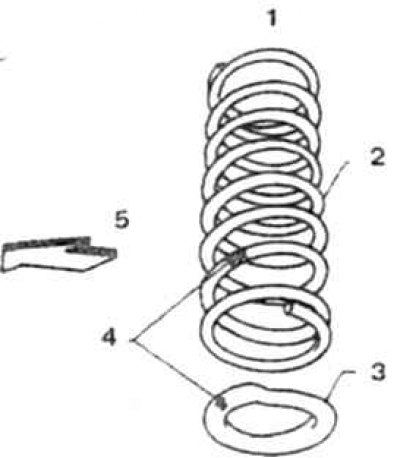
9.6 The painted band on the spring and the mark on the lower part must be directed towards the rear of the vehicle
1. Top; 2. Spring; 3. Bottom cup; 4. Orientation marks; 5. To the back of the car