


2. Remove the wheel.
3. Loosen the upper nut of the shock absorber and compress the shock absorber.
4. Slightly lift the lower arm with a jack.
5. Loosen the upper hinge nut. Press the support pin out of the knuckle eye with a puller (photo). Unscrew the nut.
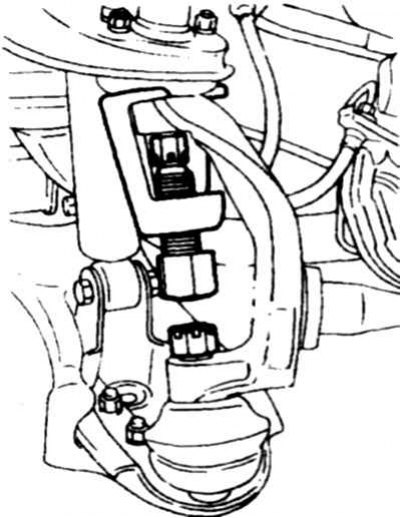
7.5a Pressing out the upper support pin using a device
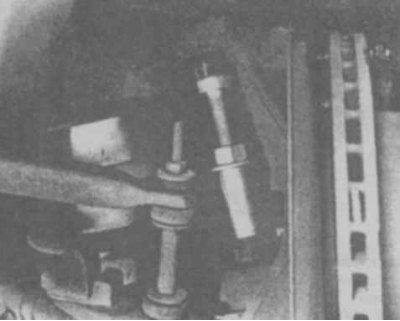
7.5b The simplest device for pressing out a support, made from a bolt, nut and socket head
6. Unscrew the bolts securing the lever axle to the frame and remove the lever assembly with the support and adjusting washers. Pay attention to the number and order of the adjusting washers (photo).
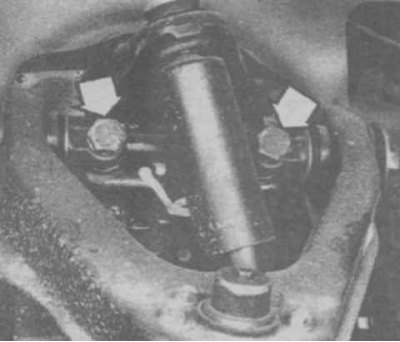
7.6 Upper arm axle mounting bolts
7. Unscrew the nuts and remove the support. The support is non-separable and is replaced entirely if worn.
8. Replace hardened or damaged lever bushings. To do this, unscrew the axle nuts and press the axle out of the lever (you will need a press).
9. Before pressing in new bushings, wet them with a soap solution. The bushings are pressed in on a hydraulic press so that the flange on the bushing rests against the corresponding recess in the lever sleeve.
10. Insert the axle and place the inner washers so that their rounded sides face inward.
11. Press in the outer bushings.
12. Tighten the axle nuts.
13. Install the support on the lever.
14. Install the lever, making sure that the adjusting washers are intact. Tighten the bolts to the specified torque.
15. Check dimensions A and B (photo). Compare them with those specified in the Technical Data, adjust if necessary.
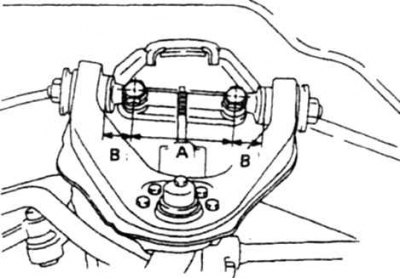
7.15 Check the lever alignment by measuring dimensions A and B
16. The remaining operations are performed in reverse order. Tighten the bolts and nuts finally after lowering the car onto the wheels. Check and adjust the wheel alignment angles.