


2. To check, lift the vehicle.
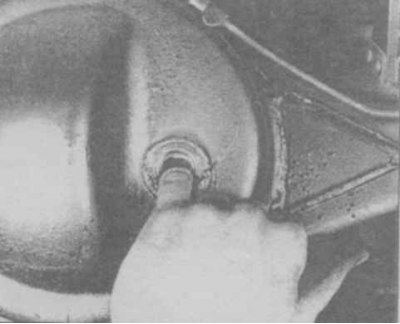
22.3 Checking the oil level in the rear axle gearbox
Disc brakes
3. Disc brakes are installed on the front wheels.
4. You can quickly check the remaining thickness of the brake pad lining material through the window in the front brake caliper (photo). If the wear of at least one lining exceeds 0.8 mm, replace all four pads in a set.
5. For a more detailed check, the brake pads can be removed and cleaned (Ch. 10).
6. Before installing the wheel, check the condition of all hoses and pipes of the brake circuit, the presence of cracks, corrosion, fluid leaks. Replace the hose if necessary.
7. Check the condition of the disc; if you find any scoring, deep wear or signs of strong heating, remove the disc and polish it.
[Information obtained from the website: NISSANBOOK.ru]
Drum brakes
8. Remove the drum. If the drum is stuck on the axle hub, then drip some penetrating liquid, then try removing it again.
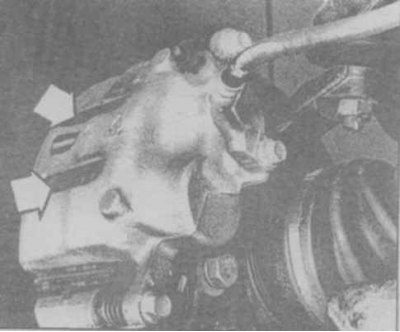
24.6 Inspection windows in the front brake caliper
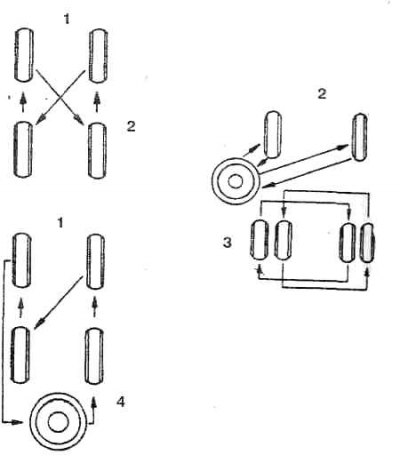
23.2 Wheel rotation diagram
1. In the direction of the vehicle; 2. Scheme of rearrangement when equipped with a roller as a spare wheel; 3. Rear wheel alignment diagram for dual rear wheels; 4. Rearrangement diagram when equipped with a standard spare wheel
9. If the drum still cannot be removed, remove the plug on the brake shield and bring the pads together by turning the toothed nut with a screwdriver.
10. As a final means of removing the drums, screw the bolts into the threaded holes and by screwing the bolts, remove the drum (photo).
11. It is prohibited to remove dust accumulated as a result of wear of the pads by blowing.
12. Check the thickness of the rear brake pads and their condition. If the thickness of the glued pads is less than 1.5 mm (or the distance from the linings to the rivet heads) less than 1.5 mm, then replace the linings. The linings should also be replaced if cracks are found, the surface is glossy, or if they are contaminated with brake fluid or grease (photo).
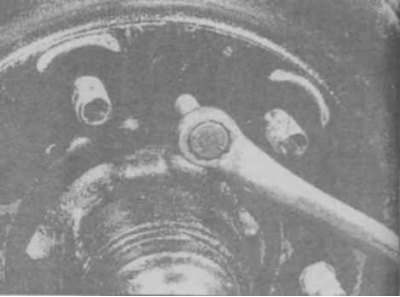
24.12 Removing the drum by screwing bolts into special holes
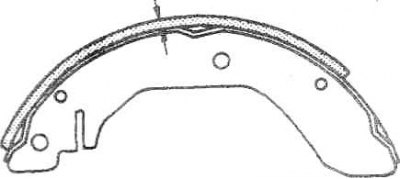
24.14 Thickness of fractional brake lining
13. Check the condition of the springs.
14. Check for signs of brake fluid leaks on the wheel cylinders by carefully prying up and moving the outer cylinder seal (photo). If there are signs of brake fluid under the seal, replace the cylinder.
15. Clean the drum with a cloth soaked in alcohol.
16. Check the drums for deep grooves, cracks, furrows and painted areas. If the defects cannot be removed with sandpaper, the drums must be removed and turned.
17. Install the brake drums.
18. Install the wheels and lower the vehicle.
Handbrake
19. The handbrake needs to be adjusted if, with 6-10 clicks of the brake lever and the gear in neutral, the car does not hold on the rise (Ch. 10).