


2. Loosen the lock plate screw.
3. Unscrew the lock nut and secure the hub (photo).
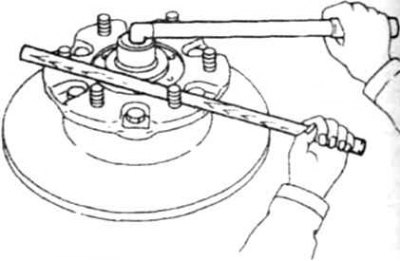
6.3 Fixing the hub when unscrewing the nut
4. Remove the plate and special washer (photo).
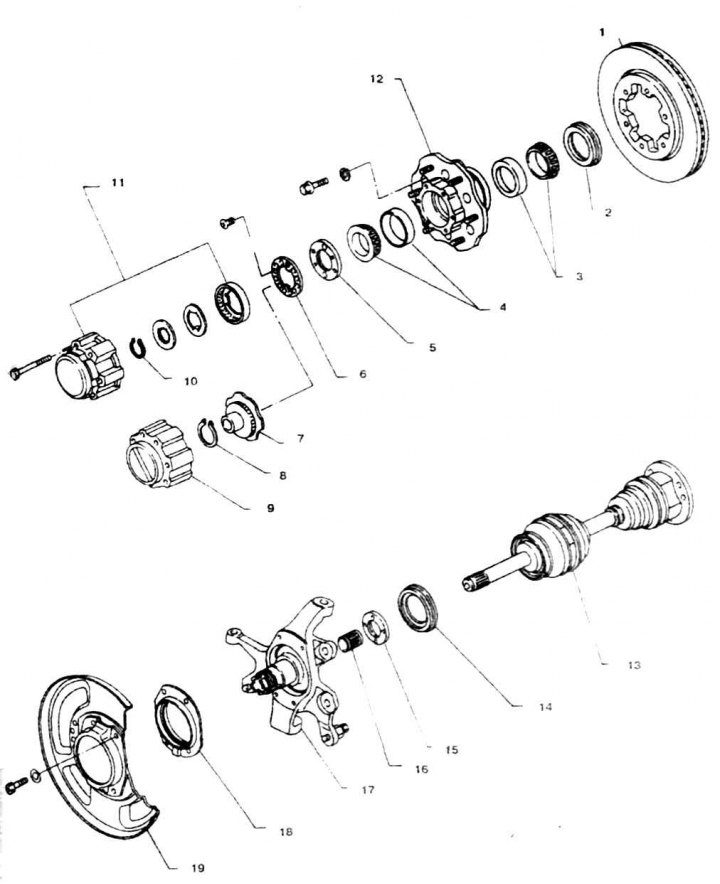
6.4 Hub, axle shaft and steering knuckle
1. Brake disc; 2. Seal A; 3. Inner bearing; 4. Outer bearing; 5. Lock nut; 6. Locking plate; 7. Lead coupling; 8, 10. Retaining ring; 9. Device for manual hub locking (early production cars)
5. Pry up and remove the oil deflector, push out the bearing sleeve.
6. Remove the fist (photo).
7. Remove the bearing seal
8. Press out the inner bearing ring (photo).
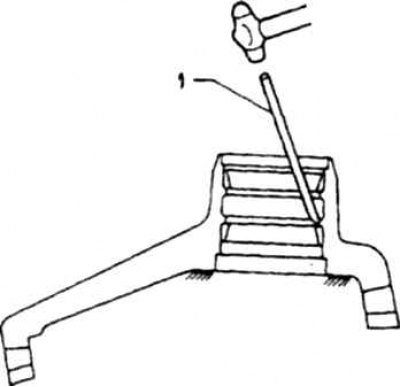
6.8 Pressing out the inner bearing ring
1. Brass beard
9. Loosen the bolts and remove the hub from the brake disc (Chapter 10).
10. Press out the outer bearing using a press, remove the oil deflector.
11. Wash all parts.
12. Lubricate the outer bearing race, place grease in the hub (photo) and press into the bearing in the hub, resting against the outer ring. Fill the central space of the hub with grease. Install the outer seal.
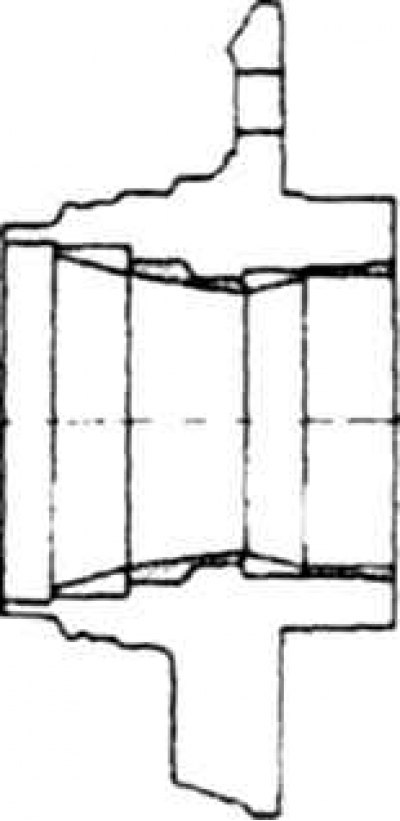
6.12 Apply grease to the areas indicated by hatching
13. Install the drive.
14. Lubricate and press in the inner bearing.
15. Tighten the hub nut to the specified torque.
16. Check the freedom of rotation of the hub.
17. Lubricate and install the inner seal
Adjustment
Attention! A special key is used to loosen and tighten the nut (Chapter 8)
(Text duplicated from the website: NISSANBOOK.RU)
18. Tighten the nut to the specified torque.
19. Loosen the nut and check the play, which should be zero.
20. Turn the wheel in both directions.
21. Determine the preload in the bearings. To do this, hook a dynamometer to the upper stud and determine the force A at which the wheel will start to rotate. Then tighten the nut by 15-30° and install a locking plate on the nut. Rotate the wheel in both directions. Hook a dynamometer to the lower stud and determine the force B at which the wheel will start to rotate. The preload is equal to the difference B-A.
22. Repeat the procedure and achieve normal tension in the bearings.
23. Install the retaining ring into the groove of the nut.
24. Install the remaining parts in reverse order.