


Removal
1. Jack up the rear of the car and place it on supports placed under the rear axle housing.
2. Loosen the nut securing the upper end of the shock absorber to the vehicle chassis. Remove the washers and rubber bushings (see accompanying illustration).
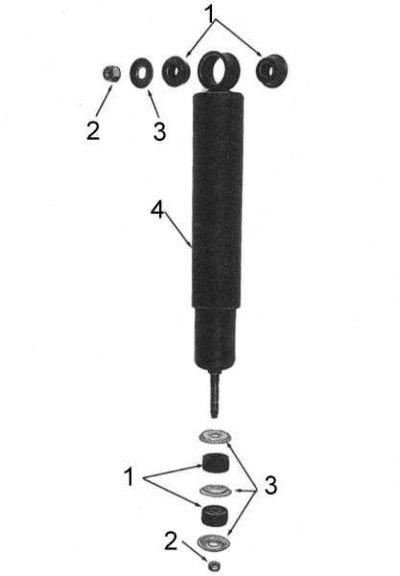
1 - rubber bushings; 2 - nut; 3 - washer; 4 - shock absorber
3. Loosen the nut securing the lower end of the shock absorber to the spring support plate. Remove the washers and rubber bushings.
4. Remove the shock absorber from the vehicle.
Installation
Installation is carried out in reverse order.
1. Make sure that the rubber bushings and fastener washers are installed correctly.
2. Make sure the shock absorber is installed correctly. The dust sleeve should be facing downwards and placed on the lower end of the shock absorber.
3. Tighten the upper fastening nut with a force of 47÷65 Nm, the lower one with a force of 17÷23 Nm.
Checking and pumping
Note: The following are procedures for checking the condition of the shock absorber, which do not require special equipment.
1. Inspect the shock absorber body for dents, other damage and signs of leaks. A defective shock absorber cannot be repaired and must be replaced.
2. Check the condition of the rubber bushings and replace them if necessary.
3. Clamp the shock absorber vertically in a vice (by the lower support pin).
4. Grasp the top of the shock absorber and pull it up until it stops, then slowly lower it down until the shock absorber is fully compressed.
5. Repeat the procedure in the last paragraph six to eight times, completely eliminating the play caused by the air present in the shock absorber. If the play is not eliminated, the shock absorber must be replaced.