Service brakes
Disc brakes on the front wheels and disc or drum brakes on the rear wheels are automatically adjusted so no adjustment work is required. When the brake pads are worn, the rear brakes are adjusted by applying the foot or hand brake, depending on the version. The condition for this is the perfect operation of the adjustment mechanism, which is located inside the drum on drum brakes, and inside the caliper on disc brakes.
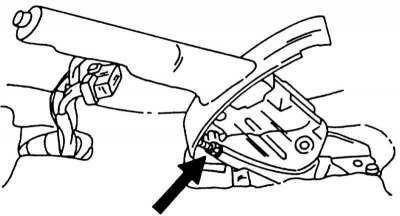
Position of adjusting nut (arrow) on the side of the handbrake lever.
Handbrake adjustment
To adjust the handbrake, adjust the nut on the side of the handbrake lever at the location shown in the illustration above. Proceed as follows when making adjustments:
1. Place the rear of the vehicle on stands and release the handbrake. For safety, place bricks in front of and behind the front wheels to prevent the car from moving off the supports.
2. Depress the brake pedal more than 5 times.
3. Engage the handbrake lever 6 to 8 clicks and check that the rear wheels do not spin. Release the handbrake again.
4. If not, tighten the nut on the handbrake lever until the rear wheels lock when the above check is made.
5. Apply and release the handbrake and check that both wheels turn freely and the brake shoes do not slip on the drum. In the case of disc brakes, the handbrake lever on the rear calipers must return to the stop bolt when the handbrake is released.
6. Check up, whether the control lamp of a manual brake burns, if the lever is tightened on 1-2 clicks.
7. Lower the vehicle to the ground.
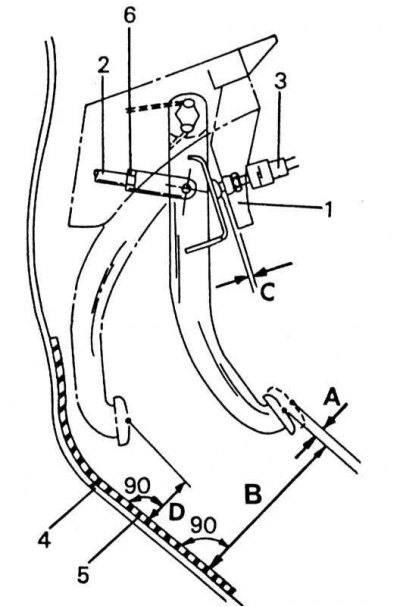
Elements for adjusting the height and play of the brake pedal
1 - locknut, 12-15 Nm; 2 - push rod of the brake booster; 3 - stop signal switch; 4 - floor panel; 5 - Floor soundproofing; 6 - locknut, 16-22 Nm; A = pedal play; H = pedal height; C = clearance at the brake light switch; D = distance from the floor
Brake pedal adjustment
The brake pedal play is adjusted by screwing in or out the brake light switch. With appropriate requirements Specifications brake pedal height loosen the lock nut (1) (see illustration) and move the switch (3), until the gap between the arrows is 0.3-1.0 mm.
Take the brake pedal with your thumb and forefinger and move back and forth until resistance is felt. A noticeable play should be 1-3 mm. Otherwise, carry out the adjustment described above.
To adjust the height of the brake pedal, the pusher of the master brake cylinder is displaced (2) after loosening locknut (6). The pedal height is in Specifications.