


Table of contents: Disassembly ↓ Checking after disassembly ↓ Assembly ↓ Adjustments after installation ↓
Disassembly
Note: Do not remove the caliper bracket, brake pads, linings, lining caps, or pad retainers when disassembling and assembling the wheel cylinder.
1. Loosen the guide pin bolts and remove the cylinder body from the caliper bracket.
Caution: Do not allow pads, linings, lining caps or pad holders to fall from the caliper bracket.
2. Remove the guide pins with dust boots from the caliper bracket.
3. Remove the bushings from the guide pins.
4. Place a wooden block as shown in the figure and apply compressed air through the hole under the mounting bolt to remove the piston with the dust cover.
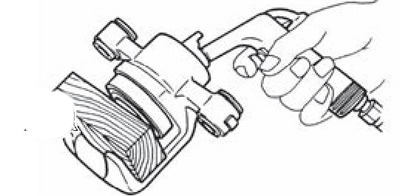
Caution: Do not place your fingers in front of the piston!
5. Using a suitable tool, remove the piston seal from the cylinder body.
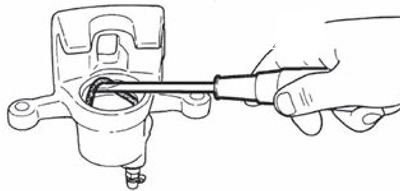
Caution: Be careful not to damage the internal machines, cylinders.
Checking after disassembly
1. Check the cylinder bore for corrosion, wear and damage. If necessary, replace the cylinder body with a new one.
Attention. Clean the cylinder body using fresh brake fluid. Do not use mineral oils, gasoline or kerosene for this purpose.
2. Check the caliper bracket for wear, cracks and damage. If necessary, replace the caliper bracket with a new one.
3. Check the piston surface for corrosion, wear and damage. If necessary, replace the piston with a new one.
Caution. The piston sliding surfaces have a metallic coating. Do not sand the piston with sandpaper.
4. Check the guide pins, guide pin bolts and dust boots for wear, damage and cracks. Replace the relevant parts if necessary.
Assembly
1. Apply rubber grease to the piston seal (1) and install the seal into the cylinder body.
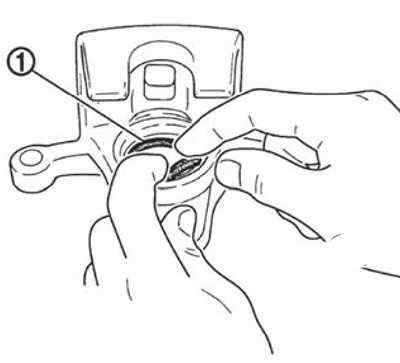
Caution: Do not reuse piston seal.
2. Apply rubber grease to the piston dust boot (1). Cover the edge of the piston (2) with the dust boot and securely insert the outer edges of the dust boot into the groove in the cylinder body.
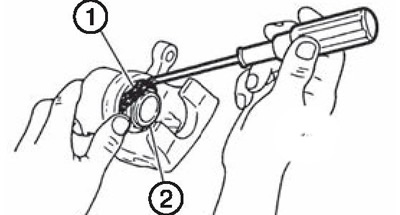
3. Apply brake fluid to the piston (1). Press the piston by hand to insert it into the cylinder body. The protrusions on the dust cover (2) should fit properly into the grooves on the piston.
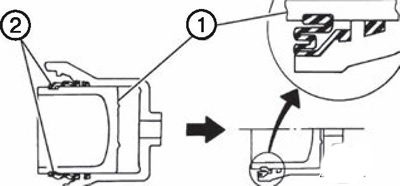
Caution: Press the piston with a smooth change of force to prevent the piston from rubbing against the cylinder mirror.
4. Apply rubber grease to the bushings and install them onto the guide pins.
5. Apply rubber grease to the guide pins and dust boots, then install the guide pins with dust boots on the caliper bracket.
6. Install the cylinder body onto the caliper bracket and tighten the guide pin bolts to the specified tightening torque.
Adjustments after installation
Brake bedding procedure
The bedding-in of new brake surfaces is carried out according to the procedure described below after grinding or replacing the brake disc, pads, or in the event of the brake pedal sinking over a short distance.
Attention.
- Care must be taken to control the speed of the vehicle as poorly worn brake pads will not provide the required braking performance.
- Perform the described procedure on safe, low-traffic, dusty roads. Exercise extreme caution.
1. Drive your car onto a straight, level road.
2. After accelerating the car a little, press the brake pedal hard for three to five seconds until the car comes to a complete stop.
3. Drive for a few minutes without pressing the brake pedal to allow the brakes to cool.
4. Repeat steps 1 through 3 until the brake disc is completely bedded in.