


Disassembly
Attention. Be careful not to damage the shock absorber rod when removing the strut components.
1. Install special tool (A) (ST35652000) onto the stand assembly and secure the entire assembly in a vise.
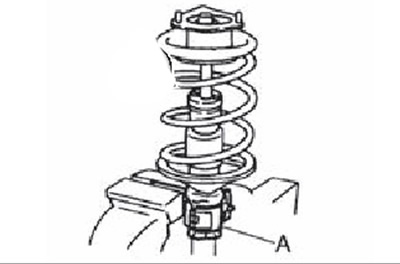
Attention. When installing the special tool on the stand assembly, wrap the stand with rags to prevent damage.
2. Using a spring compressor (A), compress the coil spring with the bearing and lower rubber seat (on stand assembly) until the rack is released.
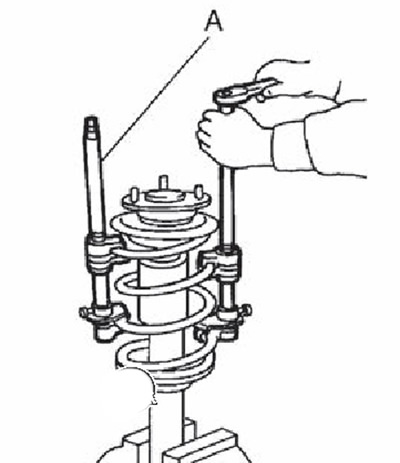
Attention. Make sure that the compression tool is firmly fixed on the spring, and only then compress the spring.
3. Make sure that the spring is compressed so that it is freely placed on the rack, then unscrew the locknut of the shock absorber rod, fixing it from turning.
4. Remove the strut mounting insulator and strut mounting bearing and compression stroke buffer from the strut.
5. Remove the spring compressor with spring and release the compression gradually.
Attention. When the suspension spring is weakened, it is necessary to provide conditions for its immobilization.
6. Remove the lower rubber seat from the suspension strut.
7. Remove fixture (ST35652000) from the rack.
Check after disassembly
Check the following and replace parts if necessary:
Rack
Check the strut for deformation, cracks or other damage.
Check the shock absorber rod for deformation or uneven wear.
Check welds and seals for oil leaks.
Mounting insulator and compression stroke buffer
Check the mounting insulator and compression stroke buffer for cracks, wear or damage.
helical spring
Check the coil spring for cracks, wear or damage.
Assembly
1. Install fixture (ST35652000) on the rack and fix the entire assembly in a vise.
Attention. When installing the special tool on the stand assembly, wrap the stand with rags to prevent damage.
2. Install the lower rubber seat,
3. Set the compression stroke buffer.
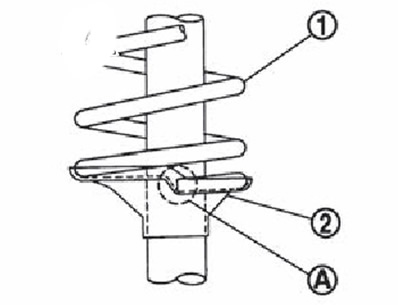
4. Compress the suspension spring using the tool and install on the strut assembly.
Attention.
- Install the spring with the cylindrical part (1) down, aligning the bottom end (A) with bottom rubber seat (2).
- Make sure that the compression tool is firmly fixed on the spring, and only then compress the spring.
5. Install the mounting bearing and mounting insulator to the suspension strut.
Note. The installation position of the suspension strut mounting insulator is shown in the figure.
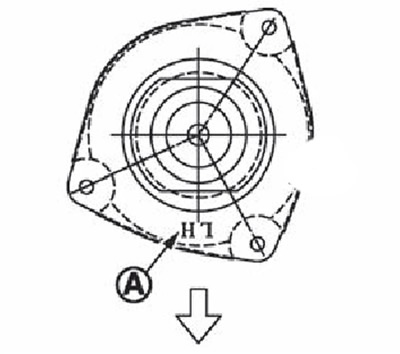
A: identification label.
The arrow points to the front of the car
6. Fix the end of the shock absorber rod so that it does not turn, then tighten the locknut to the specified tightening torque.
Attention. Do not reuse shock absorber stem locknut.
7. Gradually loosen the spring compressor and release the suspension spring.
Attention. When the suspension spring is weakened, conditions are necessary for its immobilization.
8. Remove the special tool from the strut assembly.