Headlight beam adjustment
1. Loosen the screws, remove the clips and remove the front fender protection.
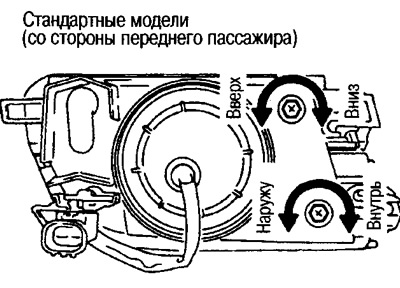
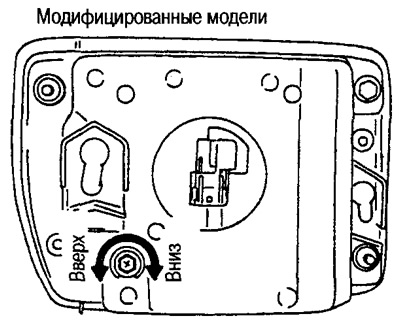
2. Using a wrench, turn the adjusting screws on the back of the fog lamp and adjust the direction of the light.
 |  |
Attention:
Adjust the headlight beam using the adjusting screws. Tighten the screw first, then adjust by loosening it.
Standard models on the driver's side: turn the screw clockwise to adjust outward, counterclockwise to adjust inward.
Preparatory work before adjustment
1. Bring the pressure in all tires to the required one.
2. Make sure there is no foreign cargo in the vehicle.
3. Clean the fog lights from dirt.
Caution: Do not clean headlights with organic solvents.
4. Bring the battery to normal.
5. Start the engine.
6. Sit one person in the driver's seat.
Screen Adjustment
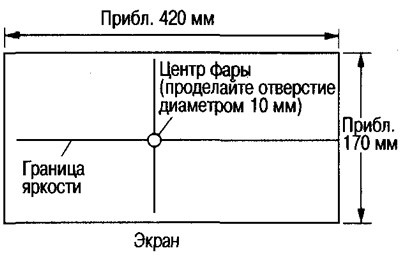
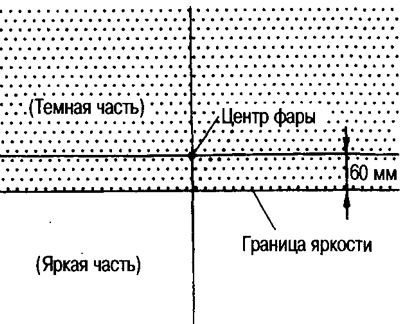
1. Take a sheet of thick white paper and draw a diagram of the border of brightness on it, as shown in the figure.
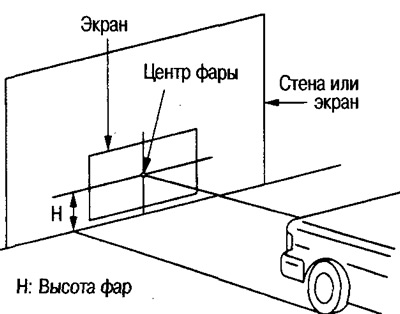
2. Position the vehicle as perpendicular to the wall or screen as possible (at a right angle with a smooth road surface).
3. Mark the same position on the wall or screen as the center position of the fog lights.
4. Adjust to the headlight center hole on the screen parallel to the flat road surface.
5. The distance between the screen and the headlights should be 3m so that the distance between the screen and each headlight is the same (A=B).
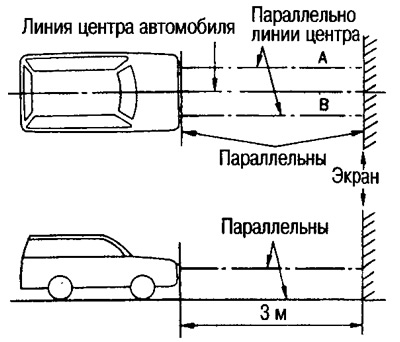
6. To prevent the light from the headlight, which is not being adjusted, from falling on the screen, cover it with a screen.
7. Turn on the fog lights.
8. Using the adjusting screws, adjust the position of the brightness limit of the fog lights falling on the screen, as shown in the figure.
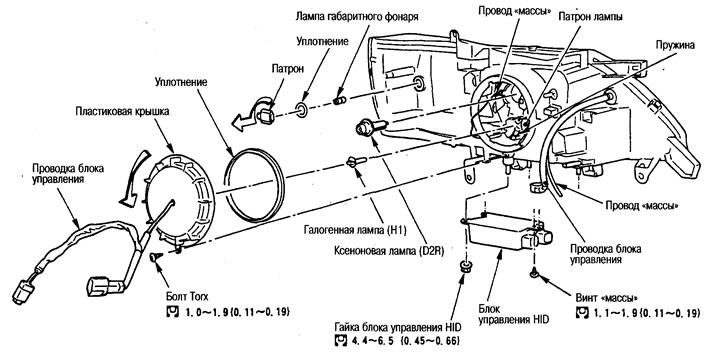
Removal and installation
Standard Models
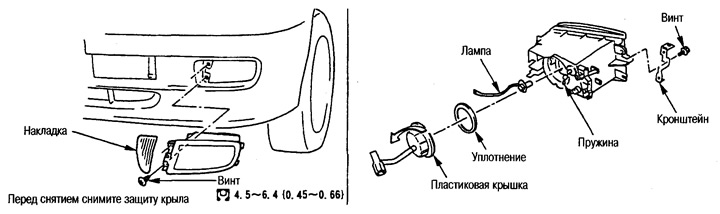
- Fog lamp: 12V - 55W (H3)
Modified Models
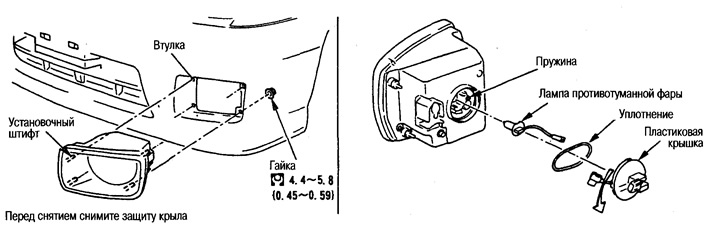
- Fog Lamp: 12V - 55W (H3)