Removing
1. Raise the entire vehicle and place on stands.
2. Remove the front wheels.
3. Remove the engine guards and fender guards.
4. Unscrew the plugs and drain the oil from the gearbox, tighten the plugs with the specified torque.
5. Remove the battery.
6. Remove air duct and air filter (see subsection 6.1.2 or subsection 6.2.2).
7. Remove the starter.
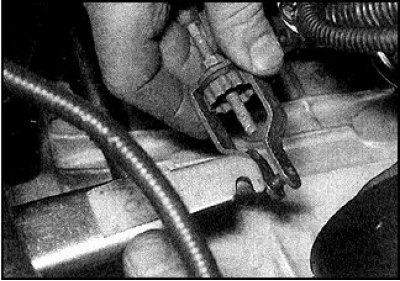
8. Loosen the knurled nut of the clutch cable, the locknut of the cable sheath and disconnect the cable.
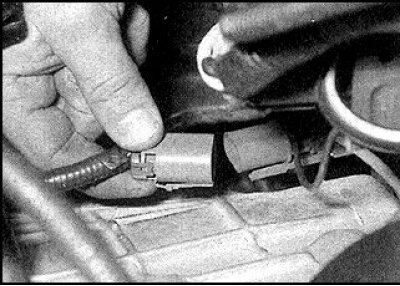 | 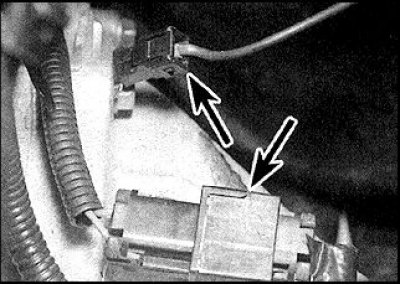 |
9. Disconnect the neutral position sensor and reverse switch wire connectors (on the right, the arrows indicate the neutral position sensor connector and the ground wire).
10. Remove the wiring from the brackets and take it aside.
11. Loosen the nut and remove the fork axle.
12. Disconnect the gear selector rod from the transmission.
13. Unscrew the thrust rod nut and remove the rod from the stud on the gearbox boat.
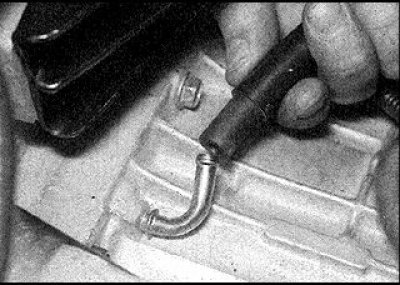
14. Disconnect the breather hose at the top of the crankcase.
15. Loosen the union nut and disconnect the speedometer cable.
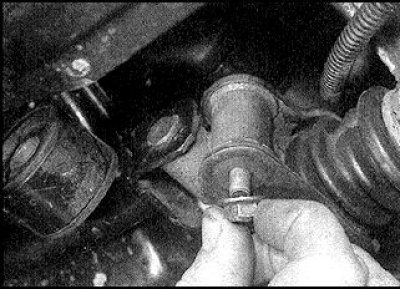
16. Remove the axle shaft from the gearbox housing, take it aside and securely fasten it, do not unscrew the axle shaft nut.
17. Slightly lift the engine on a hoist or jack it up over a plank.
18. When hanging with a hoist, lay a board between the side member and the pallet and lower the engine onto the board.
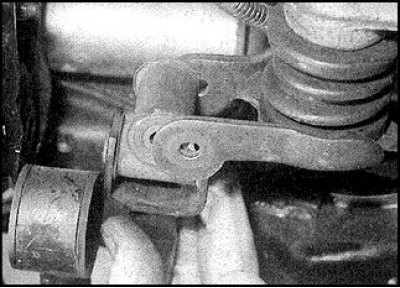
19. Roll a lifting platform under the checkpoint and support it over the board.
20. Turn away a nut and get a coupling bolt of the left support of the power unit.
21. Unscrew the three bolts securing the support to the gearbox housing and remove the support.
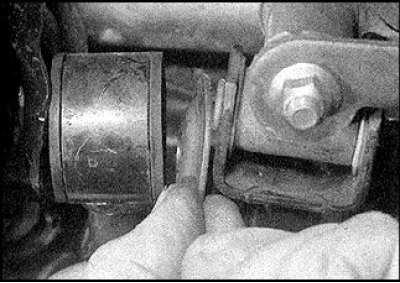
22. Remove rubber pads.
23. Turn away a nut and get a coupling bolt of the right support of the power unit.
24. Remove the three bolts and remove the support bracket.
25. Unscrew the gearbox mounting bolts, having previously marked the location of each bolt (bolts are different lengths) and marking all the brackets. It may be necessary to slightly lift the gearbox to loosen the lower bolts.
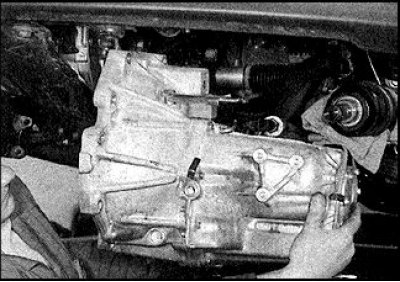
26. Make sure that all necessary parts are disconnected and cannot interfere with the removal of the gearbox.
27. Carefully slide the gearbox to the left and remove it from the guide pins, being careful not to allow the weight of the gearbox to be taken up by the input shaft.
28. Roll out the platform from the checkpoint.
29. Take out the guide pins.
Installation
1. Installation is carried out in the reverse order.
2. Lubricate the splines of the input shaft, install the guide pins, after installing the gearbox and wrap the bolts in their original places.
3. Replace axle seals.
Disassembly
Self-repair of the gearbox is not recommended, as certain qualifications and special tools are required (various pullers, micrometer heads and accessories, pliers for removing retaining rings, etc.). In addition, spare parts for gearboxes are expensive and difficult to obtain. Therefore, it is recommended to hand over the gearbox for repair to a car service, or purchase a restored unit.