


Table of contents: Removal the front door ↓ Installation ↓ Removal the rear side door ↓ Installation ↓
Attention:
- When removing and installing the door assembly, support the door with a jack, placing a rag underneath it to avoid damaging the door and the body.
- Always adjust the fit after removing and installing the door assembly.
- Check if there is enough grease on the rotating part of the joint. Apply body grease if necessary.
Removal the front door
1. Remove the lower instrument panel trim. See section "Interior trim".
2. Disconnect the front door electrical wiring connectors.
3. Remove the rubber bushing under the electrical wiring, then remove the connectors.
4. Remove the wiring connectors and clamps, then remove the wiring from the front door.
5. Unscrew the limiter rod mounting bolts.
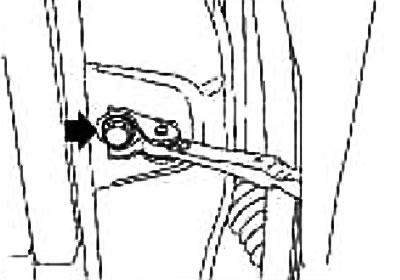
6. Unscrew the hinge mounting nuts from the door side and remove the door assembly.
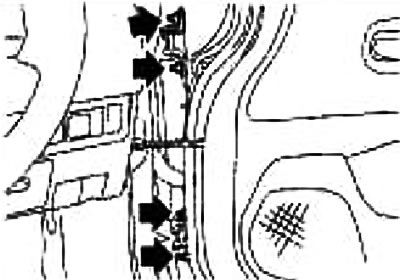
Installation
Installation is performed in the reverse order of removal.
Removal the rear side door
1. Remove the rear side door trim. See section "Exterior finishing".
2. Remove the glass. See section "Glass, window lifts and mirrors".
Disconnect the front door electrical wiring connectors.
3. Remove the wiring connectors and clamps, then remove the wiring from the rear side door.
4. Unscrew the limiter rod mounting bolts.
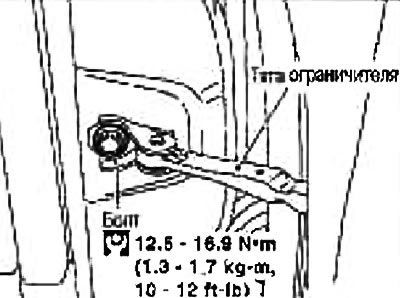
5. Unscrew the hinge mounting nuts from the door side and remove the door assembly.
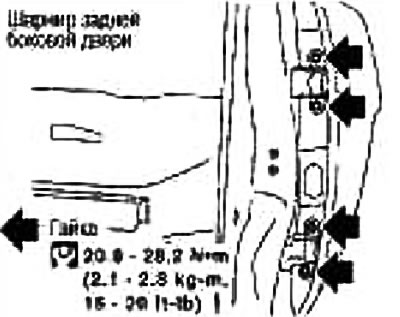
Installation
Installation is performed in the reverse order of removal.