


Table of contents: Removal ↓ Installation ↓
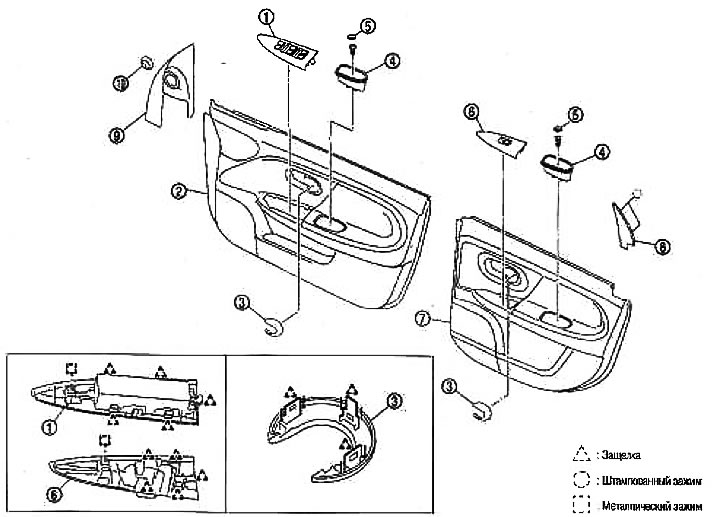
1. Window switch trim (front door); 2. Front door trim; 3. Inner handle cover; 4. Pen; 5. Handle plug; 6. Window switch trim (rear side door); 7. Rear side door trim; 8. Rear side door corner cover; 9. Front door corner cover*; 10. Dust cover
*: See chapter Glass, window lifts and mirrors
Removal
1. Lower the door windows completely.
2. Pull the inner handle lever, spread the upper and lower parts of the inner handle cover and unhook the upper and lower hooks A.
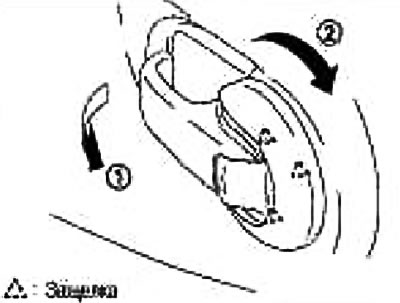
3. Slide the interior handle cover back, disengage the lower part and remove it from the door trim.
4. Insert the clip remover, wrapped with tape, into the back of the window switch trim, support the rear end and disengage the metal clips.
5. Support from the front side, take out the recessed part and remove. Pull back the back side, take out the recessed part and remove.
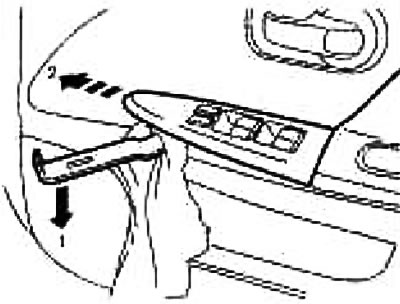
6. Disconnect the wiring connector from the back of the window switch trim and remove it.
7. Remove the plug from the inside door handle and unscrew the screws.
8. Remove the front door corner cover. See section "Glass, window lifts and mirrors".
9. Insert the clip remover into the back of the door trim and release the clips.
Note: Insert the clamp remover at the location indicated by the arrow (between the side panel of the body and the clamps). Remove the door trim.
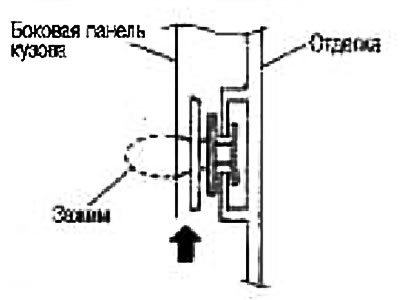
10. Pull the door trim up and out of the door panel.
Installation
Installation is carried out in the reverse order of removal, taking into account the following.
Note: When installing the trim, check that the clips are positioned correctly over the holes in the body side panel, then press them in.
The source is published on the portal www.NISSANBOOK.ru